Physical Address
304 North Cardinal St.
Dorchester Center, MA 02124
Physical Address
304 North Cardinal St.
Dorchester Center, MA 02124
Explore 22 director's-cut kitchen decorating designs. Learn to style your kitchen like a film set with expert tips on lighting, layout, and personal touches.
Picture this: It’s 7 AM. The sun streams in, your first key light of the day. This is the opening scene, and your kitchen is the set. It’s where the morning coffee ritual happens, the chaotic school lunch prep, the quiet late-night snack. This isn’t just a room with appliances. It’s the soundstage for the most important, unscripted film of all: your life.
As a guy who spends his days designing million-dollar home theaters—the grand finale of a home—I’ve realized something critical. The greatest cinematic experience doesn’t matter if the story leading up to it is a mess. The kitchen is Act One. It sets the tone, establishes the characters, and provides the energy for everything that follows. But here’s the problem I see everywhere: people are decorating their sets with someone else’s script. They follow fleeting trends instead of designing a space that tells their own family’s story. They focus on the look, but forget the feeling, the flow, the sound.
So, you asked me about kitchen design? Forget the corporate speak. I’m going to tell you how to think like a director. We’re going to design a set so perfect, so you, that it makes every single day feel like a beautifully shot film.
Before a single frame is shot, a director lives in pre-production. This is where the vision is forged. It’s storyboards, budgets, and casting. For your kitchen, this is the most crucial phase. Rushing this is like showing up to set without a script—a recipe for a chaotic, expensive disaster. We’ll map out the action, set the mood, and allocate resources before we ever call “action.”
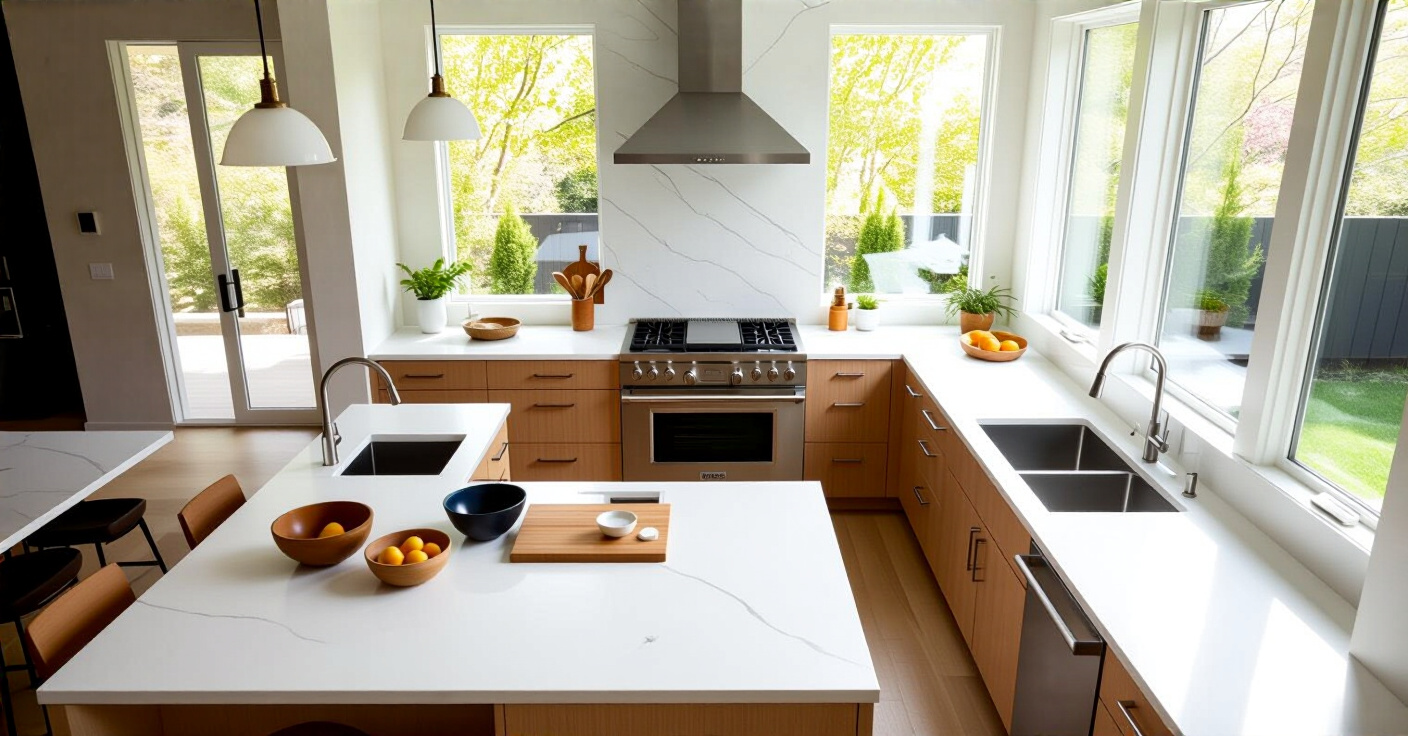
You know what people always ask me? “How do I make my kitchen feel less chaotic?” It’s not about size; it’s about the “blocking.” In filmmaking, blocking is how you choreograph the actors’ movements within the frame for maximum emotional impact and clarity. Your kitchen is no different. The old “work triangle”—sink, stove, fridge—is a fine starting point, but it’s like a script with only three characters. Life is messier. You need to account for the extras, the background action, the multiple storylines happening at once.
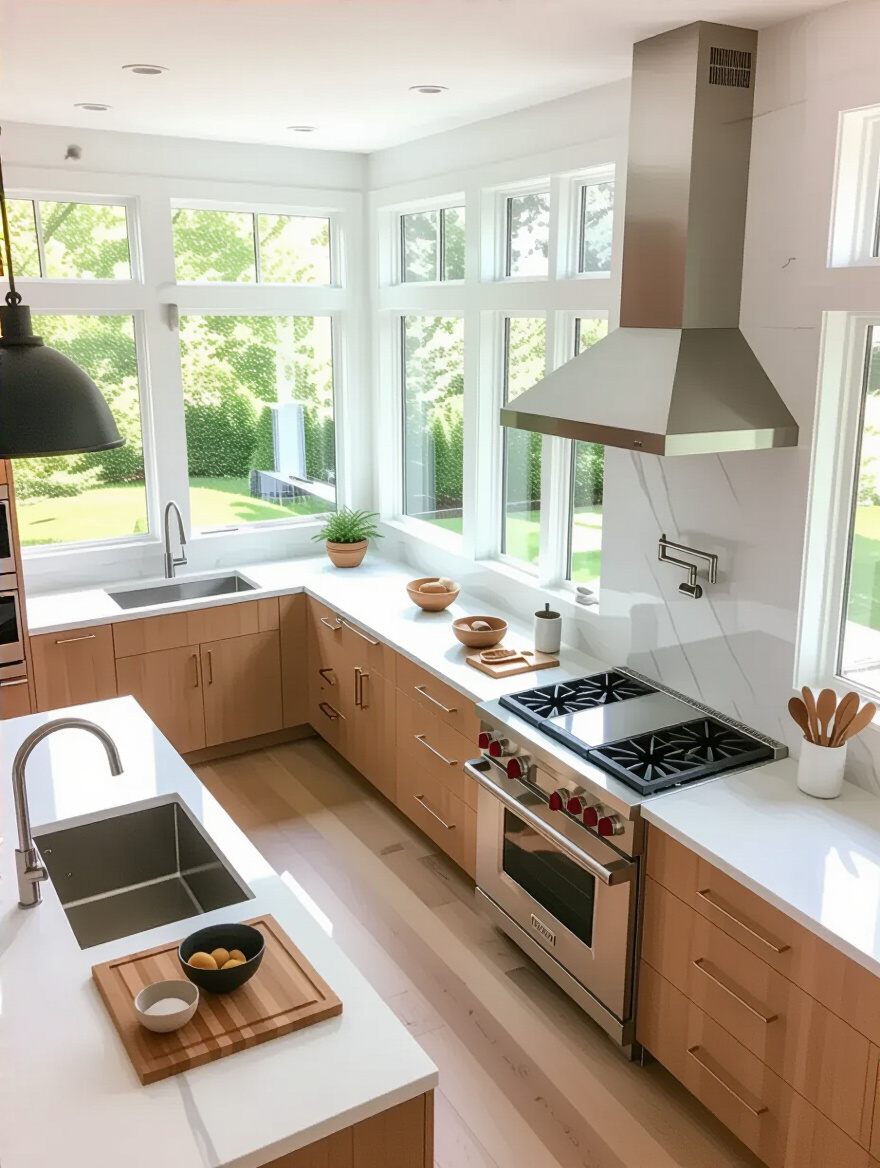
Think of your kitchen as distinct mini-sets. The Prep Zone is where the star chef (you) does their most intricate work. The Cooking Zone is the action sequence. The Cleanup Zone is post-production. And don’t forget the “Craft Services” station—your coffee bar or snack area—which needs to be out of the main traffic flow so family members (your cast and crew) aren’t constantly bumping into each other. Good blocking makes a scene feel effortless. Good zoning does the same for your kitchen, turning frantic energy into a smooth, intuitive dance.
This is your first directorial decision, and it dictates the rhythm of your entire film.
You wouldn’t shoot a gritty crime noir on the candy-colored set of a Wes Anderson movie. It would be a confusing mess. The same principle applies to your kitchen’s aesthetic. This is your Production Design. It’s the visual language that tells your story before a single word is spoken. Are you shooting a “Modern Farmhouse” dramedy, a sleek “Sci-Fi Minimalist” thriller, or a cozy “British Bake-Off” reality show? You have to choose your genre.
The BS everyone else says is to just pick things you like. A faucet here, a tile there. That’s how you end up with a Franken-kitchen that has no soul. Instead, create a lookbook, a mood board. Gather images, textures, and colors that feel right. Give it a name. This “guiding aesthetic” becomes your creative North Star. When you’re lost in a tile store, you just ask yourself: “Does this fit the visual story of my film?” It makes every subsequent decision simple.
Without this, you’re just a director without a vision, and that’s a film no one wants to watch.
Every producer knows the cold, hard truth: the vision is nothing without a budget. But a smart director knows where to spend the money for the biggest impact on screen. You don’t need to splurge on everything. You splurge on what’s in the shot the most—your “hero” elements. Is your kitchen’s star the sprawling island where everyone gathers? Then that’s where you spend on a show-stopping countertop. Is it the dramatic lighting that makes everyone look and feel great? Allocate the funds there.
The trick is to think like a set decorator. You have your “Star” items, your “Supporting Cast,” and your “Extras.”
I once saw a client spend a fortune on custom cabinets but skimp on hardware and lighting. It was like putting a Hollywood star in a cheap suit under fluorescent lights. The whole production looked cheap. Know where your money will show up on camera.
Lighting is everything. It’s the single most powerful tool a director has to create mood, direct the eye, and make the set come alive. In my world of home theaters, controlling light is an obsession. In the kitchen, it’s just as crucial, but you’re working with a mix of controlled and natural sources. Your lighting plan is the difference between a flat, uninspired scene and one that’s rich with depth and emotion.
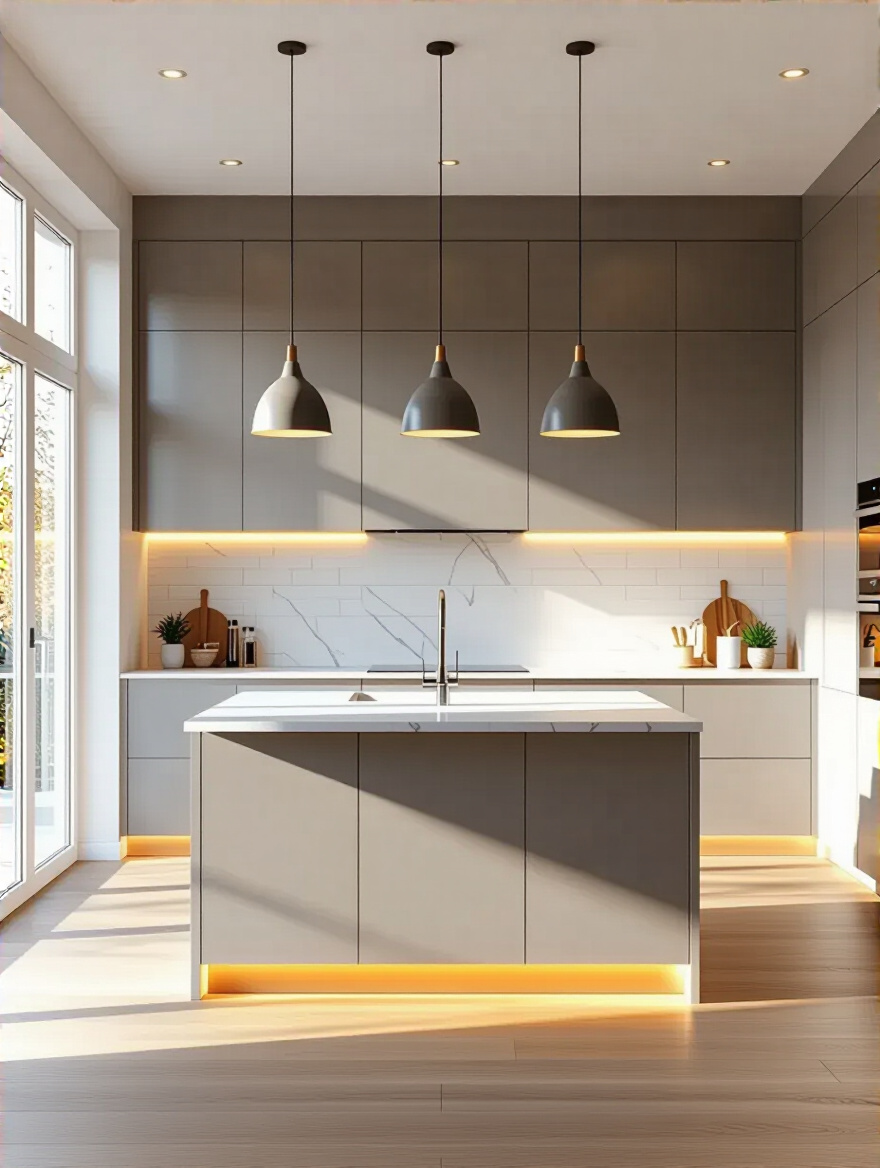
Think in layers, just like a cinematographer:
And your best lighting director? The sun. Watch how it moves through your kitchen during the day. Don’t block it with heavy curtains. Use sheers to diffuse it like a pro gaffer with a silk screen. Master your light, and you’ve mastered the mood of your entire home.
We’re still in pre-production, but now we’re getting into the nitty-gritty. This is where we solve the practical problems that could derail the shoot later on. A film set that isn’t organized is a set where time and money are wasted. We’re going to make sure your set is a model of efficiency.
Here’s a confession: I used to think my job was just about sound and picture. Then I learned about the prop master. A good prop master has everything labeled, organized, and ready at a moment’s notice. An actor can’t be scrambling for a crucial prop mid-scene. And you shouldn’t be scrambling for the whisk when your sauce is about to burn. Smart storage is your backstage prop department, and it needs to run flawlessly.
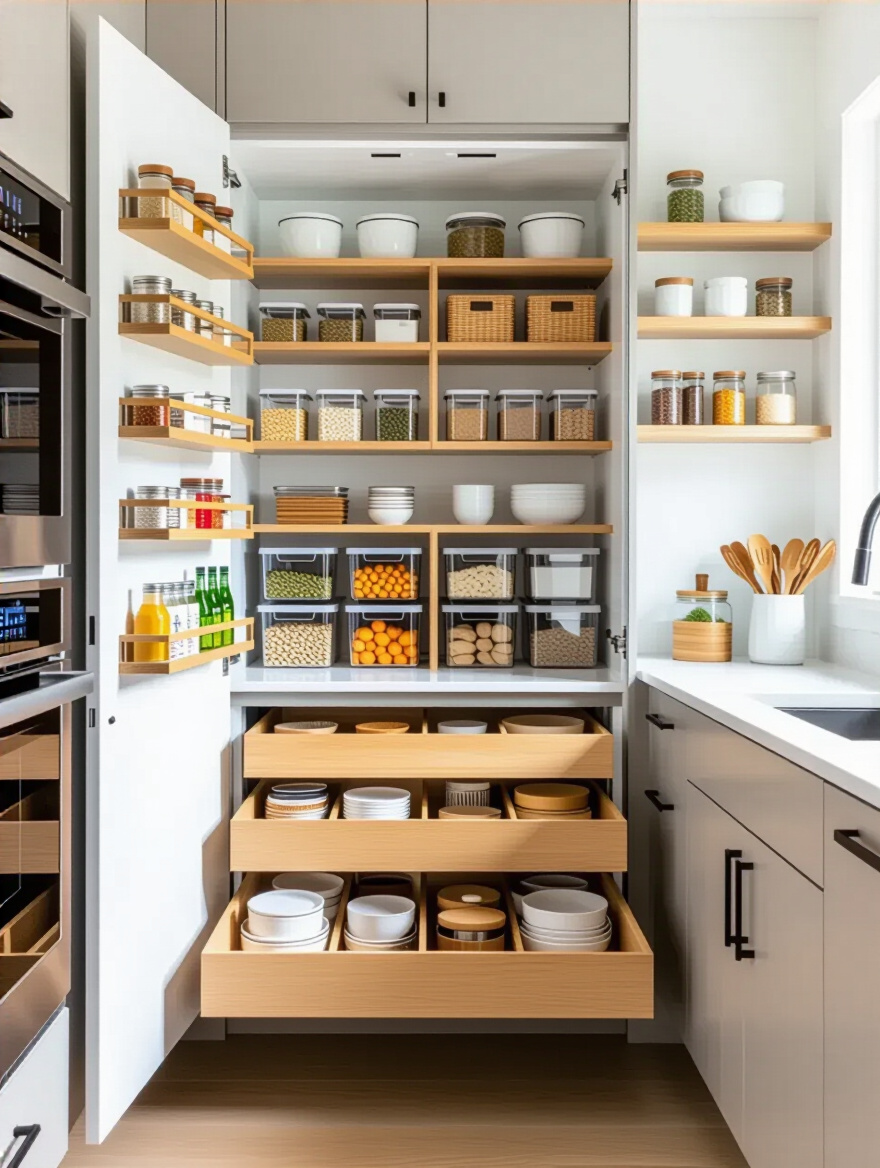
The noise is all about fancy, hyper-specific organizers. What really matters is visibility and access. You want solutions that bring the contents of the cabinet to you. Deep drawers are better than deep cabinets. Pull-out pantries are genius. Corner cabinets with lazy susans or swing-out shelves turn a “dead zone” into prime real estate. The goal is to eliminate the archaeological dig for the pot lid you need right now. A cluttered set is a sign of an amateur production. A clean, organized kitchen means the director is in control.
It’s the unseen infrastructure that makes the on-screen magic possible.
Alright, pre-production is locked. It’s time to build the set. These are the big, foundational pieces that will define your kitchen for years. This is no time for flimsy materials or short-term thinking. We’re building a set for a long-running, beloved series, not a disposable one-season wonder.
The cabinets are the main walls of your set. They take up the most visual real estate and dictate the architectural feel of the entire room. Getting this wrong is like building a wild west saloon for a space opera. The style—be it classic Shaker, modern flat-panel, or something in between—must serve the genre you established in your “Production Design” phase.
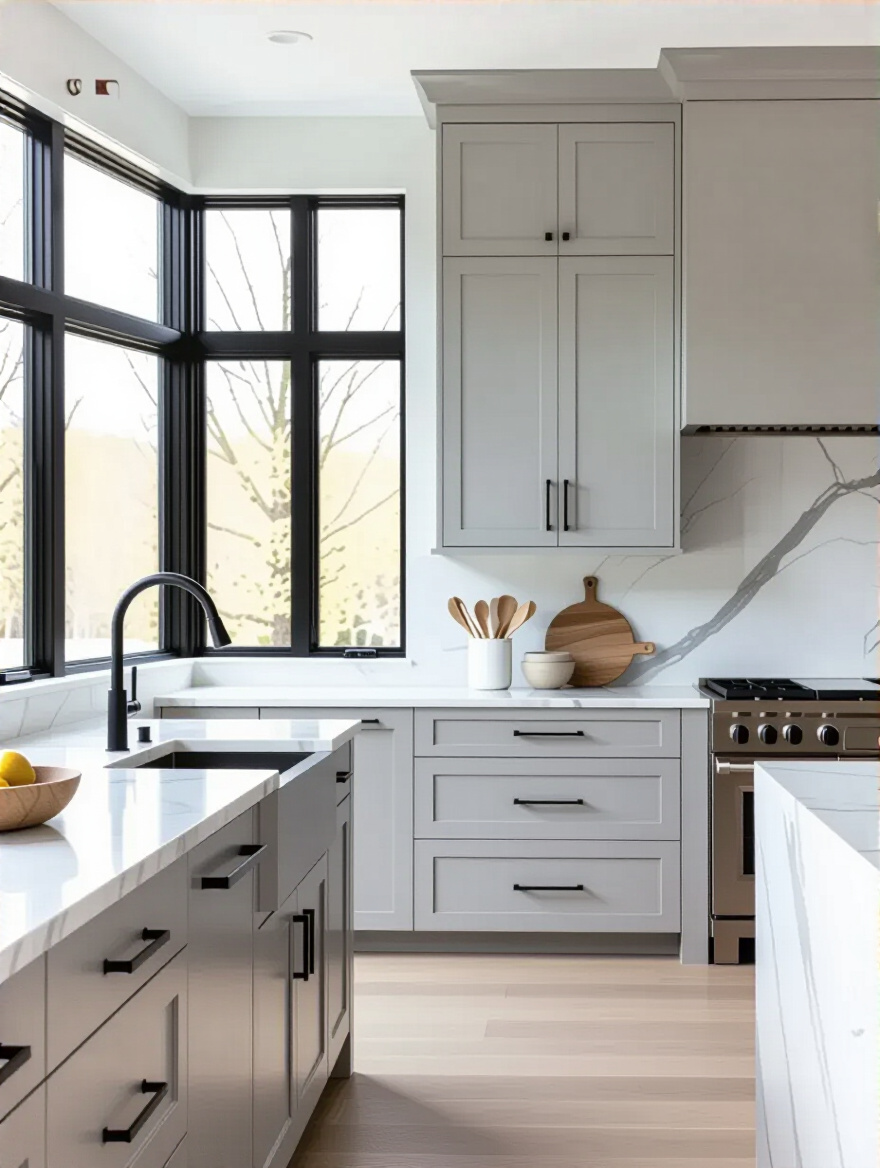
But here’s the inside scoop: finish and durability matter more than style in the long run. Everyone is obsessed with the door style, but they forget this set will be used. Every. Single. Day. You need a finish that can withstand heat, grease, and frantic cleaning. A catalyzed conversion varnish is the industry standard for a reason—it’s tough as nails. A cheap laminate or poorly painted finish will look like a worn-out, B-movie set after just a few years. Invest here. Quality cabinetry is the foundation upon which the whole production rests.
It’s the literal and visual backbone of your kitchen.
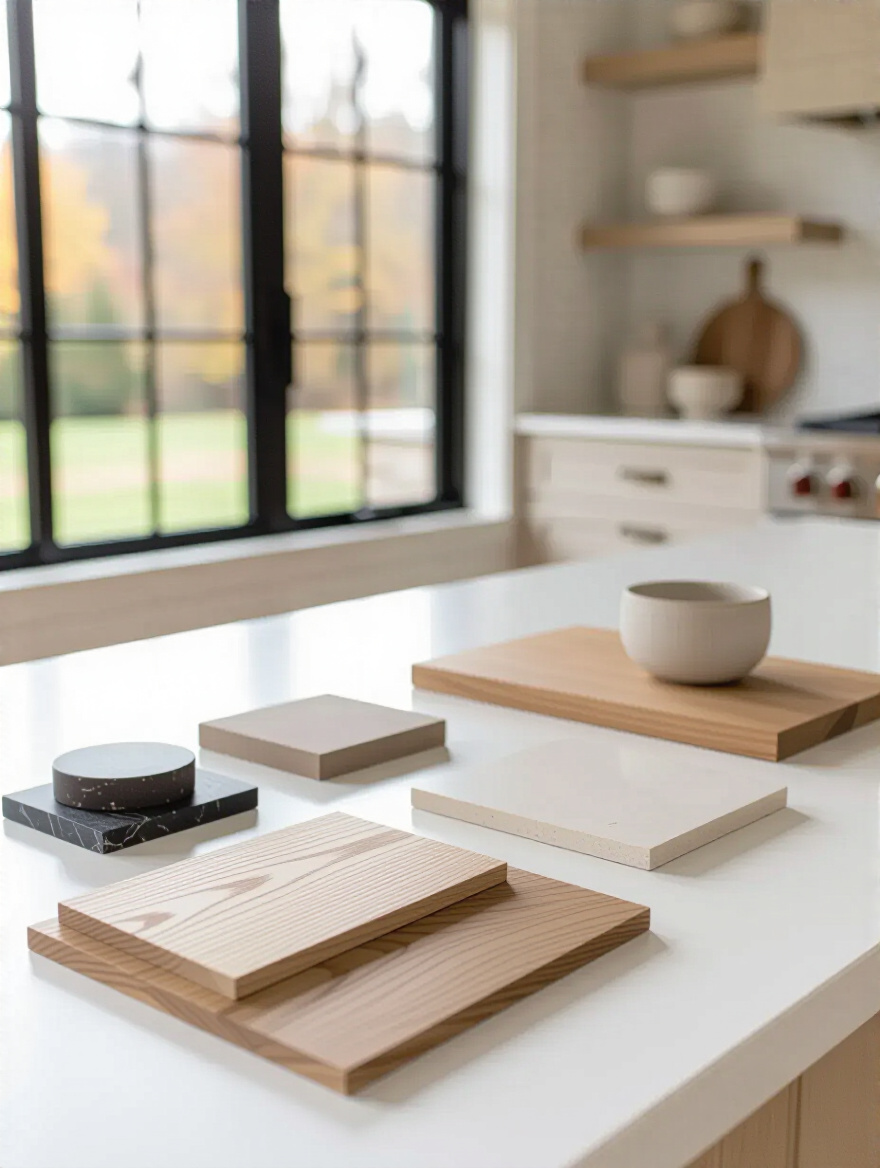
Your countertop is where the close-ups happen. It’s the surface where all the action takes place. This isn’t a prop you can swap out between takes; it’s a permanent part of the set, and it needs to be stunt-ready. It has to look gorgeous for the beauty shots but be tough enough to handle a dropped pan, a wine spill, or an aggressive chopping sequence.
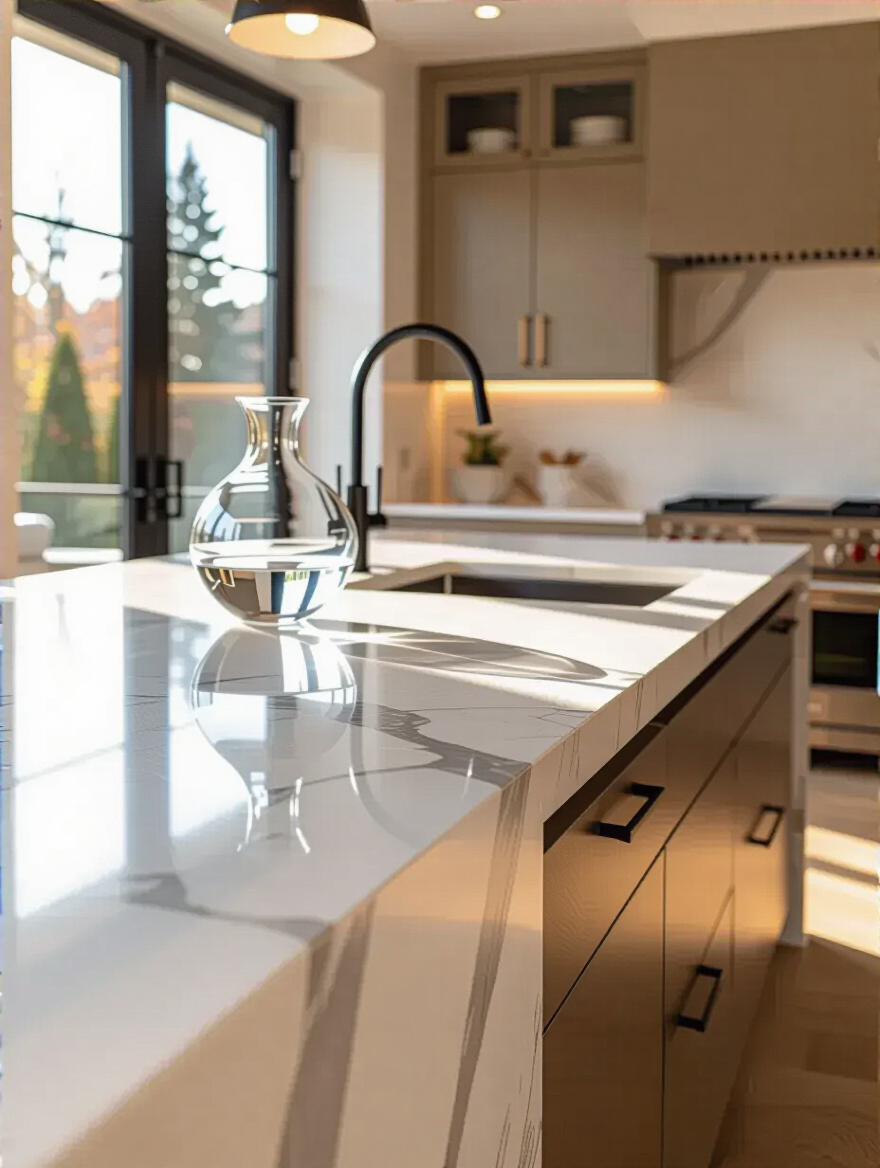
This is where you need to be brutally honest about your life’s script. Do you have kids who are going to treat it like a chemistry lab? Then maybe that stunning, porous Carrara marble isn’t your star player; it’s a diva that’s too high-maintenance. Quartz is the reliable A-lister: it’s beautiful, non-porous, and practically indestructible. Granite is another workhorse. Butcher block brings warmth, but requires upkeep. Treat this decision like casting a lead actor: you need both beauty and performance. A surface that’s all looks but no substance will ruin the production.
Your countertops work harder than anything else in the kitchen. Choose wisely.
The backsplash is your establishing shot. It’s that one visual that immediately tells the audience everything they need to know about the setting and tone. It can be subtle, supporting the scene, or it can be a bold statement piece that becomes the talk of the town. This is your chance to make a definitive stylistic choice that ties the whole room together.
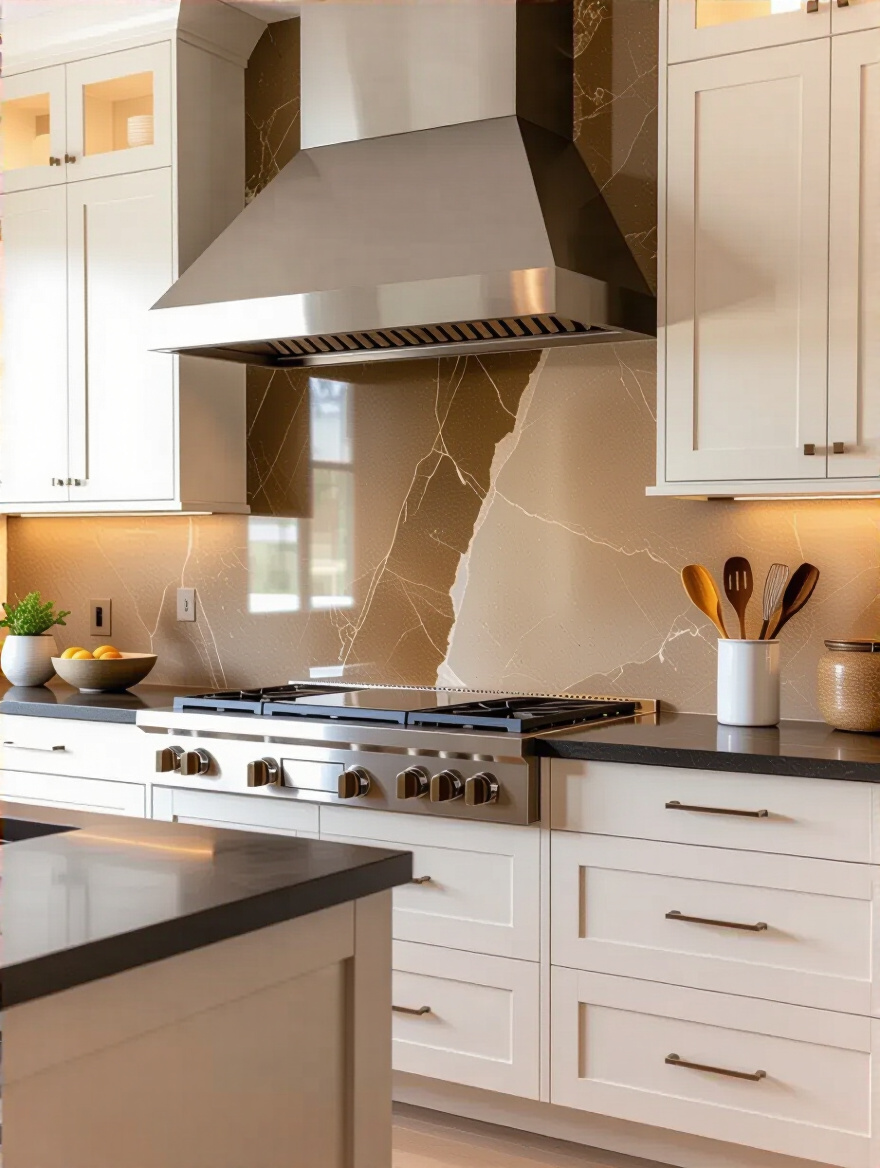
Forget the boring 4-inch lip of countertop material climbing the wall. That’s a dated TV movie look. And don’t just default to white subway tile unless it truly serves your story. Think bigger. A full slab of stone that matches your countertop creates a seamless, epic backdrop. Patterned cement tile injects energy and character. Mirrored or high-gloss tiles can act like bounce boards, amplifying light around the room. I once designed a home theater with a stunning acoustic fabric wall; think of your backsplash with the same potential for texture and impact.
This is your one shot to be bold, so make it count.
The flooring is your soundstage. It’s what the entire cast and crew walks on, drops things on, and spills on all day long. From a cinematic perspective, it’s also crucial for sound. As an acoustic designer, this drives me crazy in kitchens. A hard, echoey floor like tile can make a kitchen sound like a loud, clattery cafeteria. Every dropped spoon becomes a percussive explosion.
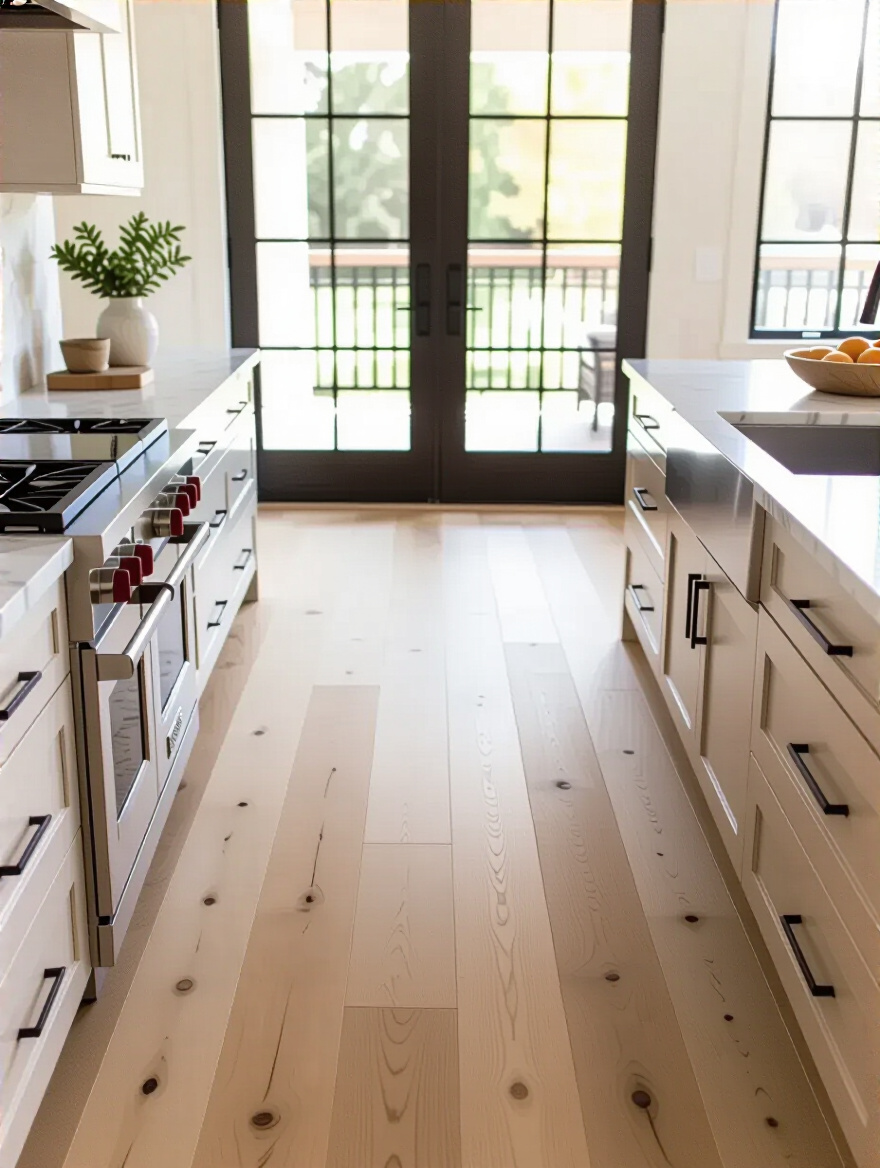
That’s why I often lean towards materials that have a bit more give and sound absorption. Luxury Vinyl Plank (LVP) is a hero product here—it looks like wood, it’s waterproof, it’s durable, and it’s quieter underfoot than tile. Engineered hardwood is great too, but can be susceptible to water damage. If you must have tile, break up the sound waves with a durable runner or rug. Think of the floor not just for its looks, but for its “soundtrack.” A quieter kitchen is a more serene and pleasant place to be.
Your floor sets the stage, both visually and sonically.
We’re still building the main set, but now we’re adding the layers of technology and color that bring it into the modern era. This is where we integrate the practical magic that makes the space not just beautiful, but brilliant.
Welcome to the special effects department. This is where technology elevates the production from a simple home movie to a blockbuster experience. Smart appliances aren’t just gadgets; they are tools that save you, the director, time, energy, and stress. A fridge that tells you when you’re out of milk? An oven you can preheat on your way home? That’s not science fiction anymore; it’s just smart filmmaking.
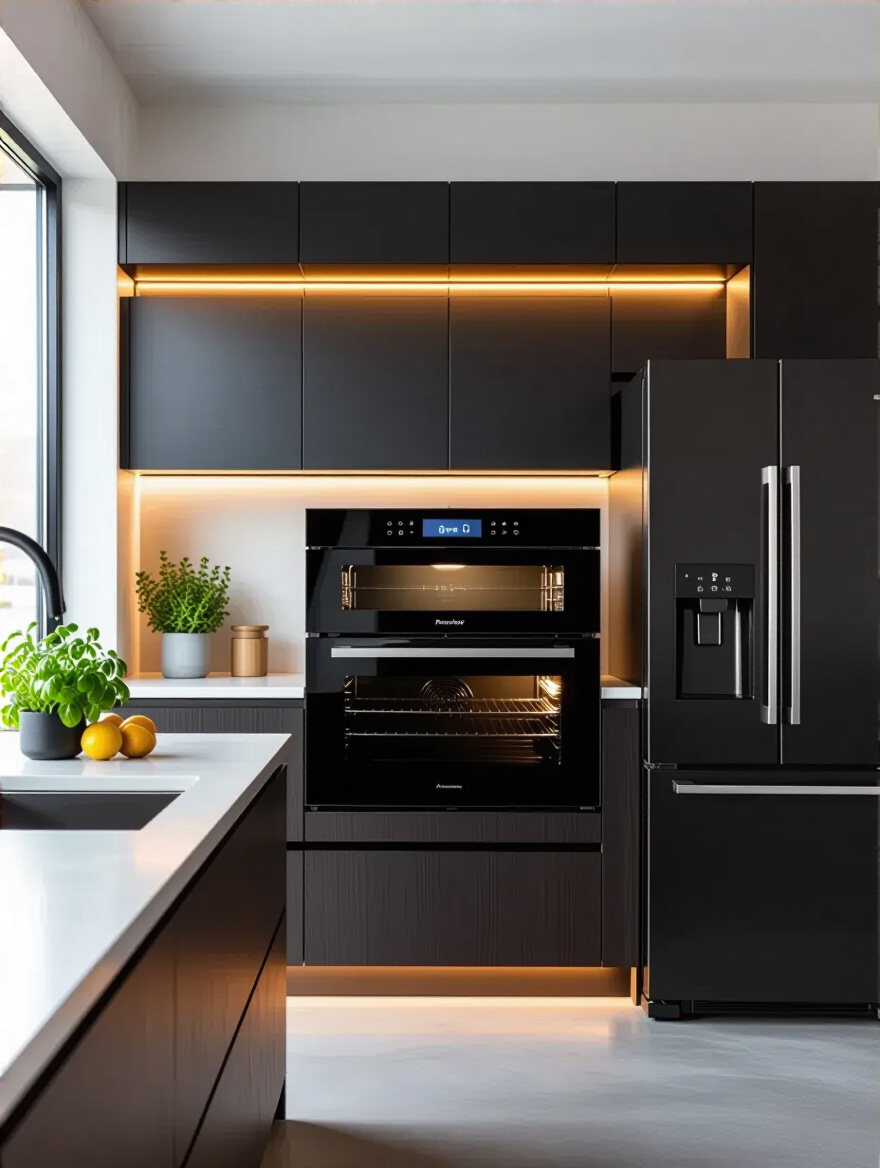
The key is to not get seduced by tech for tech’s sake. Focus on an integrated system. You want your appliances talking to each other and to you, preferably through a single, easy-to-use platform like Alexa or Google Home. Think about the practical problems you want to solve. Do you always burn the chicken? Get an oven with a smart probe. Do you hate grocery shopping? Get a fridge that helps build your list. This isn’t about creating a “smart home”; it’s about using smart tools to make your life’s production run smoother.
This is the behind-the-scenes magic that makes everything on-screen look easy.
In post-production, a colorist can completely change the mood of a film by tweaking the color grade. A scene can go from warm and romantic to cold and sinister with a few clicks. Your wall color is your kitchen’s color grade, and it’s one of the easiest and most impactful decisions you’ll make. It sets the emotional temperature of the room.
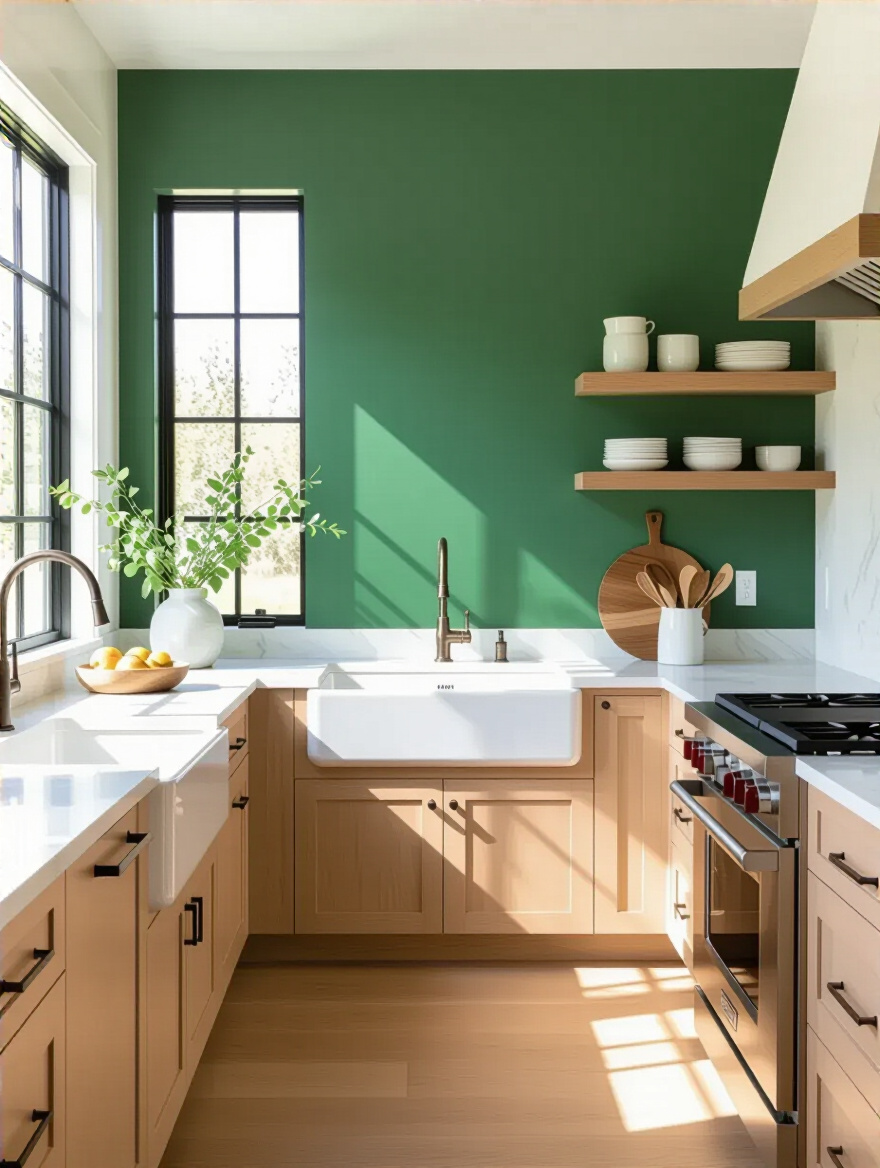
Light colors and reflective finishes (like satin or semi-gloss) act like a giant bounce card, throwing light around the room and making it feel bigger and more airy. This is your go-to for small spaces or kitchens that need more light. Dark, matte colors, on the other hand, absorb light and create a sense of drama and intimacy. This can be stunning for an accent wall or in a large kitchen, giving it a cozy, theatrical vibe. Just remember, light changes. Test your paint colors on large swatches on different walls and look at them at all times of day before you commit. A color that looks perfect under the store’s fluorescent lights can look ghastly in your home’s warm afternoon sun.
This is your final brushstroke on the canvas, so grade your film wisely.
The main set is built. Now it’s time for set dressing. This is what brings the space to life. It’s the art, the furniture, and the final lighting touches that turn a sterile environment into a place where characters (your family) can truly live and breathe.
Your bar stools aren’t just props; they are where your supporting cast will spend a lot of time. If they’re uncomfortable, those long, lingering conversations over a glass of wine or helping with homework just won’t happen. The scenes will be cut short. Function must, must, must come first. A stool with a back, a comfortable cushion, and a place to put your feet is non-negotiable.
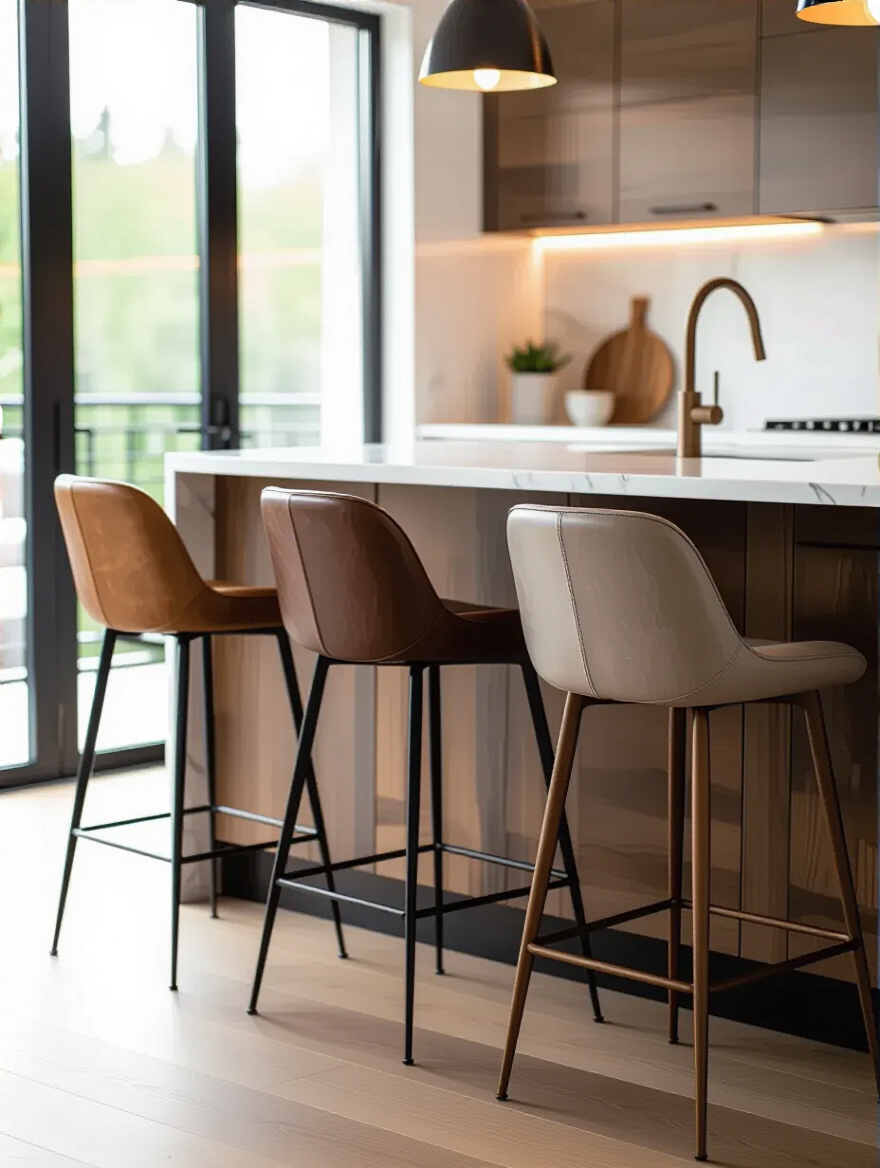
Once you have comfort dialed in, then you can focus on style. The stools should complement the overall “Production Design.” They can be a subtle supporting character, blending in with the wood or metal tones of the room, or they can be a quirky cameo, adding a pop of unexpected color or a unique shape. Just make sure you get the height right. Measure your counter, and allow for about 10-12 inches of legroom between the seat and the countertop. The wrong height is like bad dialogue—it’s awkward for everyone.
This is where the audience sits, so make them comfortable.
On a film set, every single object you see in the frame is there for a reason. It’s called a “hero prop” if it’s central to the action, or set dressing if it builds the character’s world. Nothing is accidental. Your kitchen accessories are the props that tell the story of the characters who live there. It’s the stack of beloved cookbooks, the quirky cookie jar from your grandmother, the collection of mugs from your travels.
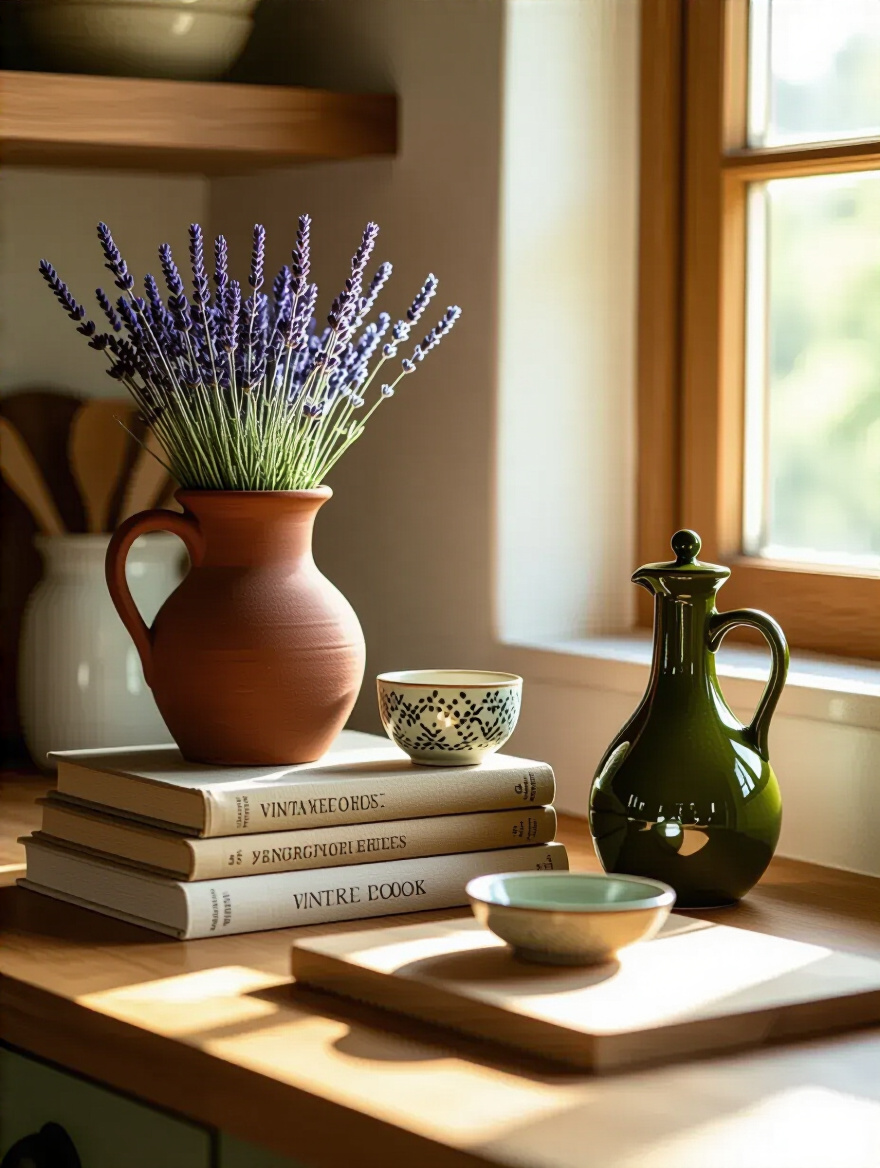
This is where you call out the BS of a showroom kitchen. Nobody lives there. Your kitchen should feel lived in and loved. But curated. The trick is to group items in intentional vignettes—like arranging a few beautiful cutting boards against the backsplash, or corralling oils and spices on a handsome tray next to the stove. The shortcut I wish I’d known earlier is the “Rule of Three.” Grouping items in odd numbers, especially threes, is almost always more visually interesting than even numbers.
These props aren’t clutter; they are your backstory, made visible.
We talked about lighting as a whole, but task lighting—your Key Light—is so critical it deserves its own scene. Can we just talk about how everyone gets this wrong? They put in a big, bright light in the middle of the ceiling and call it a day. What happens? You stand at the counter, your body blocks the light, and you’re chopping vegetables in your own shadow. It’s a terrible lighting setup, and it’s dangerous.
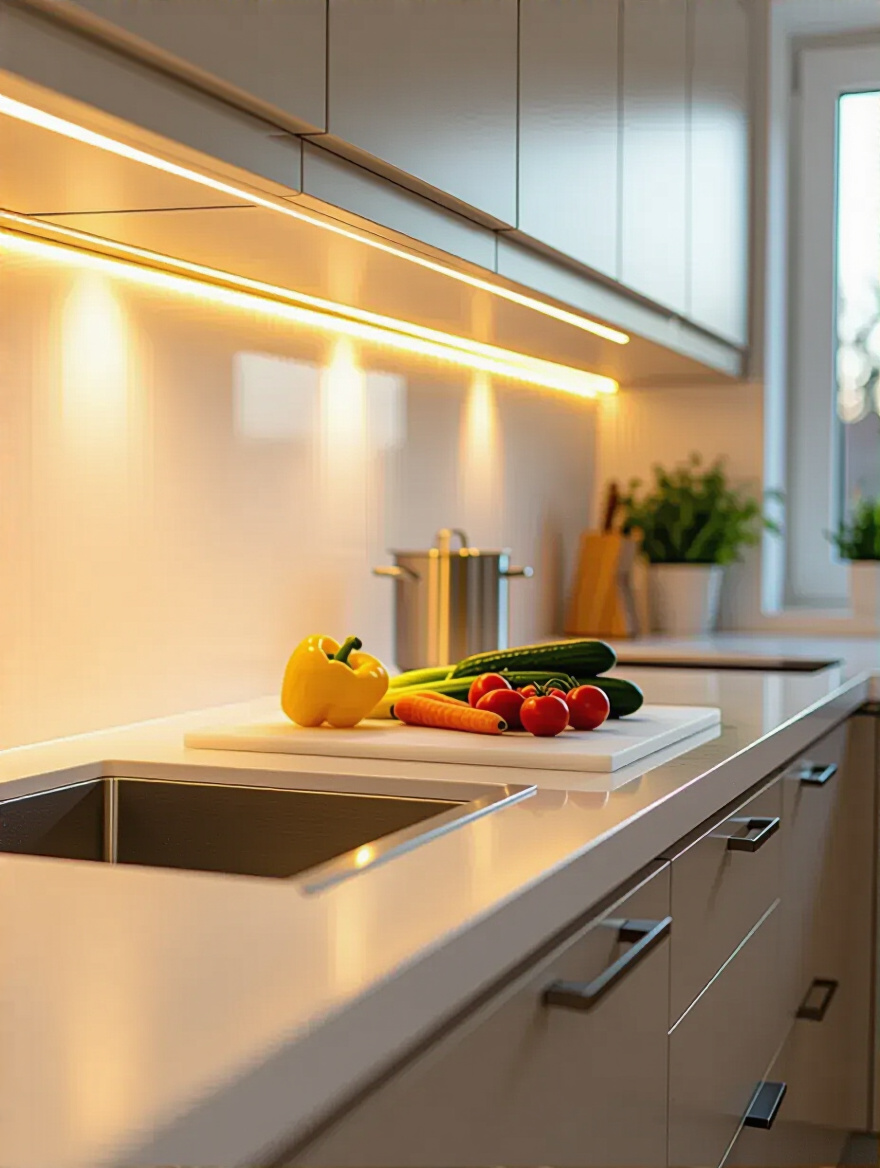
Under-cabinet lighting is the single most important lighting addition you can make to your kitchen. Period. It puts the light source between you and your task, flooding the countertop with clear, shadow-free illumination exactly where you need it. Modern LED strips are cheap, easy to install, and energy-efficient. There is absolutely no excuse not to have them. This isn’t a suggestion; it’s a directorial mandate. Your cast and crew deserve a safe and functional set.
Good task lighting is the ultimate form of practical magic.
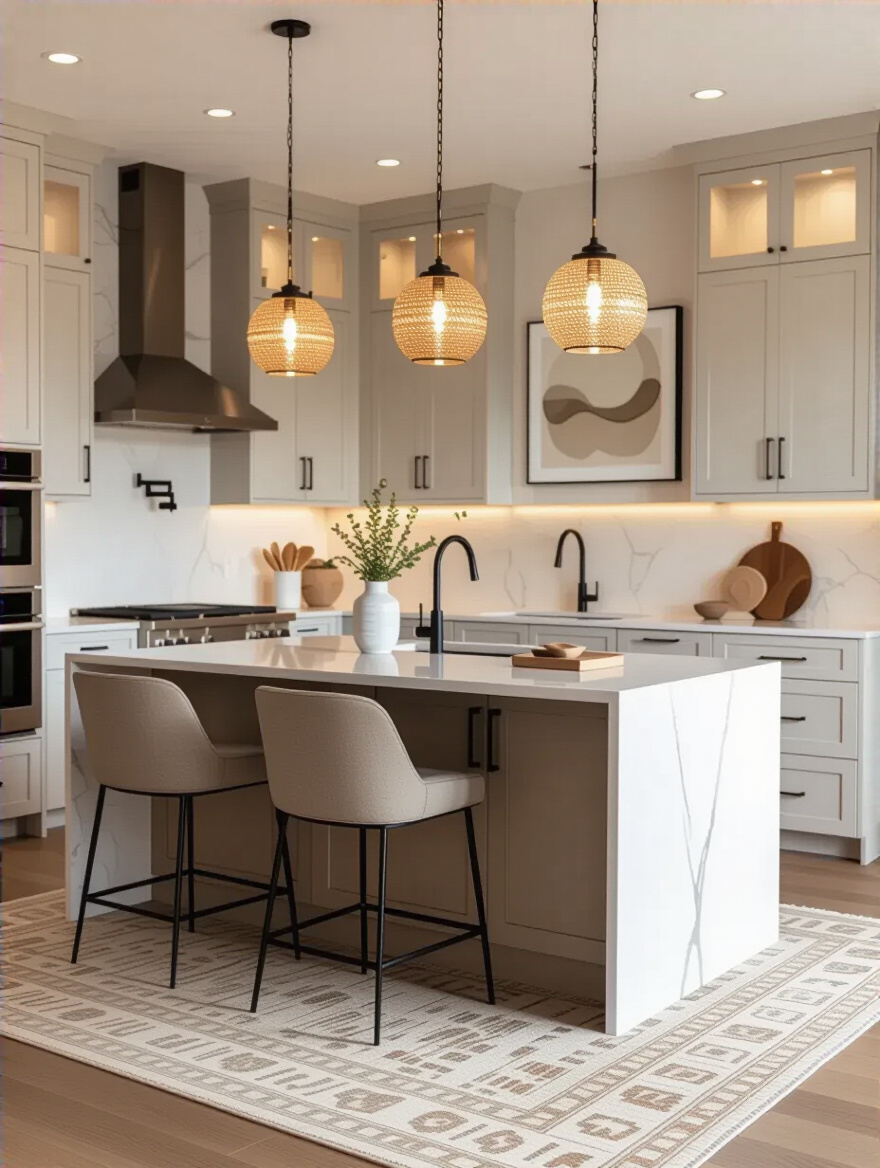
If task lighting is your functional Key Light, then pendants and chandeliers are your “Beauty Light.” This is the fixture designed to make a statement, to draw the eye, and to cast a gorgeous, flattering glow on the scene. It’s the visual centerpiece, the practical sculpture that defines the space over an island or a dining nook. It’s the mood.
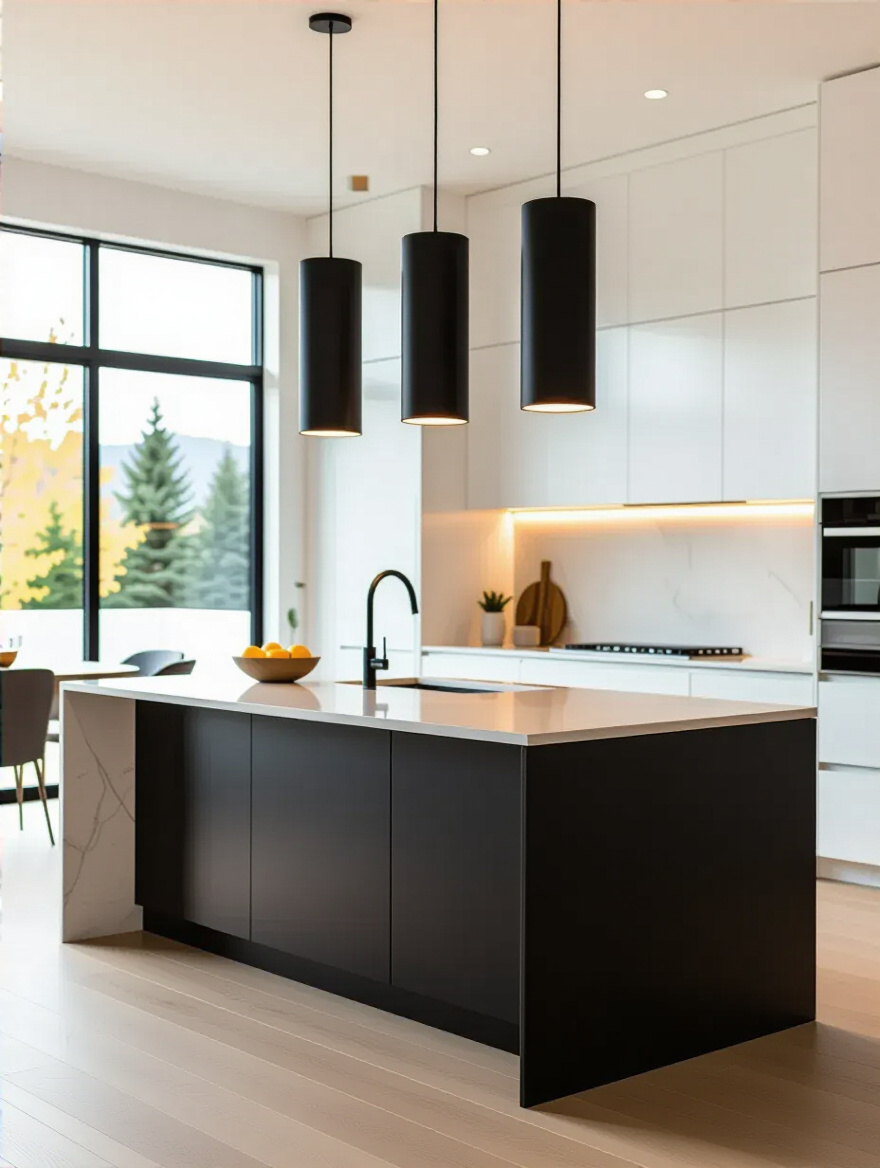
Getting the scale and height right is the entire trick. Too small, and it looks ridiculous, like a tiny hat on a big head. Too large, and it overwhelms the scene. Too high, and it loses its impact. Too low, and your tallest cast member will hit their head. The sweet spot is typically 30-36 inches above the countertop. This places it in the perfect position to provide great light without obstructing the view across the island—your camera needs clear sightlines!
This is the jewelry of your kitchen. It’s the final sparkle that makes the whole scene pop.
We’re adding the final, nuanced layers to our set dressing. These are the elements that bring an organic, lived-in feel to the space, making it feel less like a set and more like a home.
Every great director knows the power of adding a living, breathing element to a scene. It adds a touch of unpredictability and organic beauty. In your kitchen, plants are that element. They are living props that soften the hard edges of cabinetry and countertops, improve air quality, and bring a vibrant splash of color to the frame.
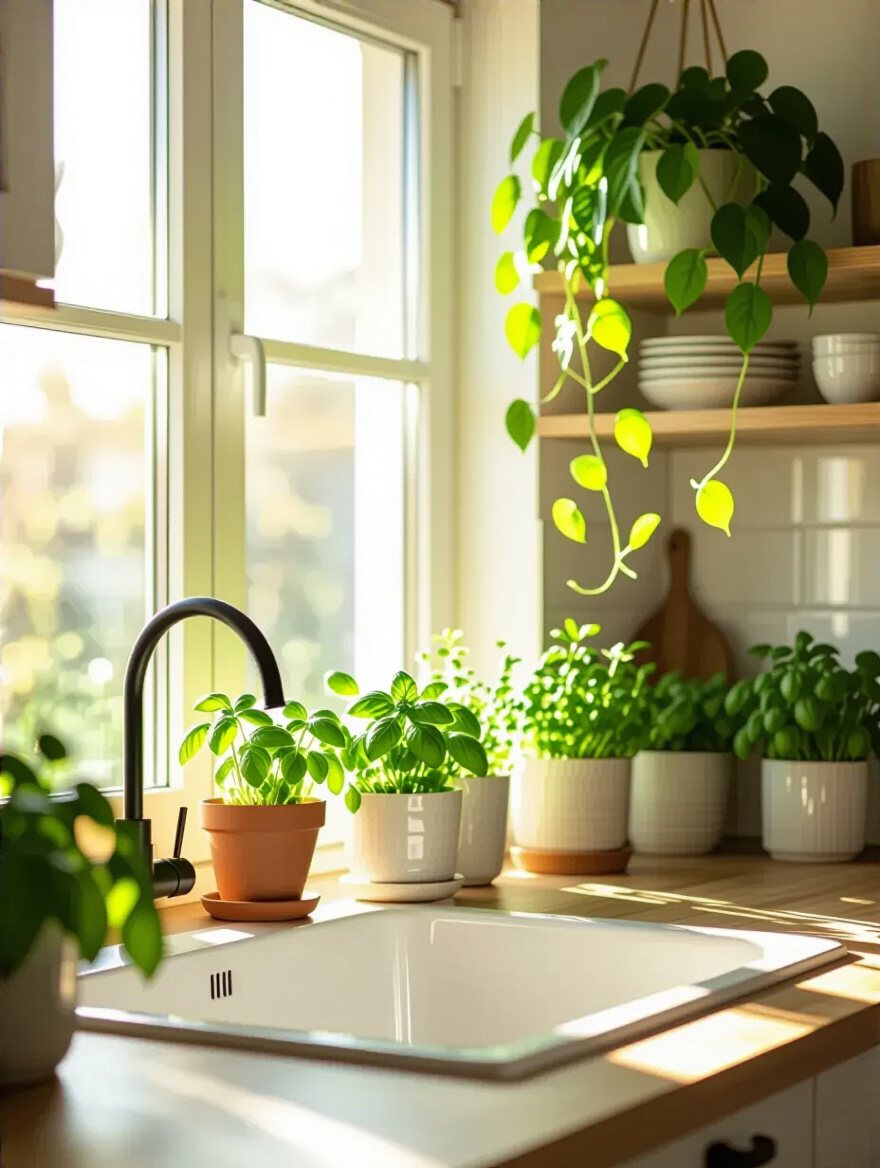
The shortcut here is to choose plants that thrive in your kitchen’s specific “location.” Does that window get bright, direct sun? Perfect for a succulent. Is it a shadier corner? A snake plant or pothos will be happy there. And don’t forget herbs. A small pot of basil, rosemary, or mint on the windowsill is the ultimate multi-functional prop: it looks good, it smells great, and you can use it in your cooking. It’s set dressing you can eat.
Plants make your set feel alive because they are alive.
Cinematographers are obsessed with natural light. They live for the “magic hour” at dawn and dusk. Your kitchen has its own light story that changes throughout the day, and your job as director is to capture and enhance it. The biggest mistake is covering your windows with heavy blinds or drapes that choke off that beautiful, free light.
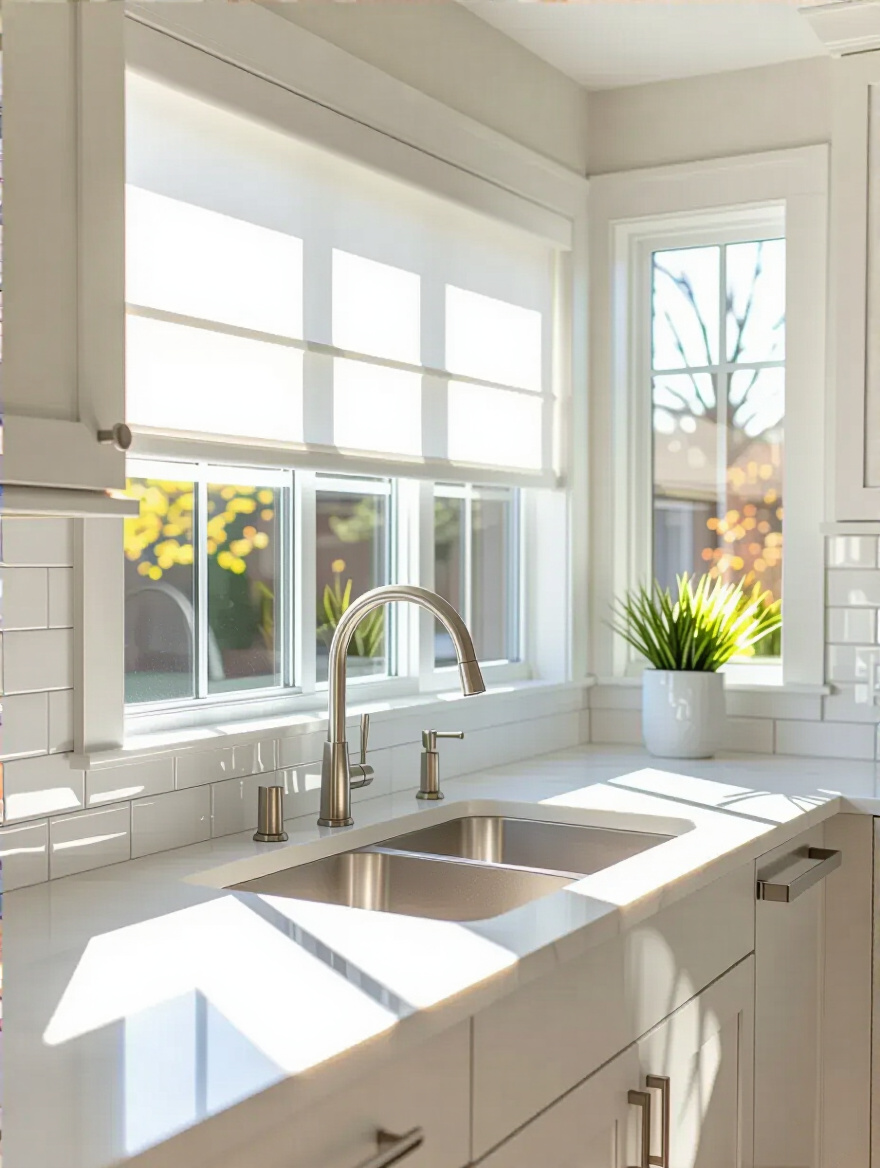
Instead, think like a gaffer. Use light-filtering shades or sheer curtains to diffuse harsh sunlight, just like a cinematographer uses a silk to soften a bright light. This gives you a soft, flattering glow without the glare. Then, use reflective surfaces like a glossy backsplash, polished chrome hardware, or even a strategically placed mirror to act as “bounce boards,” reflecting that natural light deeper into the dark corners of the room. It’s an old Hollywood trick that works every time.
Don’t just live with your natural light; harness it.
We’re in the final cut. These are the advanced techniques and personal flourishes that separate a good kitchen from a truly great one. This is where you put your unique directorial stamp on the project.
Open shelving is a bold choice. It’s like breaking the fourth wall and showing the audience what’s going on behind the scenes. When it’s done right, it makes a kitchen feel airy, personal, and effortlessly stylish. It forces you to curate your collection of dishes, glasses, and bowls, turning everyday items into part of the set dressing.
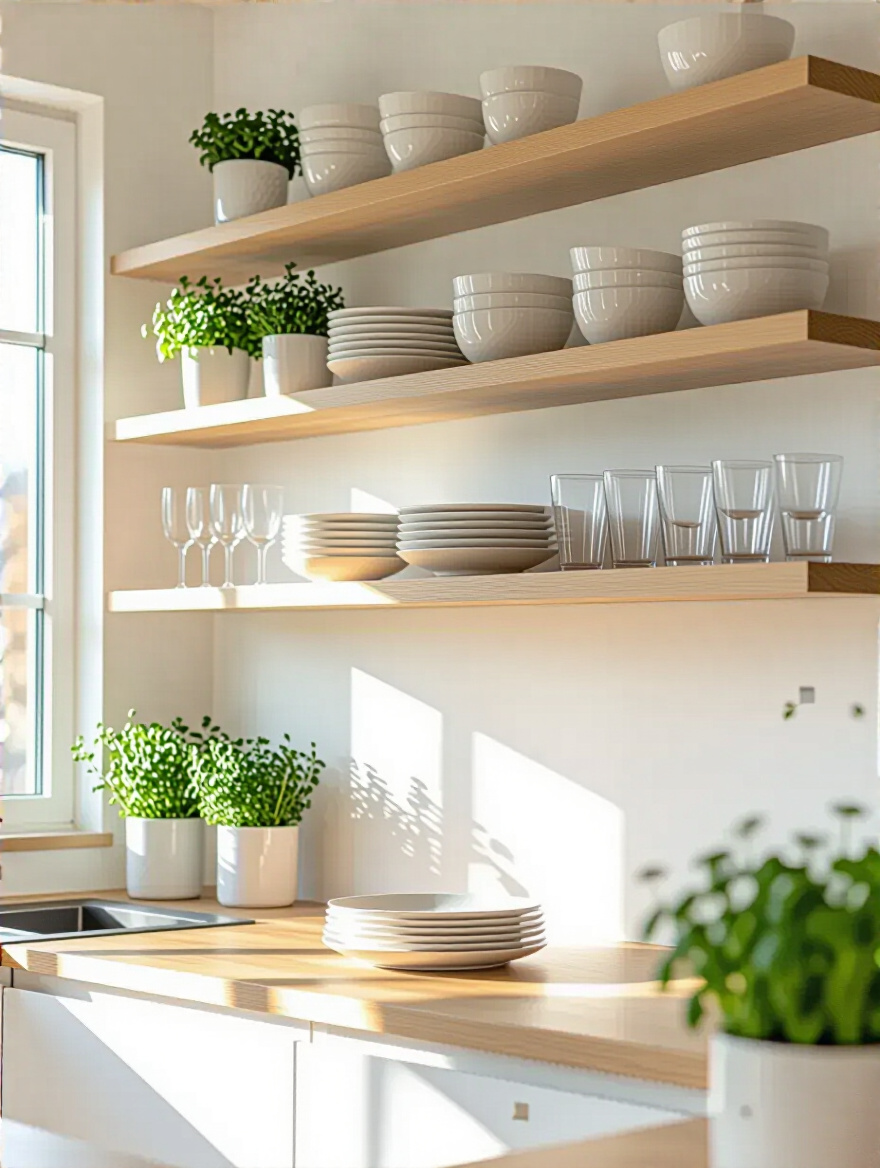
But this is where you can crash and burn. The BS everyone tells you is that it’s a cheap way to add storage. The reality is, if you’re not a neat and organized person, open shelving will expose you. It will look like a cluttered, messy backstage area, not a cool, curated display. My advice? Use it sparingly. Mix it with closed cabinets. Use it for your most beautiful, most-used items. That way, it serves as both a practical grab-and-go station and a beautiful, story-rich focal point.
It’s a high-risk, high-reward move for a confident director.
Your kitchen gallery wall is literally your family’s storyboard. It’s a curated collection of moments, passions, and aesthetics that tell your unique story. It could be framed kids’ drawings, black-and-white photos from family vacations, or even a collection of antique kitchen gadgets mounted on the wall. This is pure, unadulterated personality.
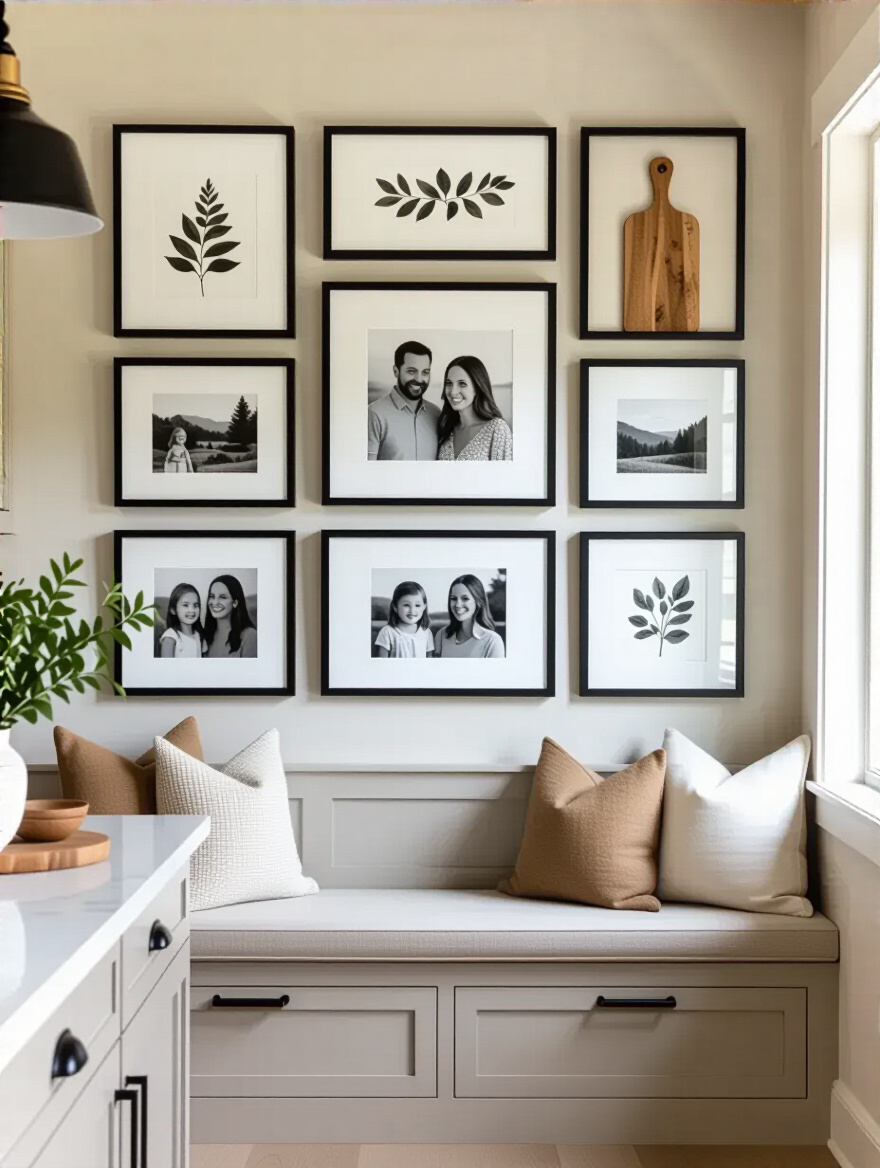
The key to making it look like a professional installation and not a random mess is planning. Lay everything out on the floor first. Play with the arrangement until you have a shape and balance that feels right. I prefer using a common element to tie it all together—like all black frames, or all food-related art. Then, and only then, do you start putting nails in the wall. This turns a blank, boring wall into the most personal and engaging scene in the entire kitchen.
It’s your life, framed and hung for everyone to see.
In a room full of hard, reflective surfaces like stone, tile, and stainless steel, textiles are the sound department’s best friend. They are the soft props that absorb sound, turning a loud, clattery kitchen into a comfortable, acoustically balanced space. A good runner or area rug does more to quiet a room than almost anything else.

Beyond sound, textiles are the wardrobe department. They bring in color, pattern, and texture. A Roman shade in a fun fabric, a beautiful set of dish towels hanging from the oven, or a durable rug underfoot—these are the layers that add warmth and comfort. They prevent your kitchen “set” from feeling cold and clinical. Just make sure they’re practical. Rugs should be durable and easy to clean (indoor/outdoor rugs are a great hack), and towels should actually be absorbent.
Don’t forget the power of soft surfaces in a hard world.
This is the final polish in post-production. It’s the little detail that elevates the entire project. Swapping out builder-grade, generic cabinet pulls and faucets for something unique and personal is the single most cost-effective way to make your kitchen look like a custom-designed, high-end production.
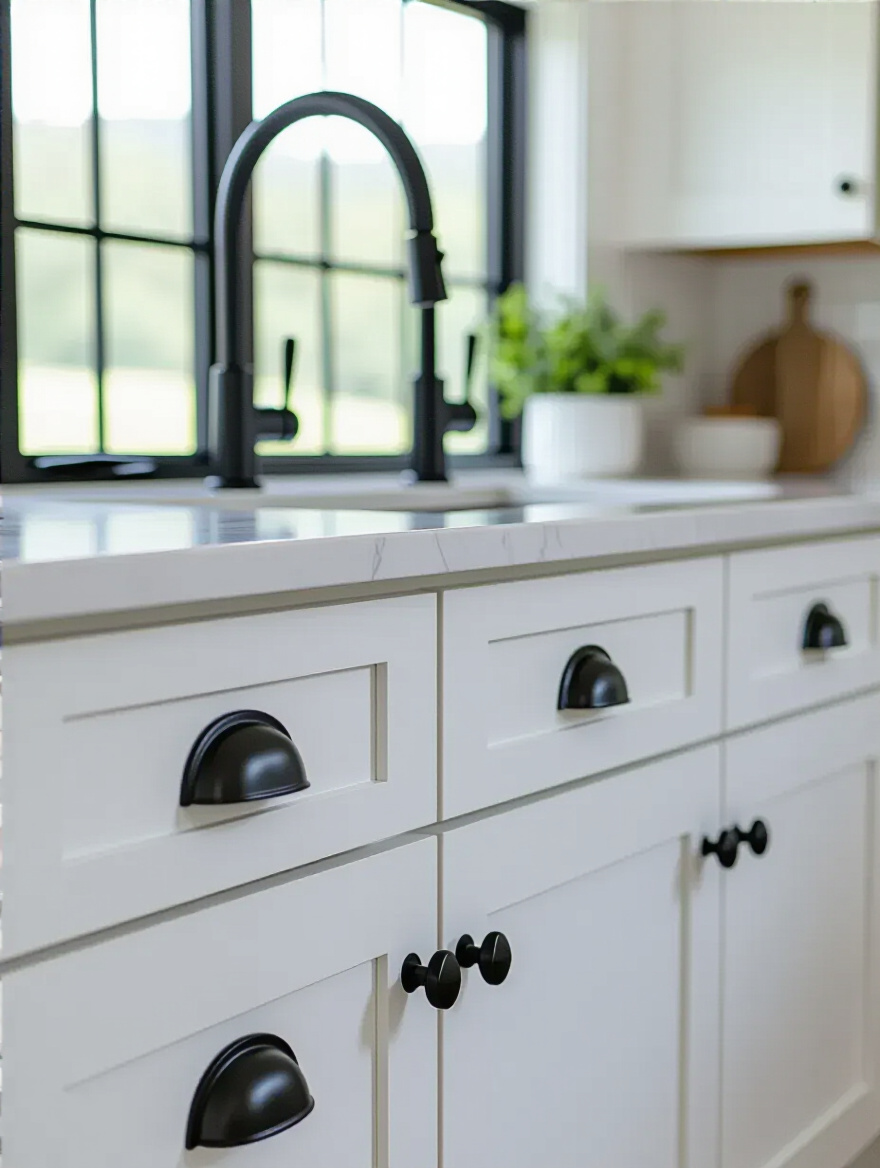
Think of it like choosing the perfect font for your film’s title card. It has to match the genre. Sleek, matte black pulls for a modern film. Warm, unlacquered brass for a historical drama. Quirky, ceramic knobs for an indie flick. The same goes for your faucet. A bridge faucet, a gooseneck with a sprayer—it’s a functional sculpture that you will use dozens of time a day. This is an easy place to add a huge dose of personality without breaking the bank.
Great directors know that the smallest details make the biggest difference.
We’re in the editing bay, making the final cuts to perfect the film. This is about taking a specific challenge—like a small space—and using creative techniques to turn a limitation into a strength.
Working with a small kitchen isn’t a problem; it’s an indie film challenge. With a small budget and a small set, you’re forced to be more creative, more intentional, and ultimately, more clever. And often, the result is more compelling than a bloated blockbuster. The key is multi-functionality—every prop, every piece of furniture must serve at least two purposes.

An island isn’t just an island; it’s an island on wheels with storage below and a drop-leaf for dining. You don’t have a wall; you have a floor-to-ceiling pegboard for vertical storage. Use light colors and reflective surfaces as your “wide-angle lenses” to make the space feel bigger. Use slim, apartment-sized appliances. Your cooktop is induction, so when it’s off, it’s just more seamless counter space. Think like an editor: cut anything that isn’t essential to the scene. Be ruthless. A small space forces you to tell a tight, powerful story without a single wasted frame.
Constraints are the mother of all creative direction.
So there you have it. We’ve walked through the entire production, from the initial script to the final cut. We’ve seen that designing a kitchen isn’t about picking out cabinets and countertops from a catalogue. It’s about directing a film. It’s about understanding the story you want to tell, mastering the technical tools of light and sound, and making thousands of small, intentional choices that all serve one unified vision: your own.
Your kitchen is the set where your family’s story unfolds every single day. It deserves to be more than just functional. It deserves to be cinematic. It should be a space that supports the action, enhances the mood, and reflects the characters perfectly. Now you have the director’s playbook. Stop following trends and start crafting scenes.
The set is ready. The lights are in place. Now, it’s your turn to call, “Action.”


