Physical Address
304 North Cardinal St.
Dorchester Center, MA 02124
Physical Address
304 North Cardinal St.
Dorchester Center, MA 02124
Discover 22 modern kitchen backsplash ideas for a warm, minimalist home. Learn how to choose materials, plan, and create a calm, functional kitchen.
You know the moment people always get stuck when designing a kitchen? It’s not the cabinets, and it’s not usually the worktop. It’s the space in between. The backsplash. It feels like such a commitment, a final piece of punctuation that will define the whole feeling of the room. People worry it will be too loud, or too plain, or that they will choose something trendy they will tire of in a year.
What they’re really asking is, how do I choose something that feels both modern and timeless? Something functional, yet warm? It’s a very Nordic question, really. We believe a home should be a refuge, and the kitchen is its heart. A backsplash isn’t just a shield against splashes—it’s the quiet spine of the room. It should be honest, beautiful in its simplicity, and designed to support the life you live there. So, let’s set aside the noise and talk about what truly matters.
Before you fall in love with a tile or a stone, we must do the quiet work. Good design is not about impulse; it is about thoughtful intention. The most beautiful spaces are born from careful planning, where every element is considered for how it contributes to the whole. This first part of our planning is about looking, thinking, and measuring, ensuring the foundation of your project is as solid as the materials you will eventually choose.
Before a single tile is chosen, you must stand in your kitchen and simply observe. Watch how the light moves through the room in the morning versus the afternoon. Notice the flow of your daily rituals—where you set down your groceries, where you chop vegetables, where you make your coffee. The backsplash must serve these moments, not compete with them. This is not about abstract “design impact”; it’s about creating a backdrop for your life that is both beautiful and effortless.
A common mistake I see is focusing only on the wall behind the cooker. But what about the small wall by the sink, or the area under the window? Thinking about the backsplash as one continuous, connecting element brings a sense of calm and cohesion to a room. A client once wanted a very busy pattern behind their large range, but we realised it would visually shout across the room at the quiet breakfast nook. Instead, we chose a simple, textured tile for the whole space, which brought a gentle rhythm and unified the kitchen, making it feel more peaceful and spacious.
Forget trends for a moment and ask yourself a simple question: How do I want to feel in this kitchen? Do you want a sense of clean, quiet calm? That is the heart of minimalism. Or do you want a feeling of honest, raw utility with a touch of warmth? That is modern industrial. Defining this feeling, this mood, is the most important decision you will make. It will guide every choice that follows and ensure your kitchen feels like a true reflection of you.
Many people think minimalism is cold or empty, but that’s a deep misunderstanding. True minimalism is not about what you remove, but about cherishing what you keep. It’s about choosing one beautiful, functional material over ten mediocre ones. For a backsplash, this could mean a seamless slab of quartz that feels like a quiet anchor in the room, or handmade tiles where the slight variations give life and character. Let the aesthetic arise from the quality of the material and the honesty of the design.
In Scandinavia, we have a deep respect for things that are made to last. “Buy well, buy once” is a philosophy that applies to everything from a good coat to the materials in your home. When you think about your budget, try not to see it as just a cost, but as an investment in the daily quality of your life. An inexpensive, poorly installed backsplash that you have to replace in five years is not a bargain; it is a waste of resources and a future headache.
That said, being practical is also a Nordic trait. You must be honest about what you can afford. Research the materials you love, but also get quotes for the installation—the craft of a good tiler is worth every penny. And here is the most important part: always, always set aside an extra 15-20% for the unexpected. Perhaps the wall behind the old tiles needs repair. This contingency is not a failure of planning; it is wise planning. It gives you peace of mind, allowing you to solve problems without compromising on the quality you set out to achieve.
Respect for your materials is a cornerstone of sustainable design. This means not being wasteful. Taking the time to measure your space carefully, twice or even three times, is an act of respect for the stone that was quarried or the clay that was fired. It ensures you order only what you need, with a small amount extra for cuts and perhaps a spare for the future. This is not just about saving money; it’s about a mindful approach to consumption.
A friend of mine, in a rush, once measured his kitchen for a beautiful, handmade tile. He forgot to account for the area around the window frame. The result was a panicked reorder, a different dye lot that didn’t quite match, and a week-long delay. A little bit of slowness and care at the beginning would have saved him so much frustration. Use a good tape measure, draw a simple diagram, and mark all the outlets and switches. It is a quiet, meditative task that sets the stage for a smooth and successful installation.
Now that we have laid the groundwork with careful thought and measurement, we can move toward the more tactile parts of our planning. This next step is about ensuring the elements of your kitchen speak to each other in a harmonious way, creating a space that feels whole and intentional.
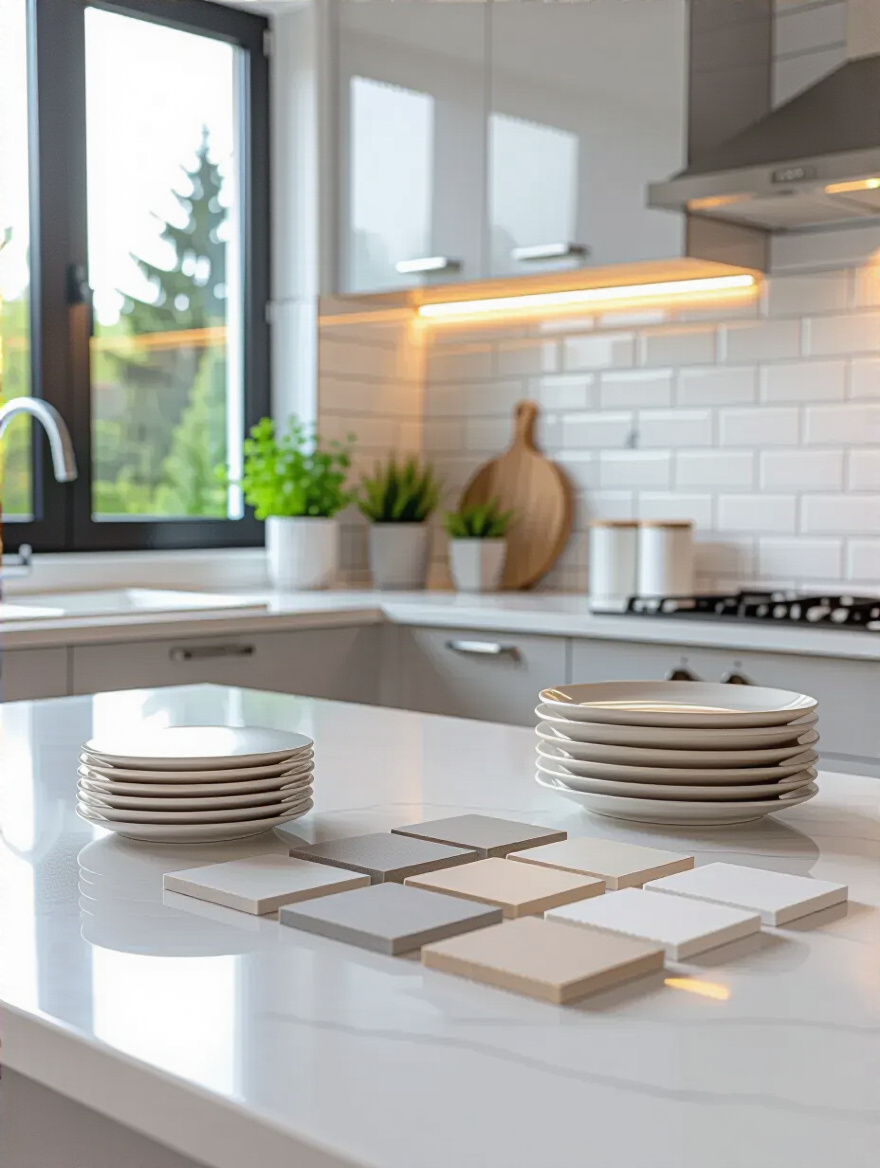
Think of your kitchen like a small forest ecosystem. The cabinets are the trees, the worktop is the forest floor, and the backsplash is the moss and stone that connect them. They cannot exist in isolation; they must work in harmony. You must gather samples—a piece of your worktop, a door from your cabinet—and place them together in your kitchen. Watch them in the morning light, in the evening glow. Do they feel calm together? Do their textures complement each other?
I once had a client who had fallen in love with a cool, blue-toned marble backsplash. The problem was, she had already installed beautiful cream-colored cabinets with warm undertones. When we put the samples together, they fought. The backsplash made the cabinets look yellowed, and the cabinets made the stone look sterile. By simply shifting to a marble with warmer, greige veining, the entire room settled into a peaceful harmony. This early testing of materials is not a chore; it is the most critical conversation you will have during your design process.
You would never build a beautiful house on a poor foundation. The same is true for your backsplash. The wall behind the tile is the unseen hero of your kitchen. If it is uneven, damp, or greasy, even the most expensive tile installed by the best craftsman will eventually fail. Preparing this surface is non-negotiable. It is the honest, unglamorous work that ensures your backsplash will last for decades.
This means thoroughly cleaning the wall to remove any kitchen grease, filling any holes, and sanding it smooth. You must check for any dampness, especially around the sink. Run your hand across the wall—it should be clean, dry, and flat. I promise you, any small bump or dip you ignore will be magnified tenfold once the tiles are on. A smooth, well-prepared wall allows the tile adhesive to create a perfect bond, ensuring your tiles sit flawlessly and remain secure for a lifetime of use.
With a solid plan and a prepared surface, we can finally turn our attention to the materials themselves. This is where the personality of your kitchen begins to emerge. Here, we will explore choices that embody the modern Scandinavian principles of simplicity, functionality, and connection to nature.
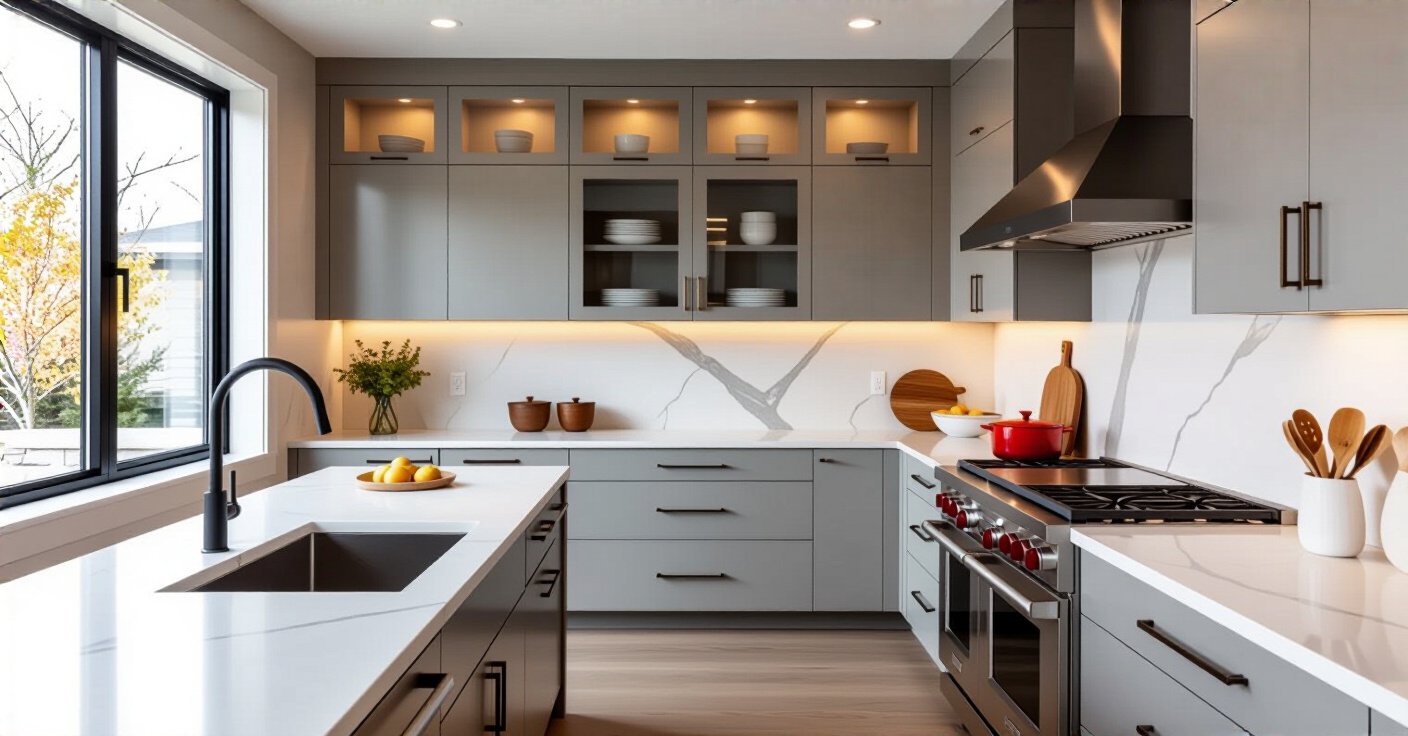
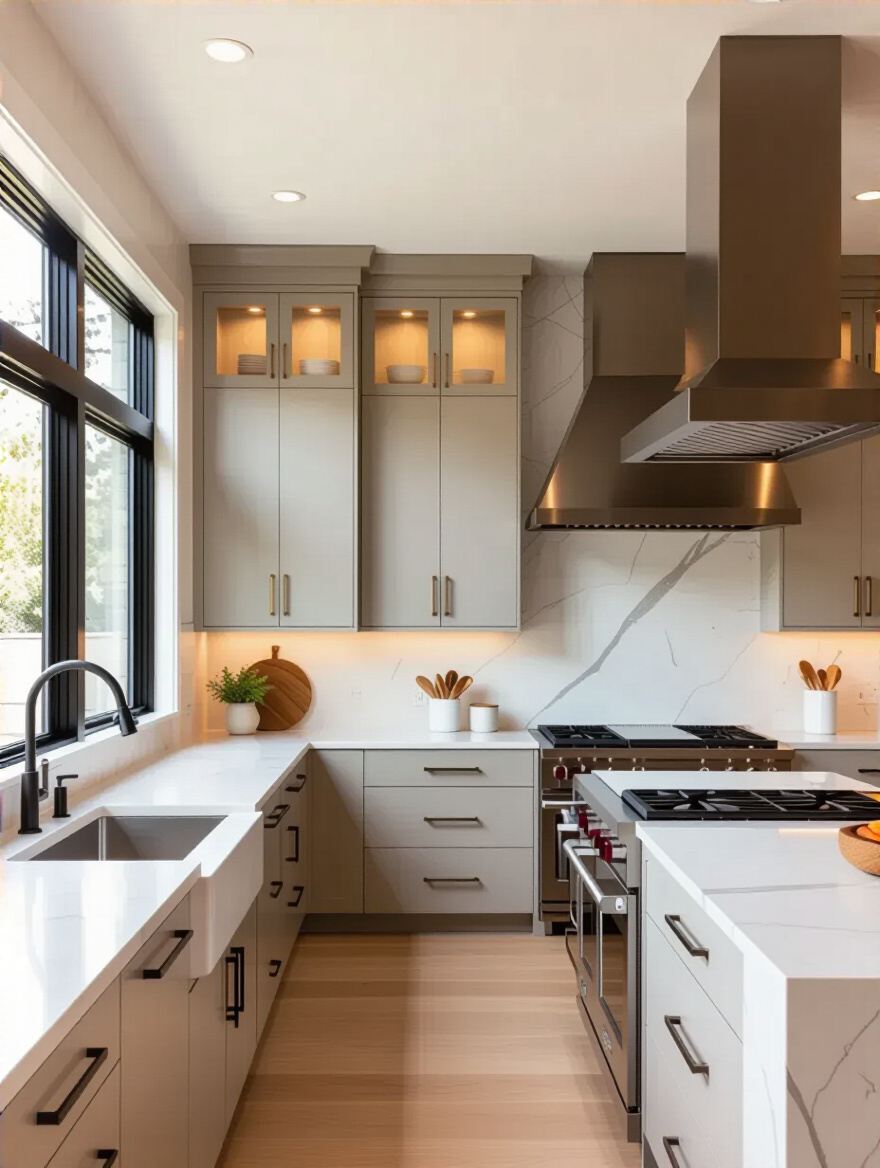
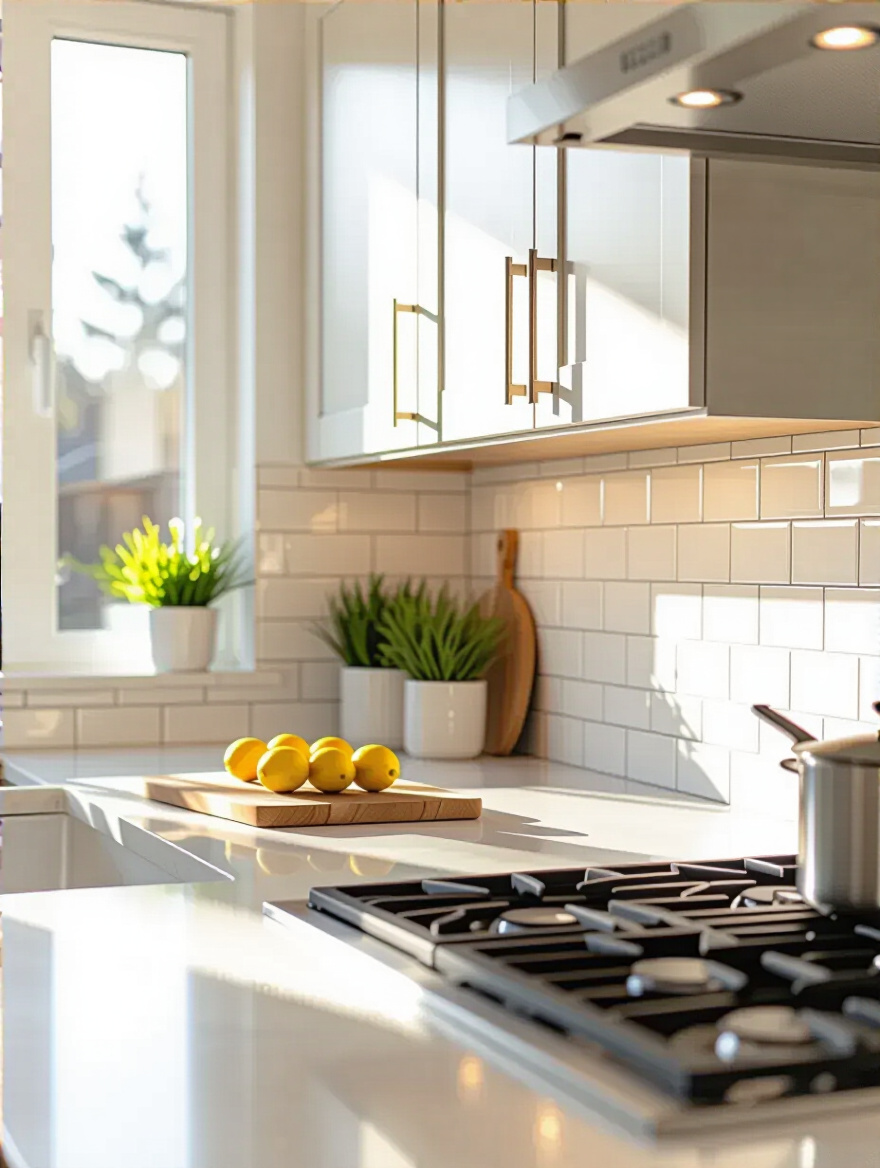
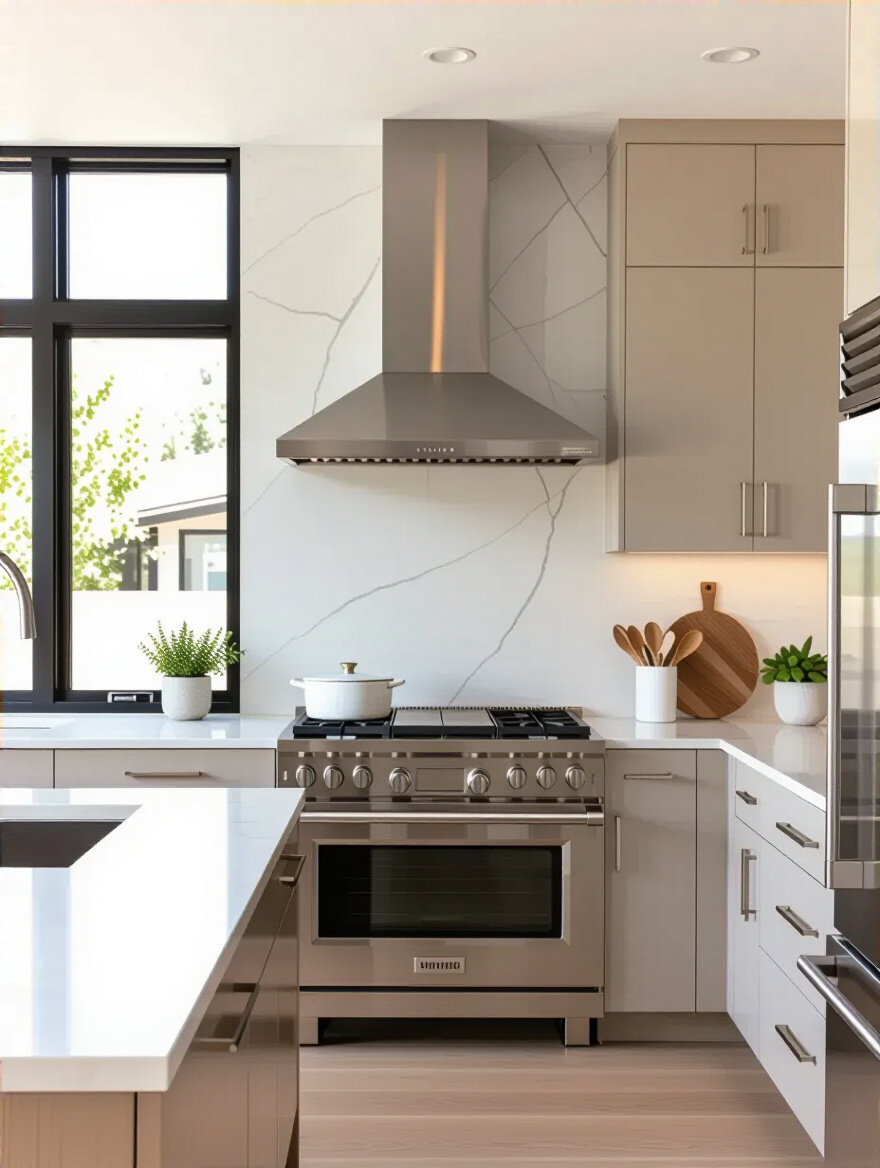
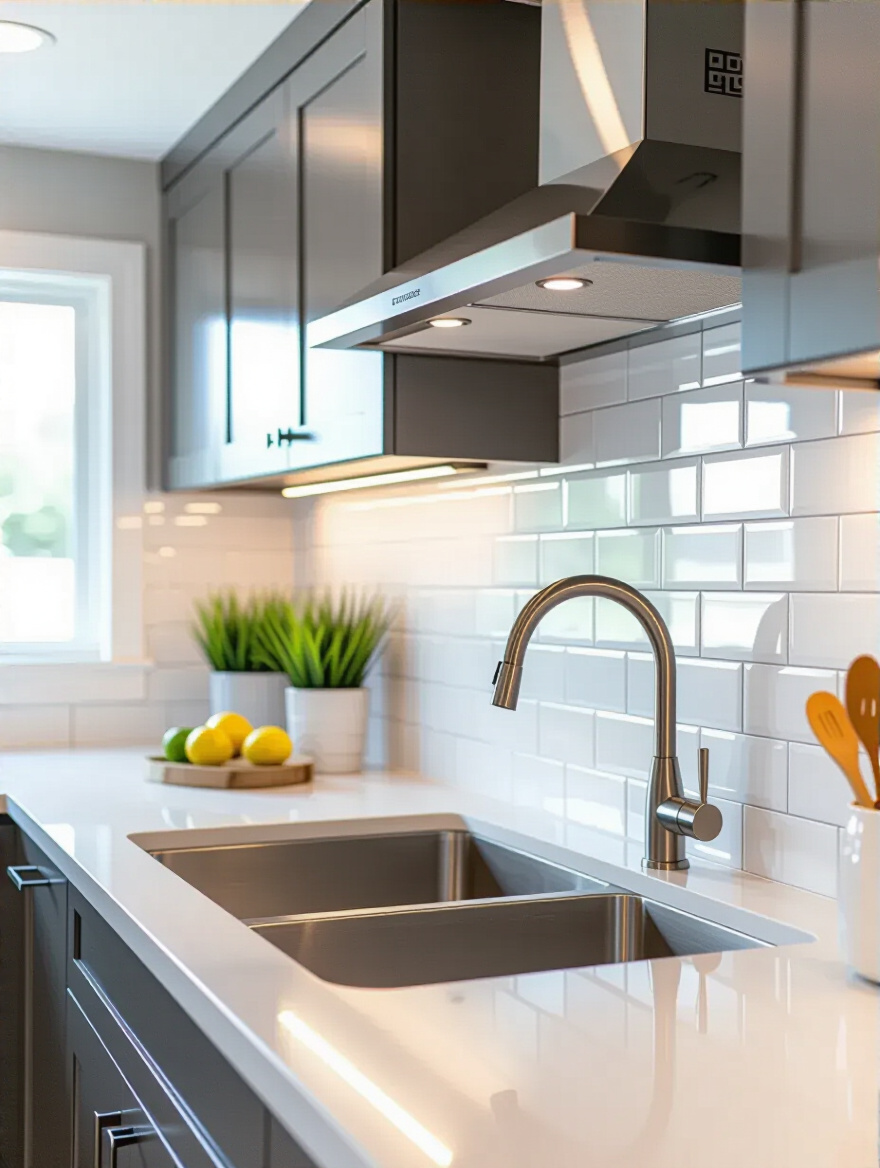
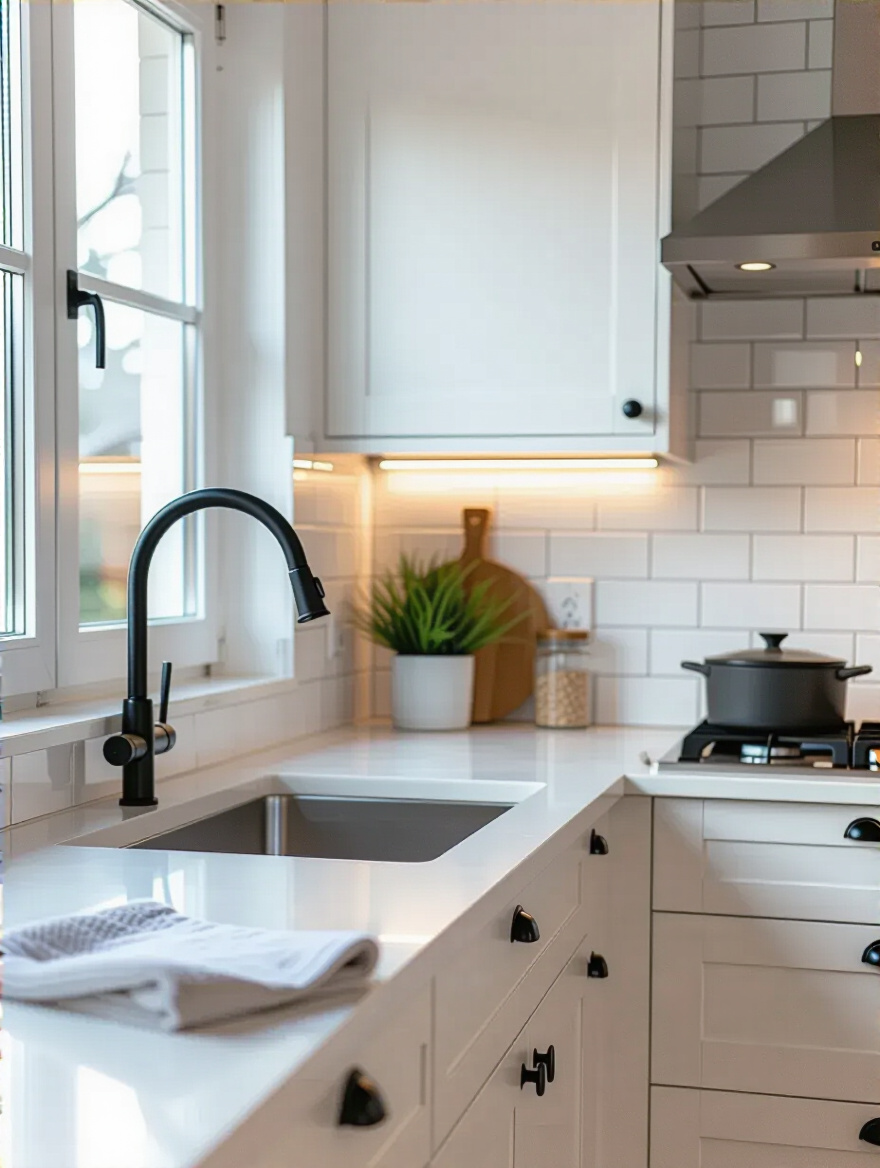
For a truly serene and modern kitchen, the goal is often to reduce visual noise. Grout lines are visual noise. Large-format tiles—those beautiful, expansive pieces of porcelain or ceramic—are the answer. By minimizing grout lines, you create a calm, seamless surface that feels uncluttered and spacious. It gives the impression of a single, monolithic slab of material, which brings a quiet confidence to the space.
Beyond their minimalist beauty, these large tiles are deeply practical. Fewer grout lines mean fewer places for kitchen grime to settle, making cleaning wonderfully simple. A quick wipe-down is often all that is needed. Imagine a backsplash behind your hob made from just one or two large tiles. It is the essence of functional elegance. This choice is about embracing simplicity not just for how it looks, but for how it makes your daily life easier.
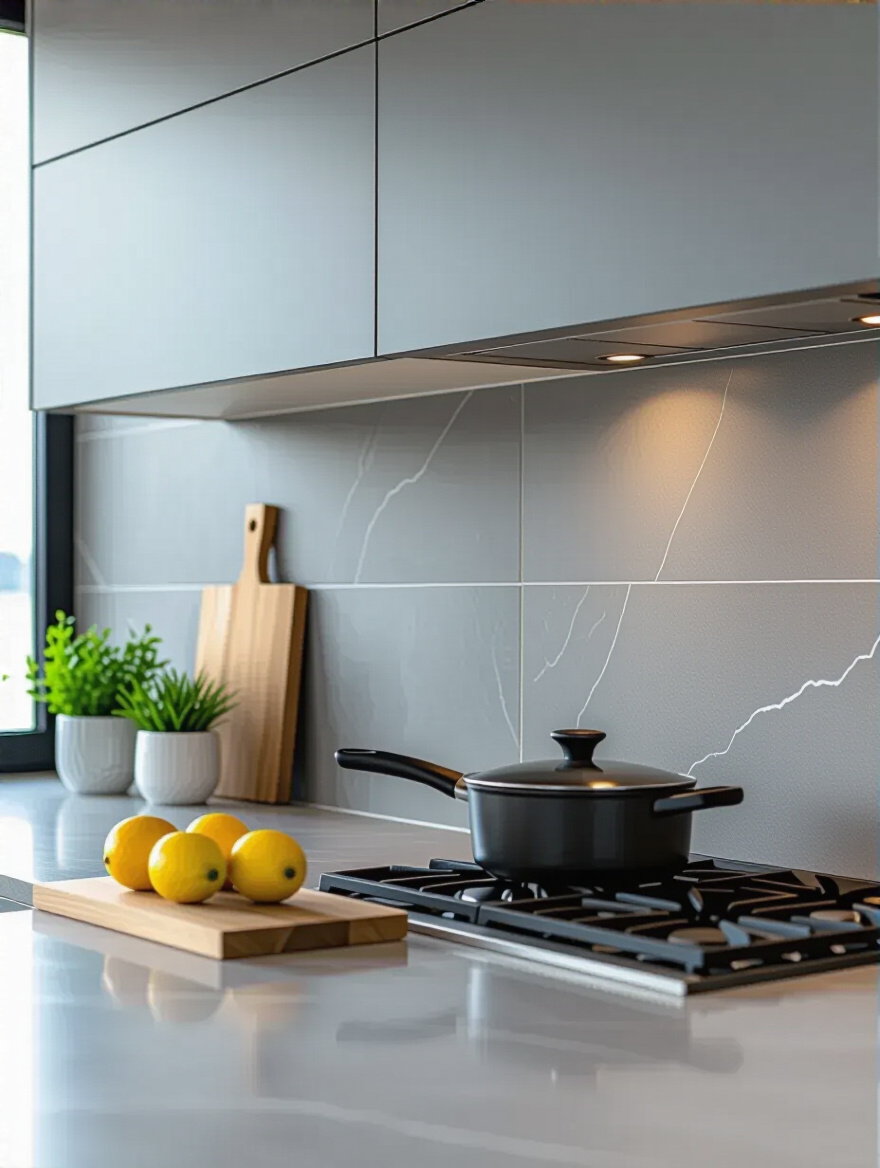
If large-format tiles are about reducing visual noise, a slab backsplash is about achieving total silence. Using a single, continuous piece of stone, quartz, or porcelain from your worktop to your cabinets is the ultimate expression of minimalism. It allows the inherent beauty of the material—the subtle veining in a piece of marble, the quiet depth of a quartz composite—to be the only statement needed. There are no interruptions, no patterns, just the honest beauty of the material itself.

This creates an incredible sense of flow and luxury, as the eye travels effortlessly up the wall. I often suggest matching the slab to the worktop material to create a truly seamless and integrated look. It’s a bold choice, yes, and an investment. But it’s an investment in a feeling of complete, understated calm. A slab backsplash doesn’t shout for attention; it holds the space with a quiet, powerful grace that will never go out of style.
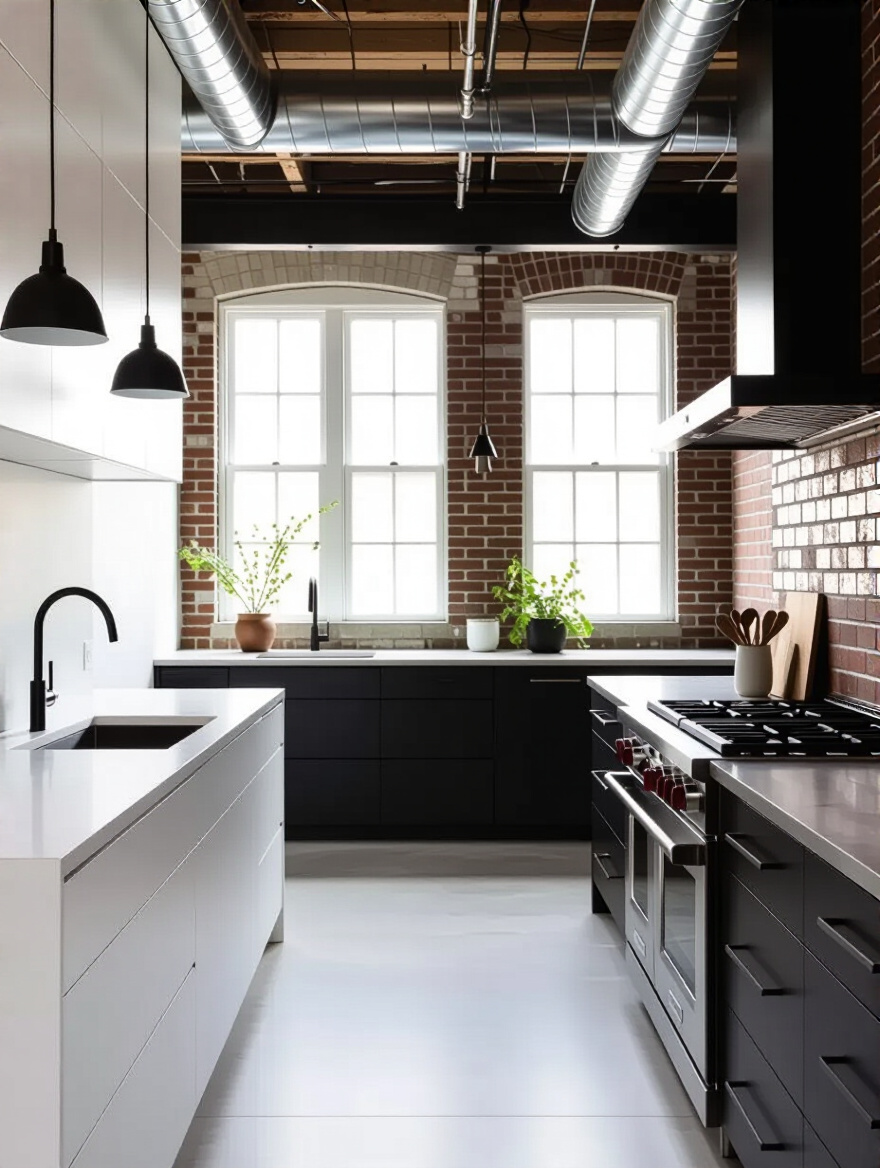
A modern home should never feel sterile. It needs warmth, life, and touchability. This is where texture comes in. A textured backsplash is a wonderful way to introduce a tactile quality that interacts with light, creating soft shadows and gentle highlights. It’s the difference between a flat, printed photograph and a living, breathing landscape. It adds depth and character without adding clutter.
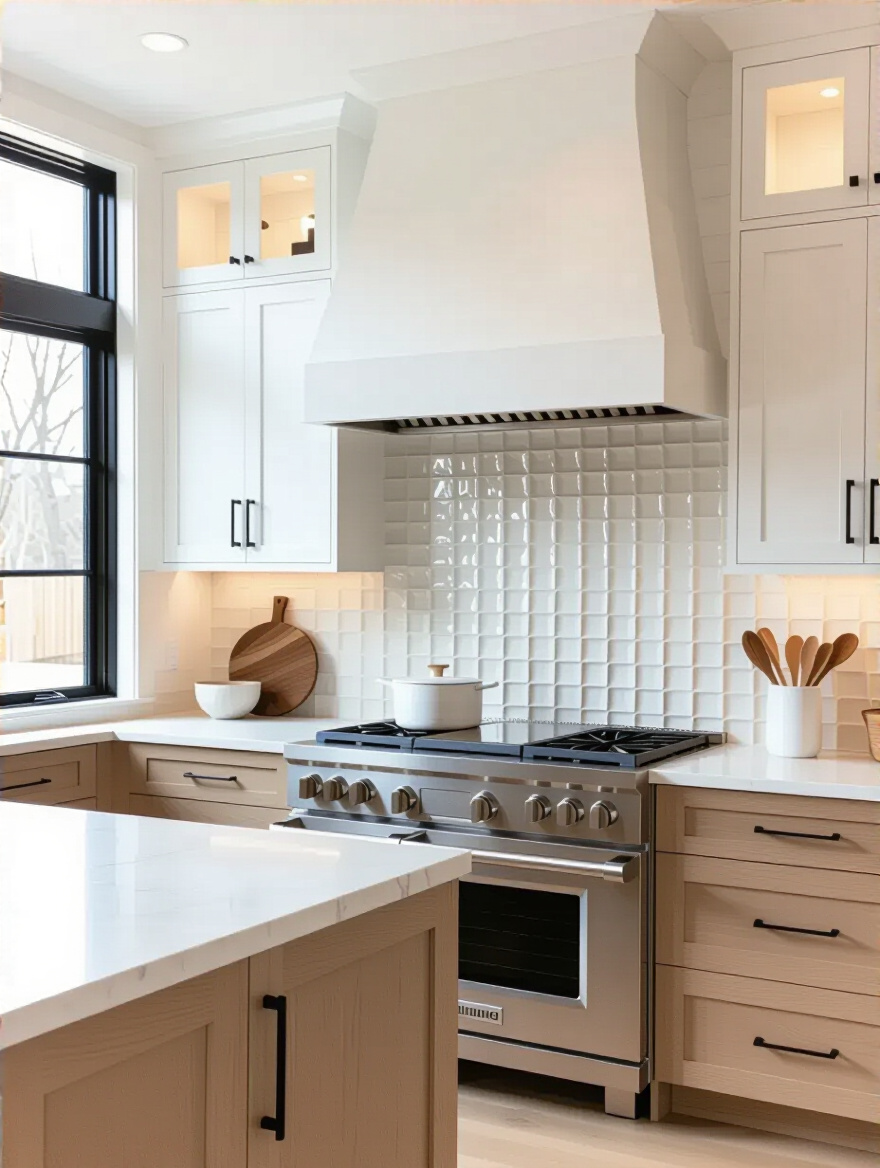
Consider materials like handmade Zellige tiles, with their imperfect surfaces and subtle variations in glaze. Or a fluted tile that creates a beautiful rhythm of light and shadow. Even natural stone, like slate or honed limestone, brings a piece of the outdoors inside, grounding the space. A textured backsplash invites you to touch it. It adds a layer of sensory experience that is essential for creating a cozy, hyggelig home.
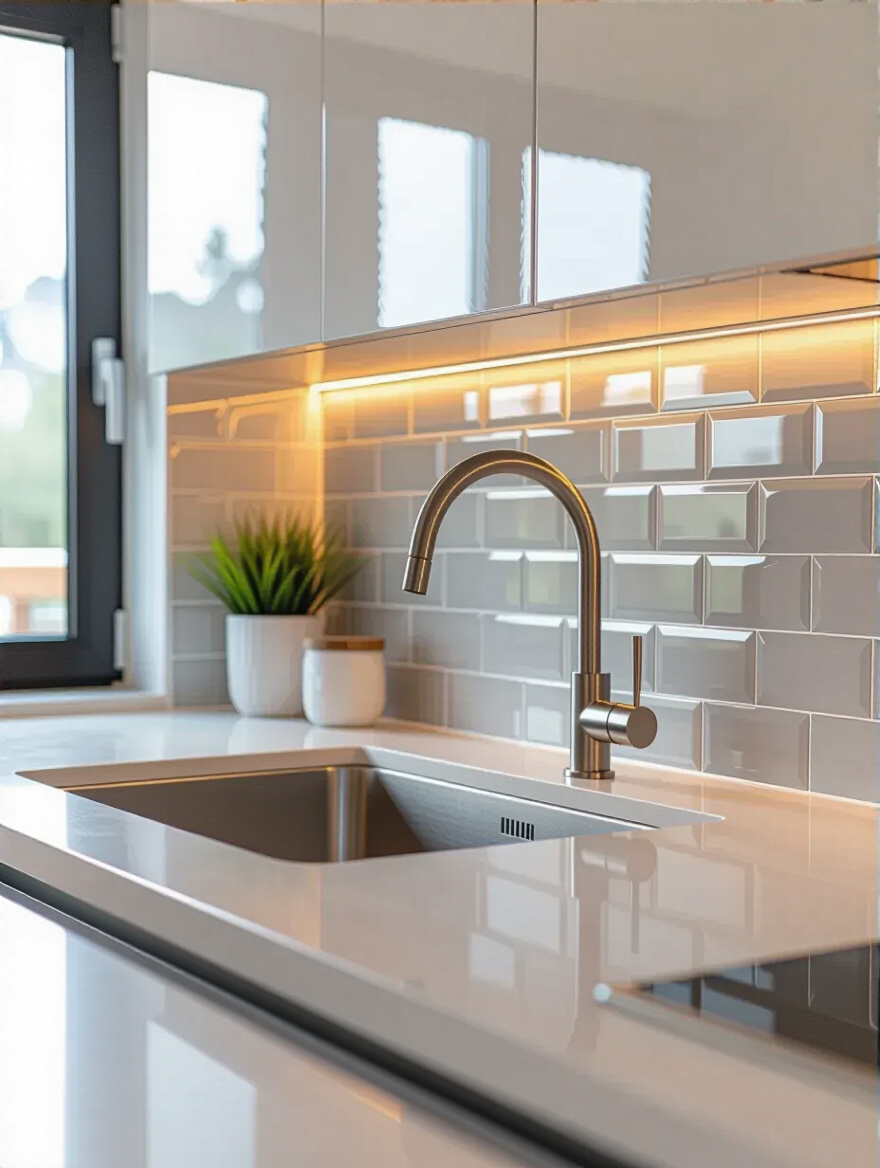
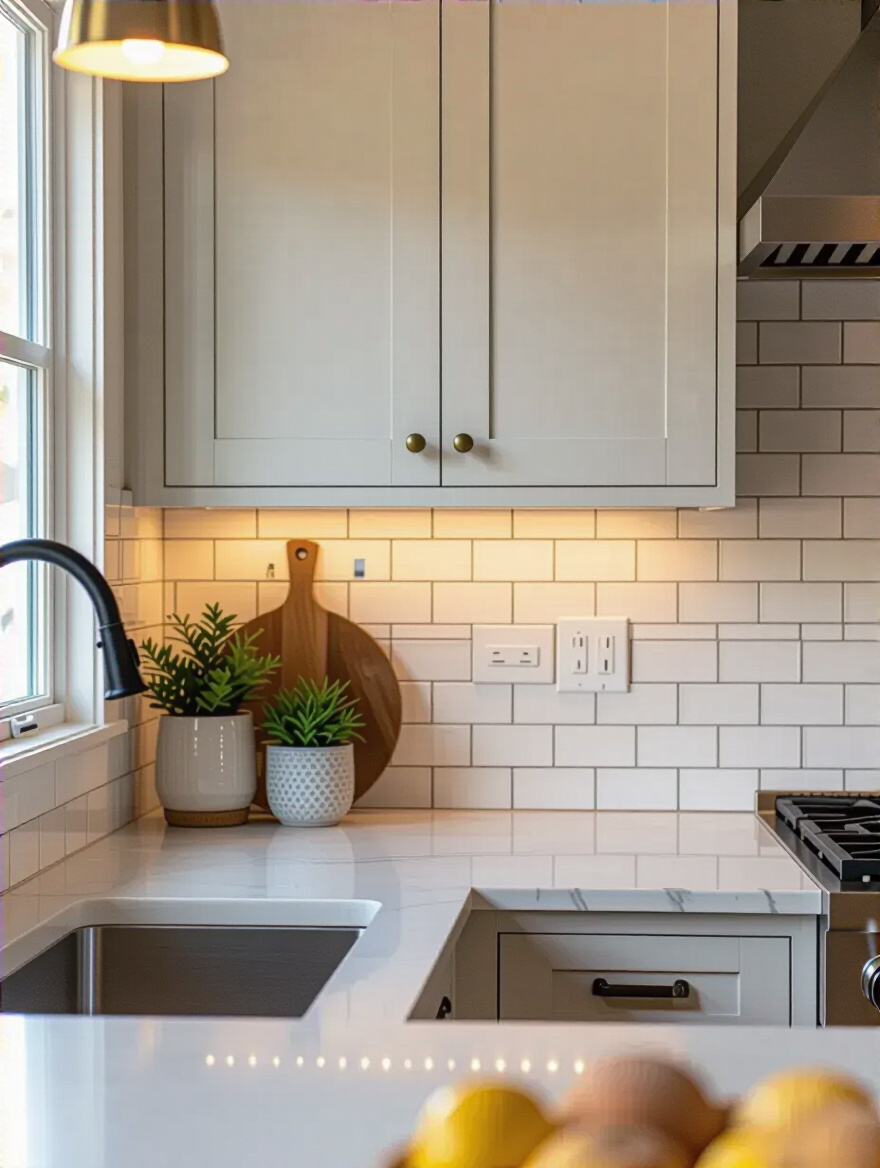
Grout is not just the glue that holds your tiles together; it is a critical design element in its own right. Your choice of grout color will fundamentally change the character of your backsplash. It is a choice between rhythm and unity. Do you want each tile to be celebrated as an individual shape, or do you want the entire surface to feel like a single, unified plane?
Choosing a contrasting grout—for example, a dark grey grout with a white subway tile—creates a graphic pattern. It emphasizes the grid, the shape of the tile, and the careful hand of the installer. On the other hand, choosing a grout that closely matches the color of your tile makes the grout lines recede. This creates a softer, more subtle texture and allows the focus to remain on the material of the tile itself. For the calm, minimalist aesthetic we often seek, matching the grout is usually the path to a more serene result.
Choosing your materials and how they relate to one another is a significant step. Now, we must consider the craft of bringing them into your home. The way a material is handled and installed is just as important as the material itself.
There can be a deep satisfaction in building something with your own hands. However, installing a backsplash, especially with beautiful materials, is a craft that requires precision and experience. I would always ask you to be honest with yourself about your skills. Are you patient? Are you meticulous? An improperly installed tile is a very sad thing—it disrespects the material and creates a flaw you will have to look at every single day.
For simple ceramic tiles in a straightforward layout, a skilled DIYer might achieve a good result. But for large-format tiles, natural stone, or intricate patterns, I believe in honoring the material by hiring a professional. A good tiler understands how to create perfectly straight lines, how to cut around obstacles with grace, and how to achieve a flawless finish. This is not just a labour cost; it is an investment in quality and peace of mind. As we say, the respect is in the details.
We have spoken of this before, but it is so important that it must be said again. All the beauty of your chosen tile, all the skill of your installer, will mean nothing if the wall beneath is not properly prepared. This is the final, critical checkpoint before installation begins. The wall must be a perfect canvas: clean, smooth, dry, and structurally sound.
Take this step seriously. Any grease must be cleaned away, any cracks must be filled, and any unevenness must be smoothed. A professional installer will insist on this, but if you are doing the work yourself, do not be tempted to cut corners here. This meticulous preparation is your guarantee that your backsplash will adhere perfectly and last a lifetime, looking as beautiful in twenty years as it does on the day it is installed.
Your materials are chosen, and your wall is ready. Now we move on to the finer points—the details that elevate a good kitchen into a truly exceptional one. These are the touches that blend style and function so seamlessly that you hardly notice them, yet they contribute enormously to the feeling of effortless elegance.
Extending your backsplash from the worktop all the way to the ceiling is a powerful and elegant gesture. It is not “dramatic” in a loud, flashy way, but in a quietly confident, architectural way. It creates a single, uninterrupted plane of color and texture that draws the eye upward, making the kitchen feel taller, more spacious, and more considered. This technique turns the entire wall into a feature.
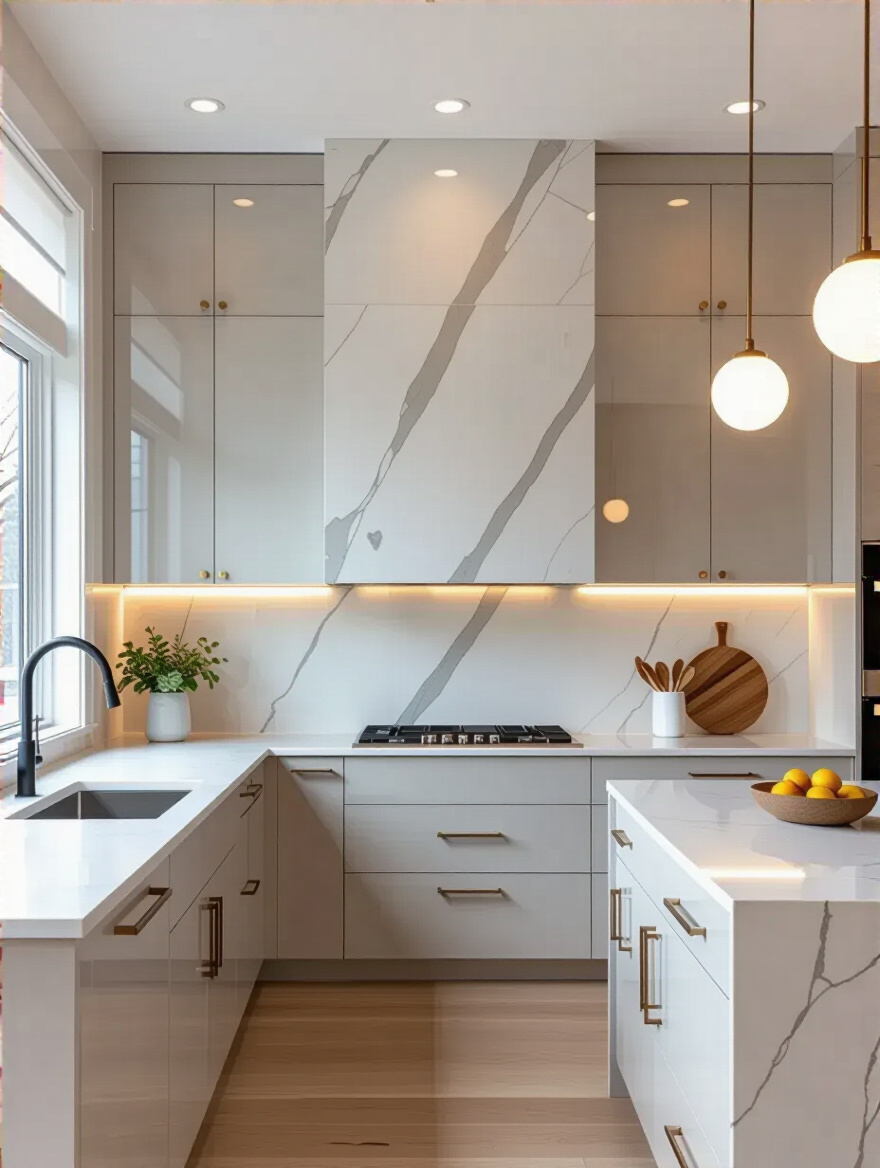
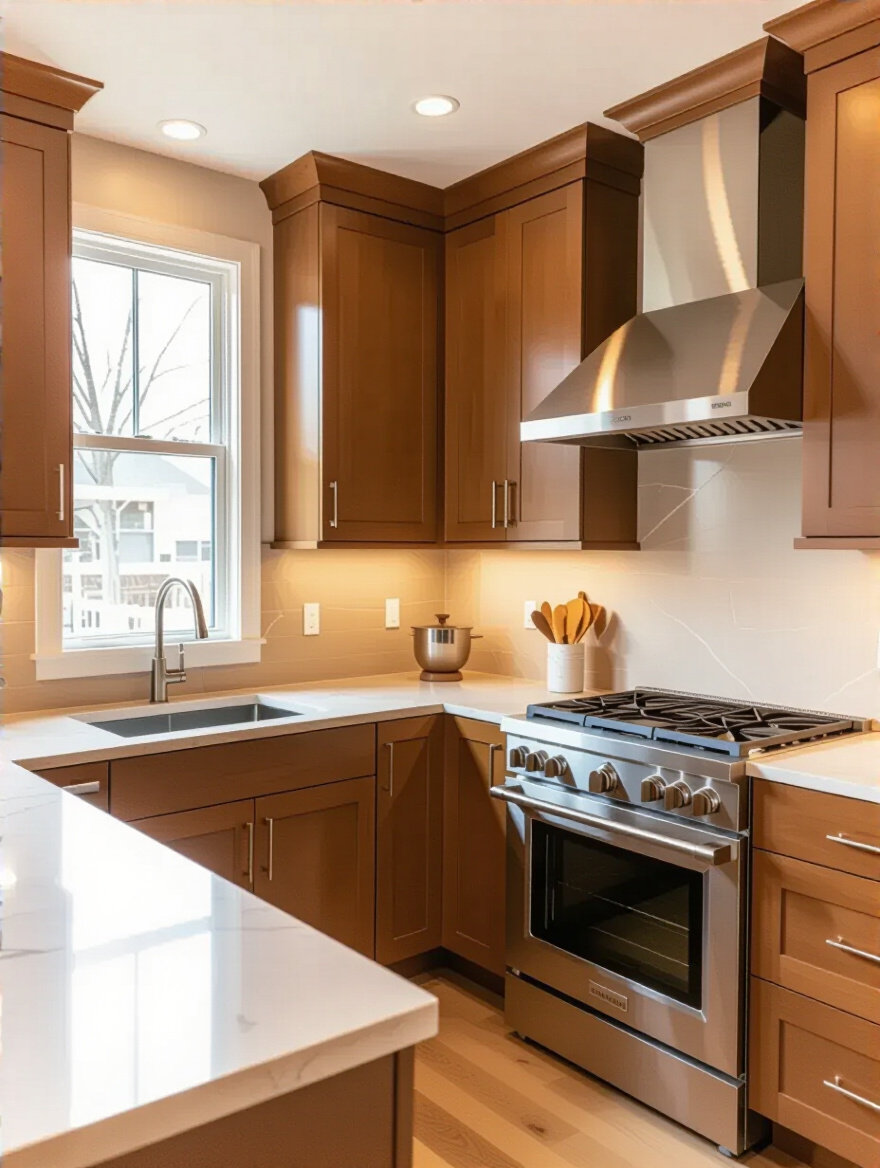
This works particularly well in kitchens without upper cabinets, or on a single feature wall, such as behind the cooker or sink. Imagine a beautiful, subtly veined marble or a wall of warm, textured tiles stretching to the ceiling. It removes the awkward visual break where a traditional backsplash would stop, resulting in a cleaner, more integrated, and high-end feel. It’s a statement of commitment to your chosen material, allowing it to be fully expressed.
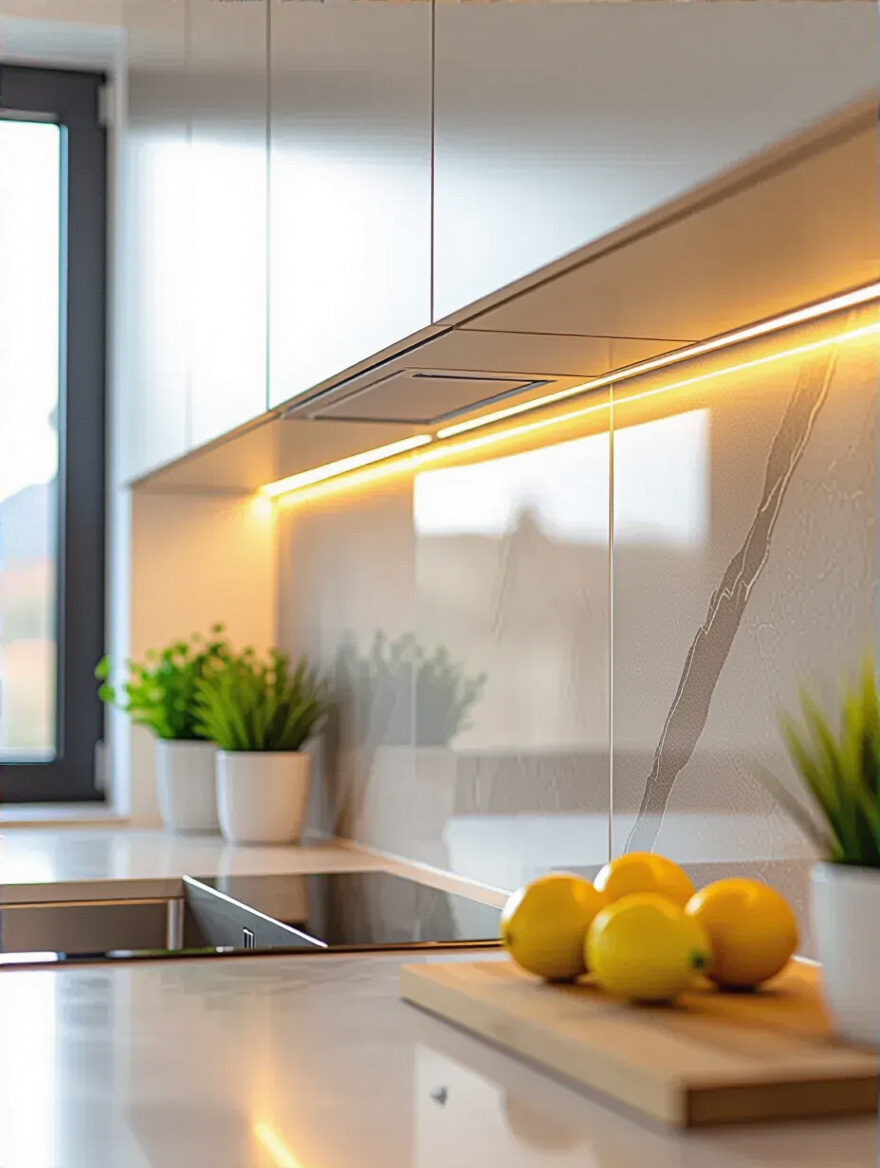
In Scandinavia, where the winter days are short, we have a deep appreciation for the power of good lighting. It is not just about function; it is about creating a mood. Integrated under-cabinet lighting is essential in a modern kitchen. It illuminates your work surface without shadows, making food preparation safer and more pleasant. But it does much more than that.
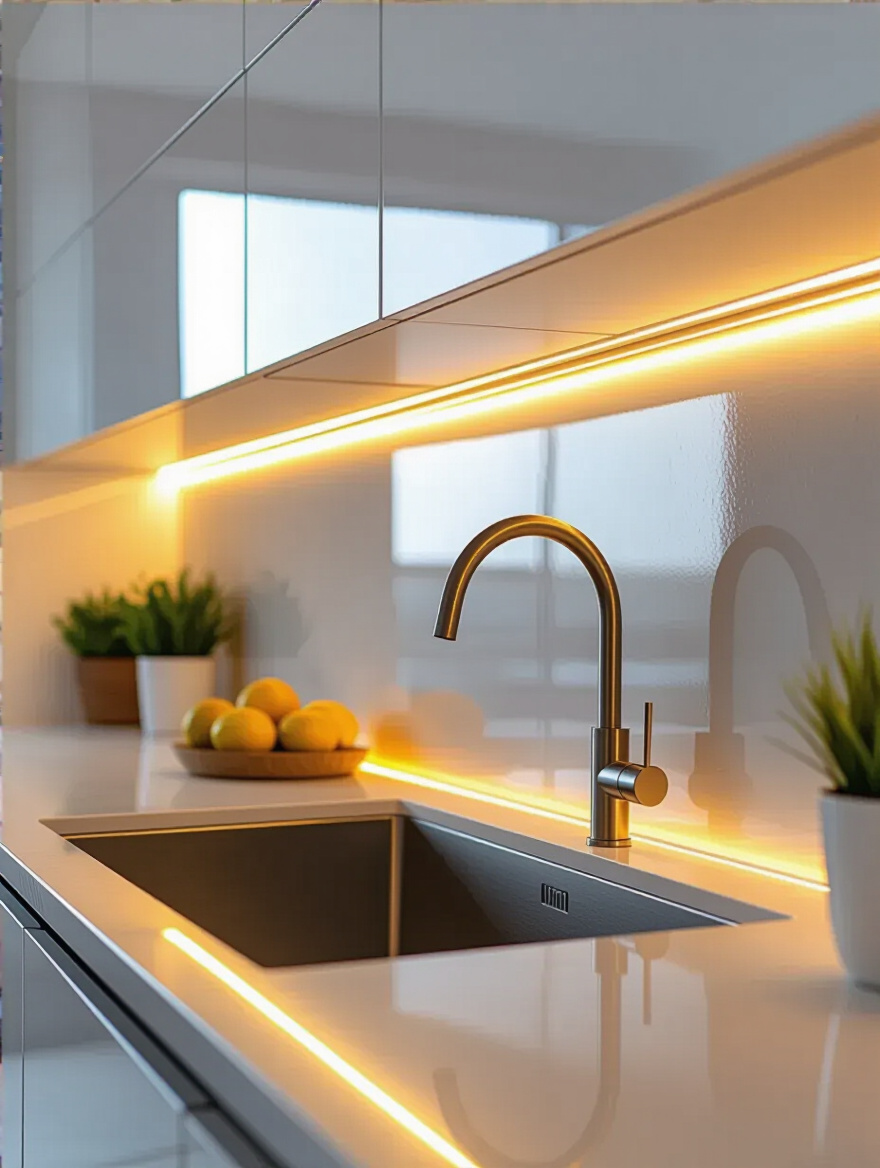
A soft wash of light across your backsplash completely transforms the feel of the kitchen in the evening. It highlights the texture of your tiles, reveals the subtle depth of your stone, and turns a functional workspace into a warm, inviting hub for entertaining or quiet reflection. Choose a warm-temperature LED strip for a cozy glow. This layer of light is what creates hygge—that feeling of contentment and comfort that is so vital to a happy home.
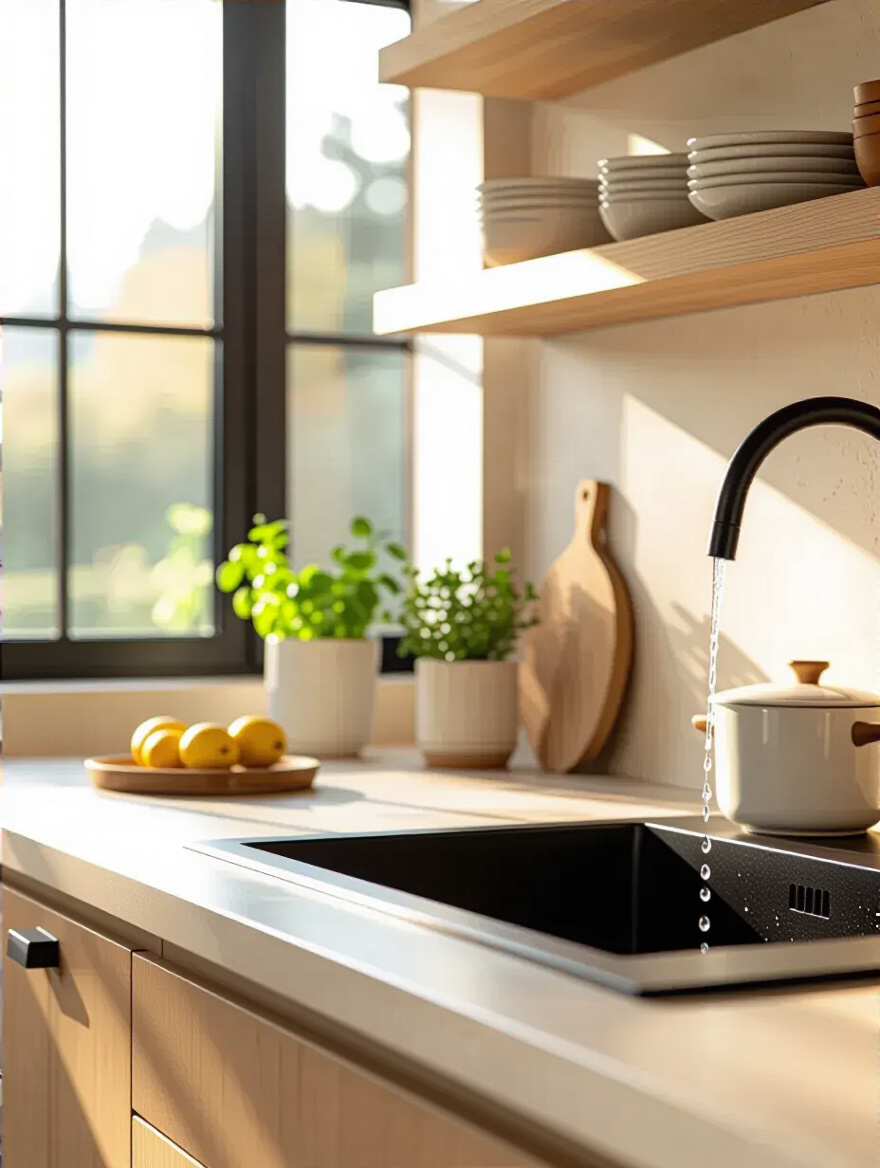
Upper cabinets can feel heavy and visually confining. Replacing them with simple open shelves is a core principle of Scandinavian design. It opens up the space, making it feel lighter and airier. Critically, it allows your beautiful backsplash to be seen, turning it from a small strip of material into a complete backdrop. It encourages you to live more mindfully—to own fewer, more beautiful things.
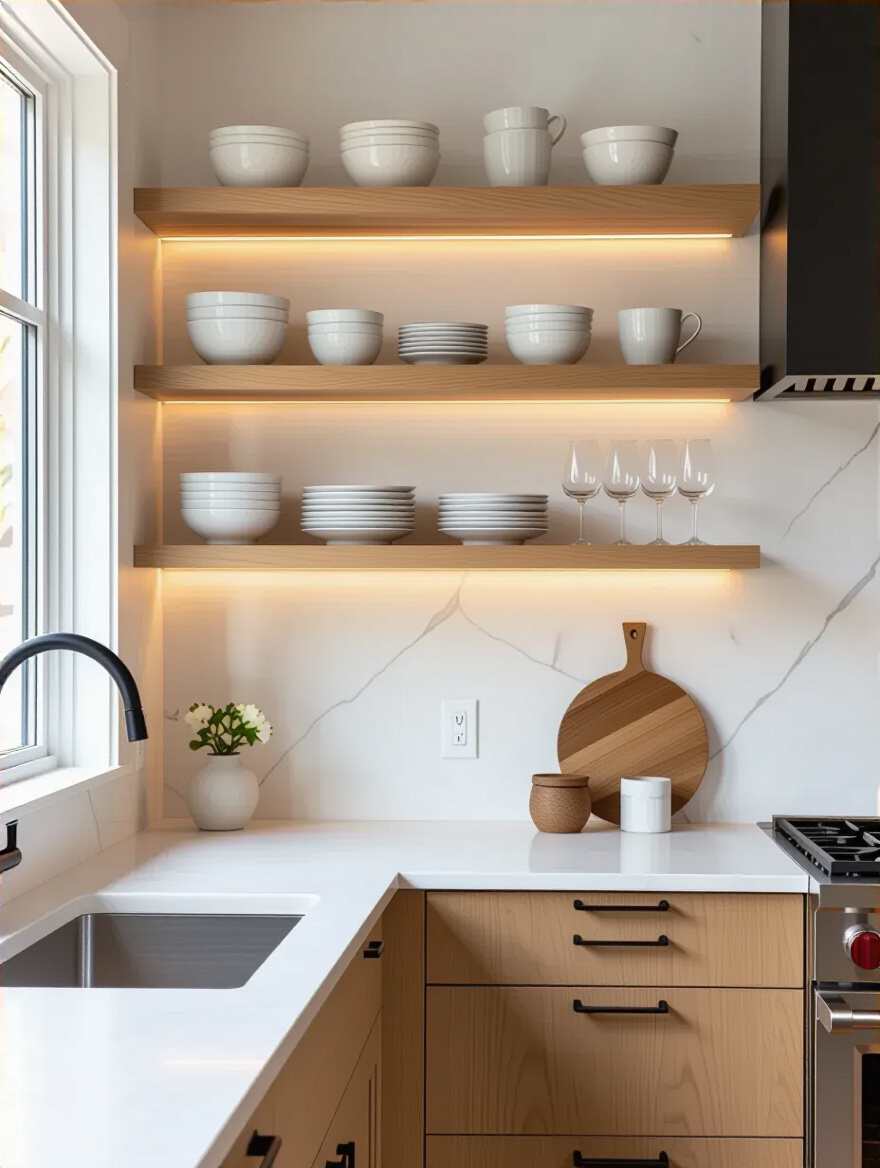
The key is curation. These shelves are not for clutter. They are for your most-used, most-loved ceramics, glassware, and cookbooks. Objects that are both functional and beautiful. This combination of the practical shelving, the curated objects, and the stunning backsplash behind them creates a vignette that is personal and alive. It is a picture of how you live, perfectly blending utility with beauty.
This is an advanced technique and should be approached with care to avoid creating visual clutter. However, when done thoughtfully, combining two materials can beautifully and subtly define different zones in the kitchen. For example, you might use a durable, easy-to-clean material like stainless steel or a large porcelain tile directly behind the hob, where most of the cooking happens.
Then, for the rest of the backsplash, you could transition to a warmer material, like a handmade tile or even a sealed wood panel near a coffee station. The key is to choose materials that share a common sensibility—perhaps a similar tone or level of simplicity. The transition between them must be clean and intentional, perhaps marked by a slim metal trim. This creates a bespoke, highly functional design that signals different uses within a single, cohesive space.
As we refine our design, we must focus on the small details that create a sense of finish and calm. It is often these final touches—the ones that are almost invisible—that make the greatest difference to the overall feeling of quality and tranquility in a room.
How a backsplash ends is just as important as how it begins. A raw, exposed tile edge looks unfinished and is vulnerable to chipping. This is a small detail that speaks volumes about the level of care and craftsmanship in your kitchen. A simple, clean edge treatment is the perfect punctuation mark, providing a crisp, intentional finish.
In modern Scandinavian design, we often favour a minimalist metal trim, such as those made by Schluter. A slim profile in brushed aluminum, matte black, or brass can define the edge of the tile area with elegance and precision. It protects the tile while perfectly complementing a minimalist aesthetic. For slab backsplashes, a mitered edge, where two pieces are cut at a 45-degree angle to meet perfectly, creates a virtually invisible corner. Whichever you choose, ensure it is executed flawlessly.
Visual clutter is the enemy of a calm space, and nothing creates visual clutter on a beautiful backsplash like a clumsy plastic outlet cover. This requires planning from the beginning. You must think about where you need power and how you can make those outlets disappear. The goal is an uninterrupted surface, where function is integrated invisibly.
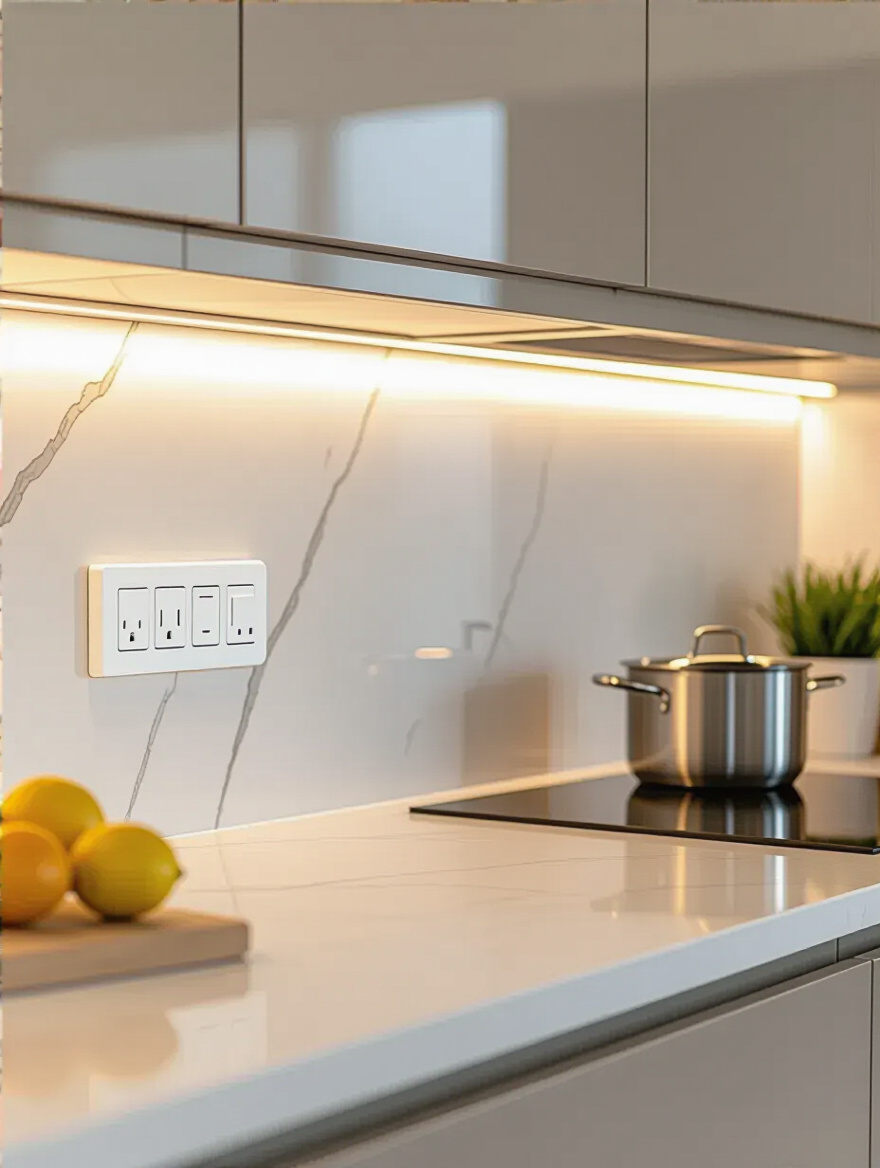
Consider mounting power strips just underneath your upper cabinets, hidden from sight but easily accessible. Pop-up outlets that retract into the worktop are another excellent solution. If you must have outlets on the backsplash itself, choose covers that are designed to be painted or tiled over, or select ones in a finish that matches your tile or metal fixtures as closely as possible. I once worked on a kitchen with a dark grey stone backsplash where we used matte black outlets. They simply vanished, allowing the beauty of the stone to remain the focus.
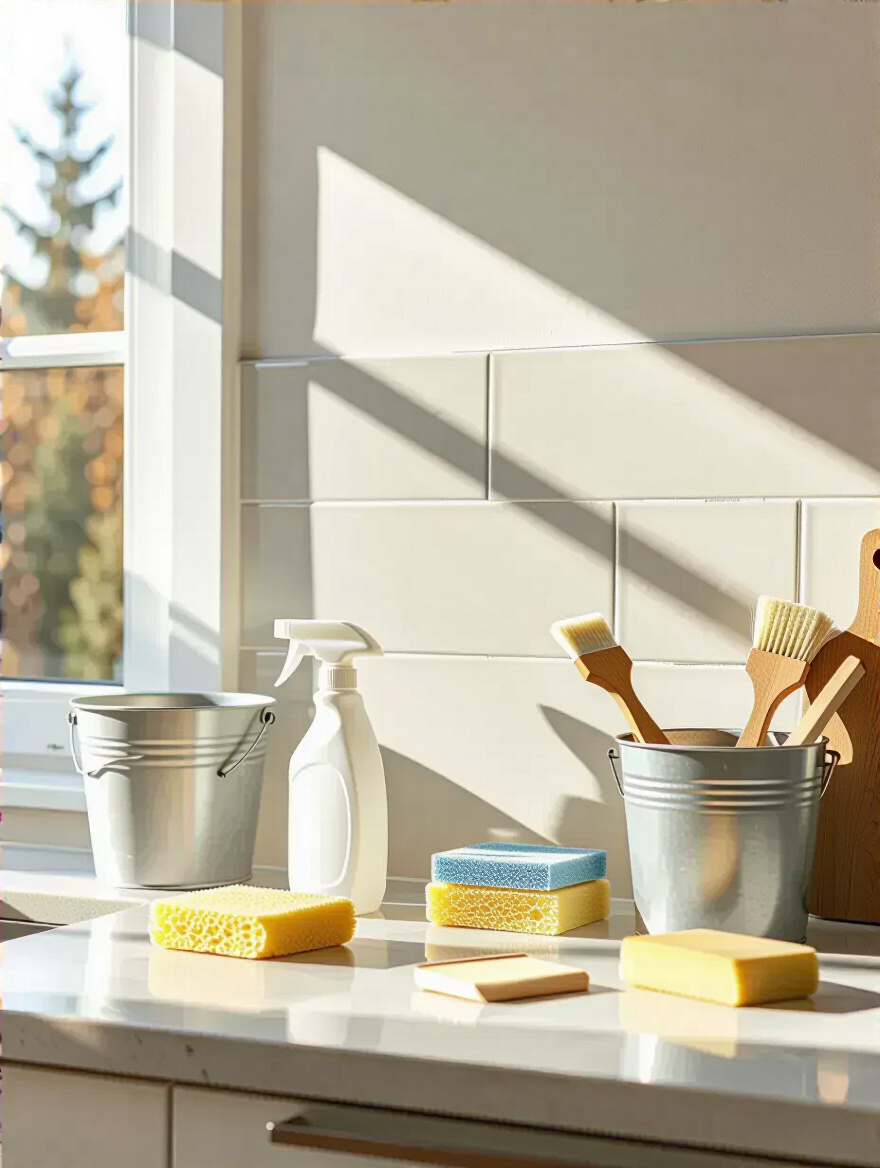
A backsplash is not finished once it is installed. It is a part of your home that you will live with for many years. A mindful approach to its care is the final piece of the design process, ensuring it remains as beautiful as the day it was completed.
Caring for your home should be a gentle ritual, not an aggressive chore. The key is regular, gentle cleaning with the right materials. A soft cloth and warm water is often enough for daily splatters. For more thorough cleaning, understand what your backsplash is made of. A natural stone like marble is sensitive to acids (like vinegar or lemon juice), so it needs a special pH-neutral cleaner. Ceramic or porcelain is much more robust.
Establishing a simple routine—a quick wipe after cooking, a gentle clean once a week—prevents buildup and the need for harsh chemicals. It’s a small act of respect for the materials in your home that preserves their beauty and extends their life. This is the essence of sustainable living: choosing well, installing with care, and maintaining with mindfulness.
Some of the most beautiful materials—natural stone, cement tiles, unglazed ceramics—are porous. Think of them as being thirsty; they will absorb liquids like oil, wine, or coffee, which can lead to stains. A good quality penetrating sealer is essential. It acts as an invisible shield, sinking into the pores of the material to block liquids from getting in, without changing the look or feel of the surface.
Sealing is not a one-time event. Depending on the material and how much you use your kitchen, it may need to be reapplied every few years. You can test it easily: just put a drop of water on the surface. If it beads up, the sealer is working. If it soaks in and darkens the material, it is time to reseal. This simple act of maintenance will keep your beautiful, natural backsplash pristine for decades.
Even with the best care, spills happen. The most important thing is to act quickly. Wiping up a splash of tomato sauce or a drip of coffee immediately prevents it from setting into a stubborn stain. For grout, which is naturally porous, discoloration can happen over time. A simple paste of baking soda and water, scrubbed gently with a small brush, can work wonders.
For persistent stains on grout, there are oxygen-based cleaners that can lift discoloration without damaging the surrounding tile. The key is to be gentle and patient. And once your grout is clean and dry, consider applying a grout sealer. This will make it resistant to future stains and much easier to keep clean, maintaining that crisp, fresh look.
This is perhaps my most important piece of practical advice. When you order your backsplash material, always order 10-15% more than you need. This is not for waste; it is your insurance policy for the future. Keep these extra tiles or a piece of the slab stored safely away. Ten years from now, if a tile cracks or gets chipped, you will have a perfect match from the same batch.
Trying to find a matching tile years later is often impossible. Dye lots change, styles are discontinued. Having those few extra pieces turns a potential disaster—ripping out the whole backsplash—into a simple, quick repair. Also, keep a small record of the grout color and adhesive you used. This forethought is the key to true longevity, allowing your kitchen to be easily maintained and enjoyed for a lifetime.
As you can see, choosing a modern kitchen backsplash is about so much more than what is fashionable. It is a thoughtful process of balancing beauty with function, of understanding materials, and of planning for a lifetime of use. It is about creating a space that not only looks clean and modern but feels calm, warm, and deeply personal. The right backsplash does not demand attention; it provides a quiet, supportive backdrop to the moments that make a house a home—the morning coffee, the shared meal, the late-night conversation.
So take your time. Gather your samples, stand in your space, and think about how you want to feel. Choose honest, quality materials and have them installed with care. A kitchen built with this intention becomes more than just a room for cooking; it becomes a sanctuary. And a beautiful, functional backsplash is its quiet, beating heart.


