Physical Address
304 North Cardinal St.
Dorchester Center, MA 02124
Physical Address
304 North Cardinal St.
Dorchester Center, MA 02124
When it comes to bathroom renovations on a budget, I’ve seen countless clients get discouraged by their financial constraints. But here’s the truth: some of the most stunning transformations I’ve witnessed didn’t require emptying a savings account or taking out a loan. Through my years as an architect, I’ve developed a collection of clever, cost-effective strategies that can completely reimagine your space without breaking the bank. Whether you’re dealing with a cramped powder room or a dated master bath, these 24 budget-friendly updates will help you create the bathroom of your dreams – one thoughtful change at a time.
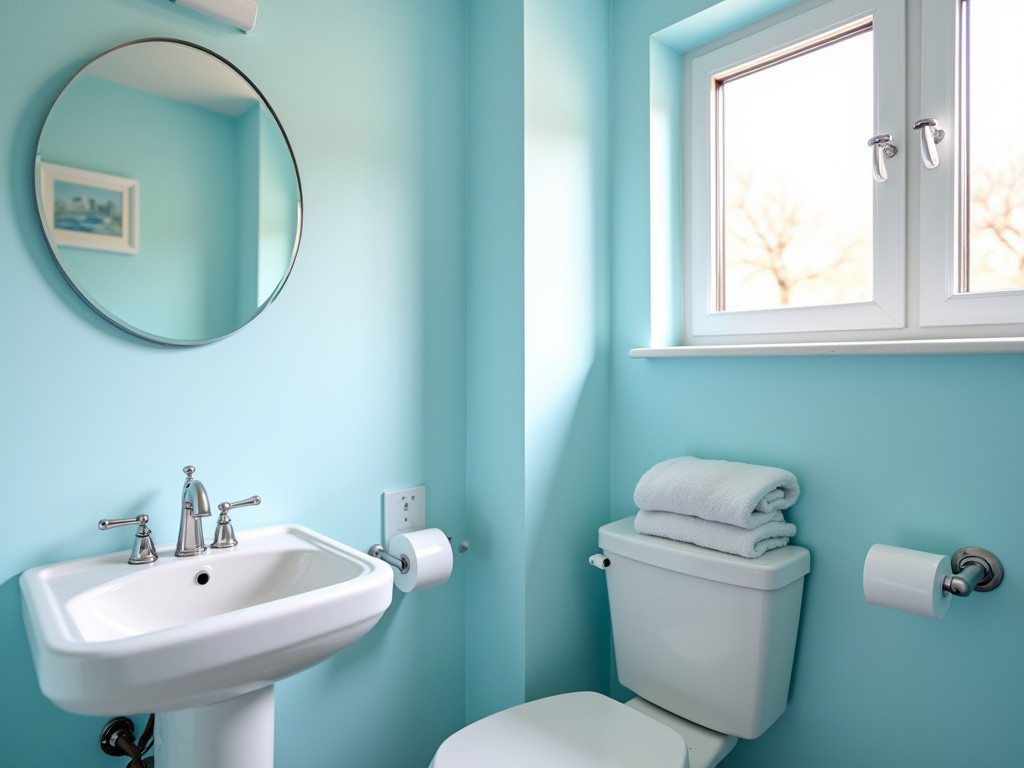
The power of paint never ceases to amaze me. Just last month, I worked with a client whose windowless bathroom felt like a cave until we transformed it with the perfect shade of paint. It’s remarkable how this simple change – arguably the most cost-effective bathroom renovation on a budget – can revolutionize your entire space. The right color choice might make your vintage brass faucet sing against a cool sage green, or help your modern chrome fixtures pop against a warm greige.
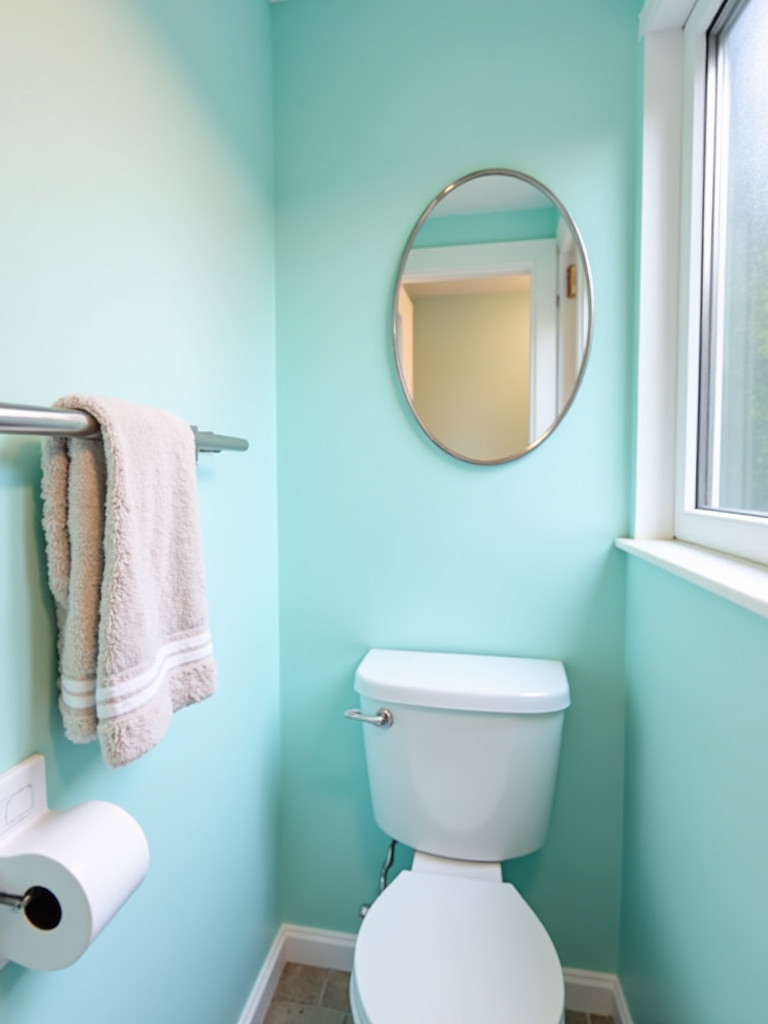
Success lies in choosing the right finish and proper preparation. After years of experimentation, I’ve found that a satin finish offers the ideal balance – durable enough to withstand bathroom moisture while forgiving enough to hide minor wall imperfections. Before you pick up that brush, invest time in thorough preparation: clean walls with a degreasing cleaner, patch any holes, and don’t skip the primer, especially for dramatic color changes. Your future self will thank you for the extra effort.
Ready to complement those freshly painted walls? Let’s explore how new hardware can add the perfect finishing touch to your budget-friendly bathroom renovation.
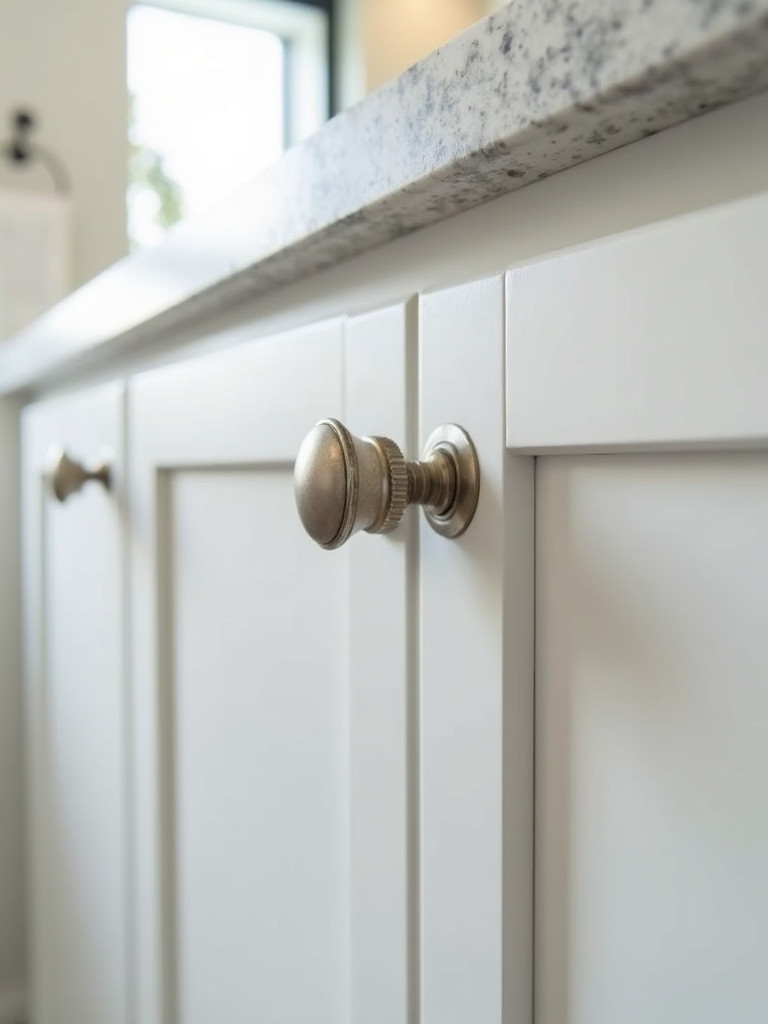
Sometimes the smallest changes pack the biggest punch in bathroom renovations on a budget. During a recent project, my client was convinced she needed new cabinets – until we tried a simple hardware swap. The transformation was nothing short of magical; her dated 90s vanity suddenly looked custom and contemporary. Think of hardware as jewelry for your bathroom: the right pieces can elevate the entire space from basic to brilliant.
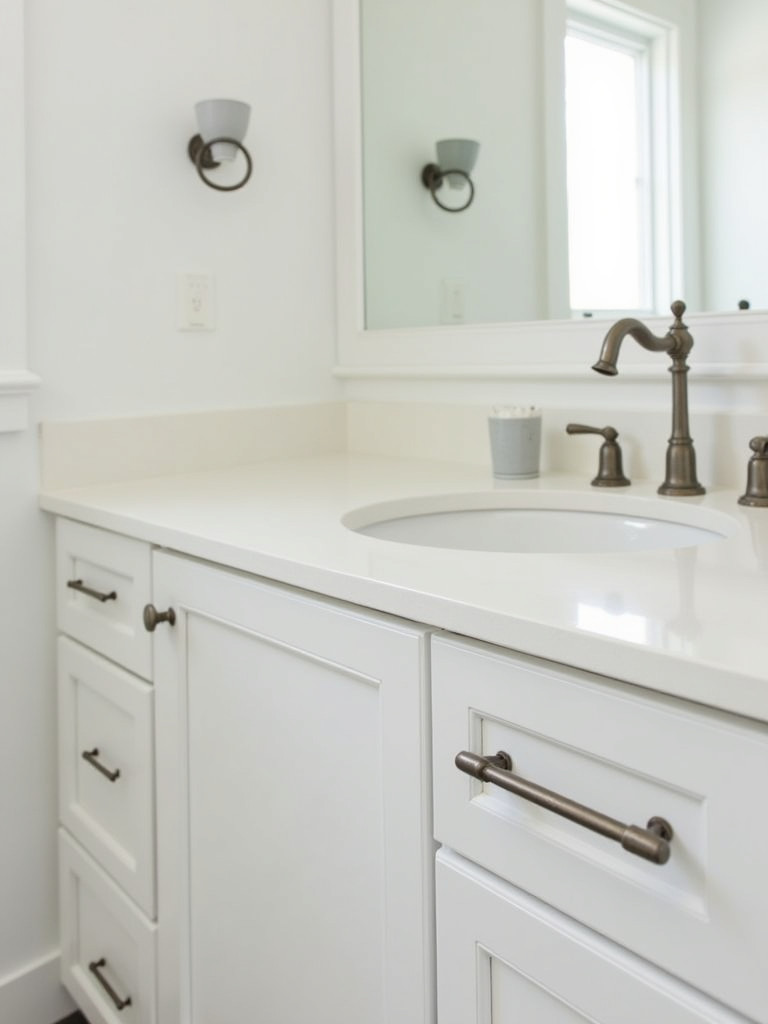
Before you fall in love with any specific style, take precise measurements of your existing hardware spacing. Trust me, this five-minute task can save you hours of unnecessary work filling and redrilling holes. I always encourage clients to bring an old piece to the store for comparison or create a paper template. While matching your new hardware finish to existing fixtures creates a cohesive look, don’t be afraid to experiment – a thoughtfully chosen contrasting finish might just become your favorite design decision.
Speaking of impactful changes, let’s explore how a new faucet can transform your entire vanity area without straining your renovation budget.
It’s amazing how a single element can date or elevate an entire bathroom. Last week, a client gasped when she saw how a simple faucet replacement completely transformed her space – and her morning routine. When tackling bathroom renovations on a budget, this update delivers incredible bang for your buck, offering both visual and functional improvements that you’ll appreciate every day.
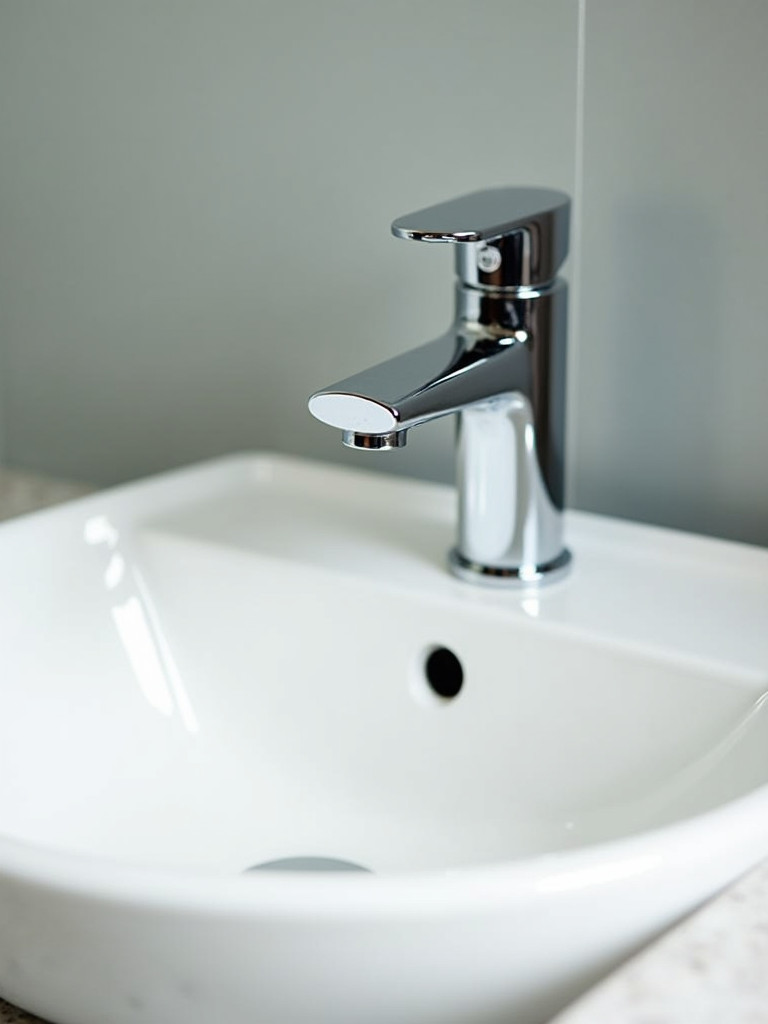
Before diving in, consider both style and practicality. That sleek modern faucet might look stunning in the showroom, but will it provide enough clearance for washing your face? Pro tip: take photos of your existing plumbing configuration before disconnection – they’ll be invaluable reference points during installation. While many faucet replacements are straightforward DIY projects, don’t hesitate to call a plumber if you encounter complications. Remember to use plumber’s tape for a proper seal; it’s an inexpensive insurance policy against future leaks.
Now that we’ve updated your sink area, let’s transform your shower experience without breaking your renovation budget.
Want to know one of my favorite secrets for bathroom renovations on a budget? A new showerhead can transform your daily routine from mundane to luxurious in less than an hour. Just last month, I helped a client upgrade her basic shower to a rainfall system, and now she calls her morning shower her “daily spa retreat.” The best part? This transformation cost less than dinner for two at a nice restaurant.
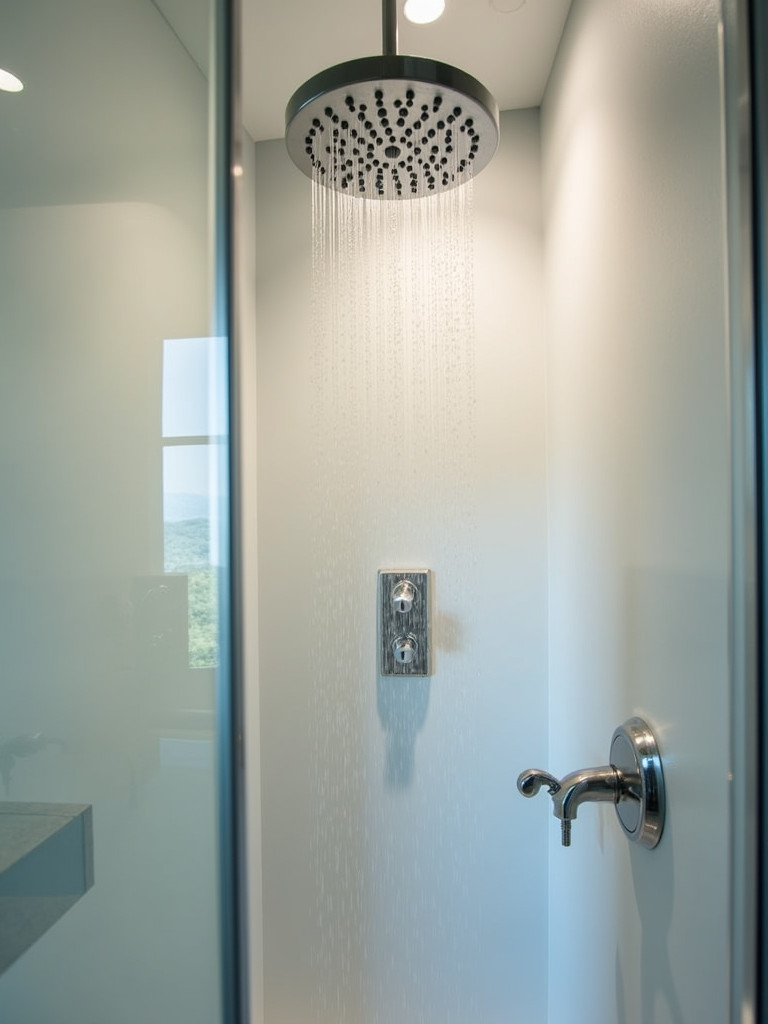
Before selecting your new showerhead, consider your home’s water pressure – those oversized rainfall heads might look stunning, but they need adequate pressure to perform well. Installation is typically straightforward, but attention to detail matters. Always use plumber’s tape on the threads to prevent leaks, and hand-tighten before using a wrench to protect the finish. Here’s a designer secret: mounting your showerhead slightly higher than standard height can create an even more luxurious experience without adding a penny to your budget.
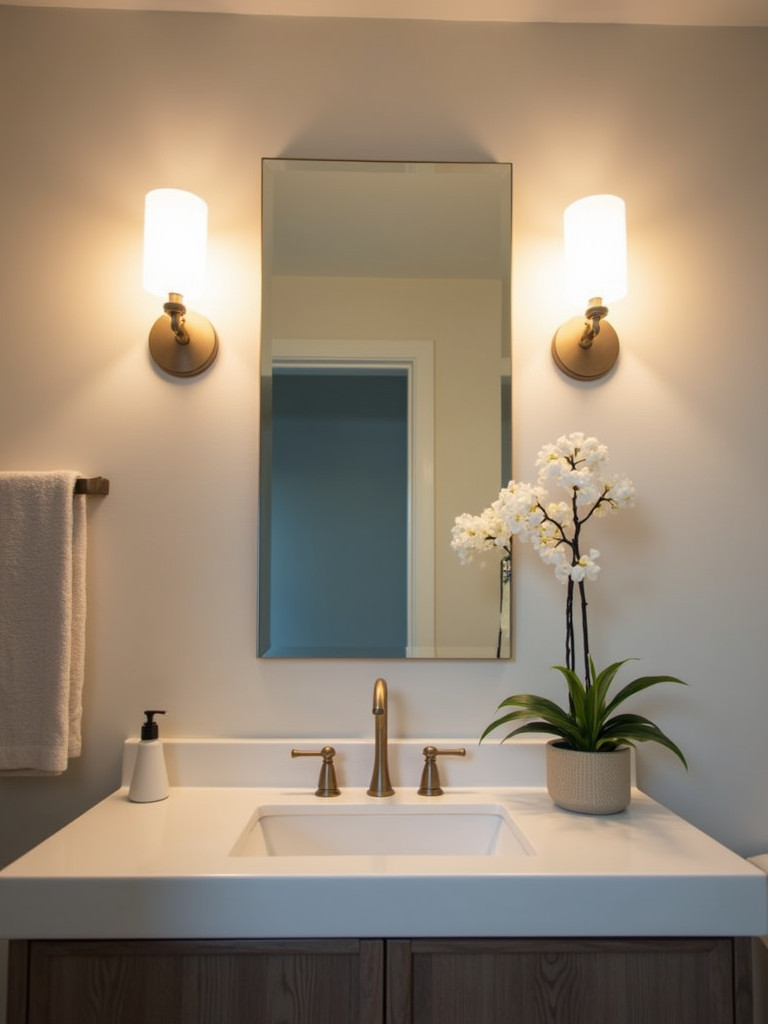
Ready to maximize the impact of your budget-friendly bathroom renovation? Let’s talk about mirrors – your secret weapon for making any space feel larger and brighter.
Mirrors are magical things. They expand spaces, amplify light, and can serve as stunning focal points in any bathroom renovation on a budget. Recently, I worked with a client whose small powder room felt cramped and dark until we replaced the basic builder-grade mirror with a larger, statement piece. The transformation was instantaneous – the room doubled in perceived size, and the new mirror added an elegant touch that elevated the entire space.
When choosing a new mirror, think big – but not overwhelming. I encourage clients to go as large as the space allows while maintaining proportion with the vanity below. Don’t be afraid to experiment with shapes; a round mirror can soften a bathroom full of hard angles, while a geometric frame adds interest to simple spaces. For installation, proper anchoring is crucial. Here’s a pro tip that’s saved countless walls: place painter’s tape where you plan to drill – it prevents the drill bit from slipping and makes marking your holes effortless.
Speaking of those essential finishing touches that make a big difference, let’s explore how fresh caulking can give your bathroom a clean, polished look without straining your renovation budget.
While it might not be the most glamorous aspect of bathroom renovations on a budget, fresh caulking can take your space from tired to polished in a single afternoon. Recently, a client was convinced her tub needed replacing until we removed the old, discolored caulk and applied a fresh bead. The difference was striking – suddenly, her old tub looked new again, and we saved thousands in unnecessary replacements.
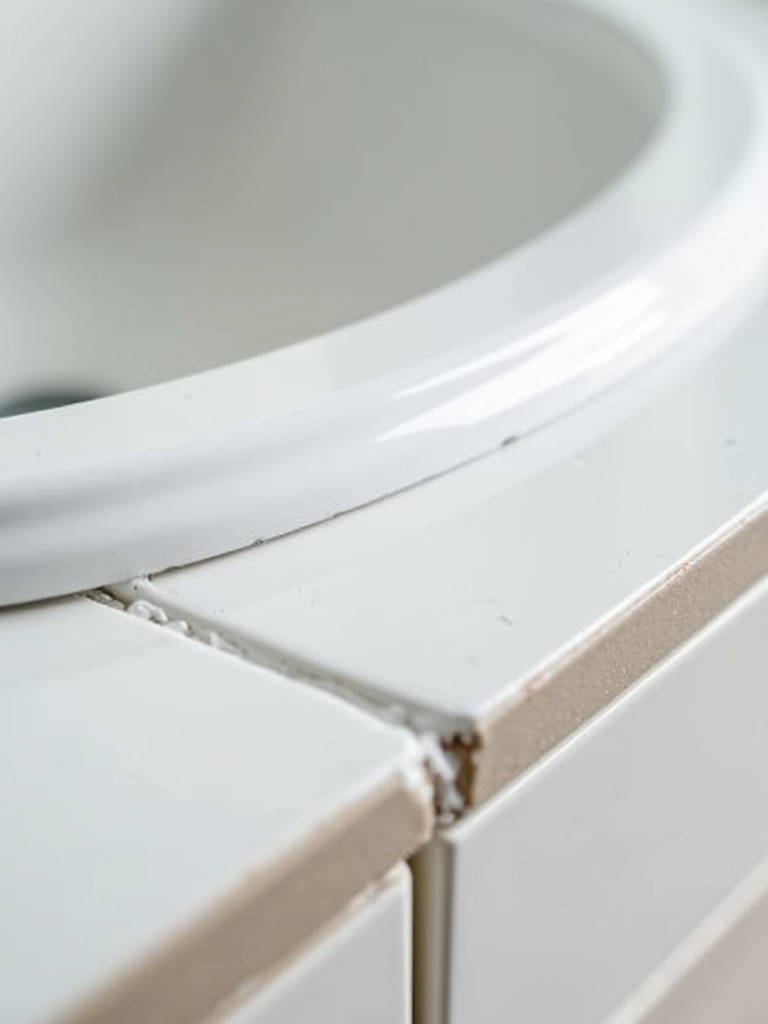
Success with caulking lies in both preparation and technique. Always invest in high-quality, mildew-resistant silicone caulk specifically designed for bathrooms – those few extra dollars will save you time and frustration in the long run. Before applying new caulk, remove every trace of the old material and clean thoroughly. Here’s my favorite pro tip: fill your tub with water before caulking. This ensures the tub is at its heaviest point, preventing future separation when it’s filled for use.
Now that we’ve addressed this essential detail, let’s brighten things up by talking about one of the most transformative elements in budget-friendly bathroom renovations – lighting.
Lighting can make or break a bathroom’s ambiance, and I’ve witnessed countless spaces transformed by this simple update. Take my recent client’s windowless powder room – it went from dreary to dazzling with just a change in fixtures. When planning bathroom renovations on a budget, new lighting offers an exceptional return on investment, improving both functionality and aesthetics in one go.
The key is understanding that bathroom lighting isn’t just functional – it’s an opportunity to create atmosphere. Look for fixtures with a color temperature around 2700K-3000K for a warm, flattering glow that’s still bright enough for tasks like applying makeup. Always turn off power at the breaker box, not just the switch, during installation. My favorite design trick? Layer your lighting by combining overhead lights with sconces or a backlit mirror, creating a more sophisticated and functional space.
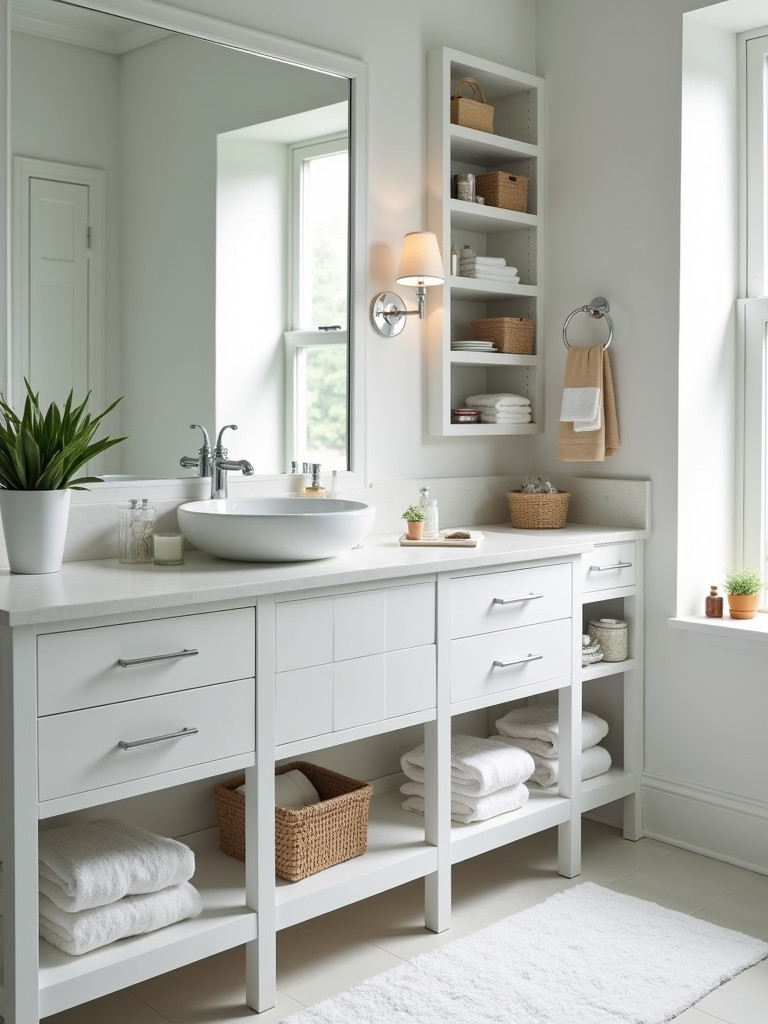
Ready to maximize your storage potential while adding style? Let’s explore how open shelving can transform your space while keeping your renovation budget intact.
When tackling bathroom renovations on a budget, sometimes removing elements can be just as impactful as adding them. During a recent small bathroom makeover, my client was convinced she needed more cabinets until I suggested open shelving instead. The result? A space that felt twice as large while providing even more accessible storage. It’s amazing how this simple change can transform both the functionality and visual appeal of your bathroom.
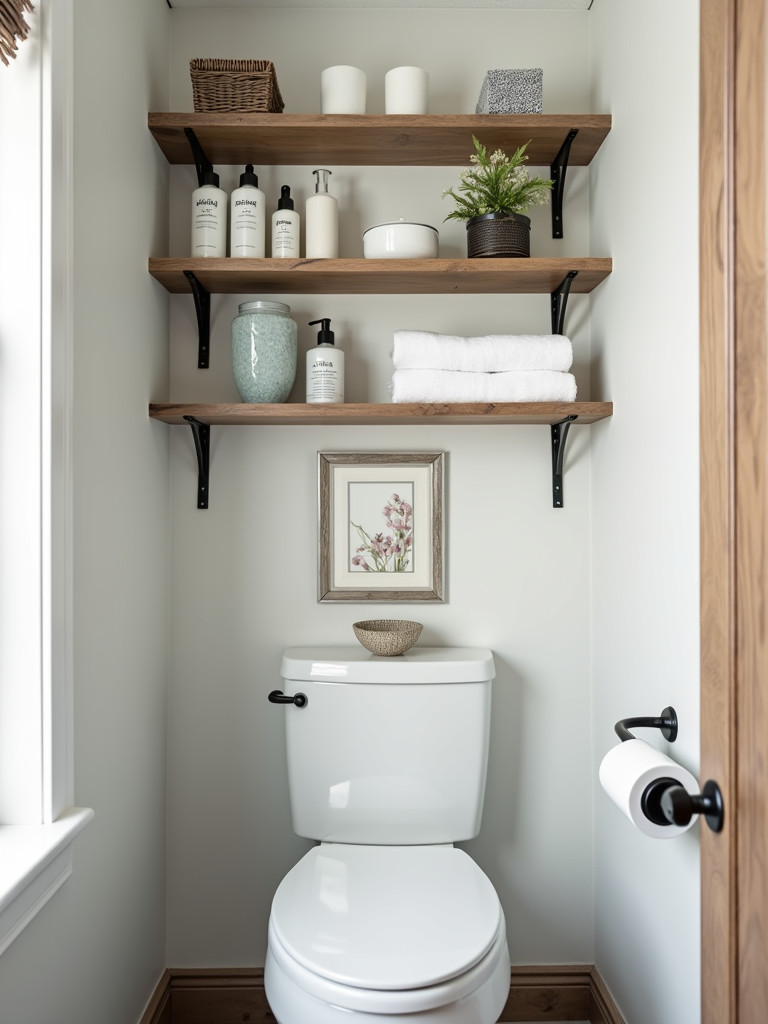
The secret to successful open shelving lies in both installation and styling. Always anchor into studs or use heavy-duty wall anchors rated for your intended weight load. When it comes to styling, think in terms of both function and aesthetics – use beautiful containers for everyday items like cotton balls and elegant boxes for tissues. Pro tip: maintain a cohesive color scheme in your storage containers and limit material varieties to keep the look sophisticated rather than cluttered.
Speaking of bringing life to your budget-friendly bathroom renovation, let’s explore how adding a touch of nature can transform your space into a serene retreat.
Nothing breathes life into a bathroom quite like carefully chosen greenery. During a recent bathroom renovation on a budget, my client was skeptical about adding plants to her windowless space – until we found the perfect low-light varieties. Now, her snake plant and pothos add vibrant color while naturally purifying the air, making her morning routine feel more like a spa experience than a daily chore.
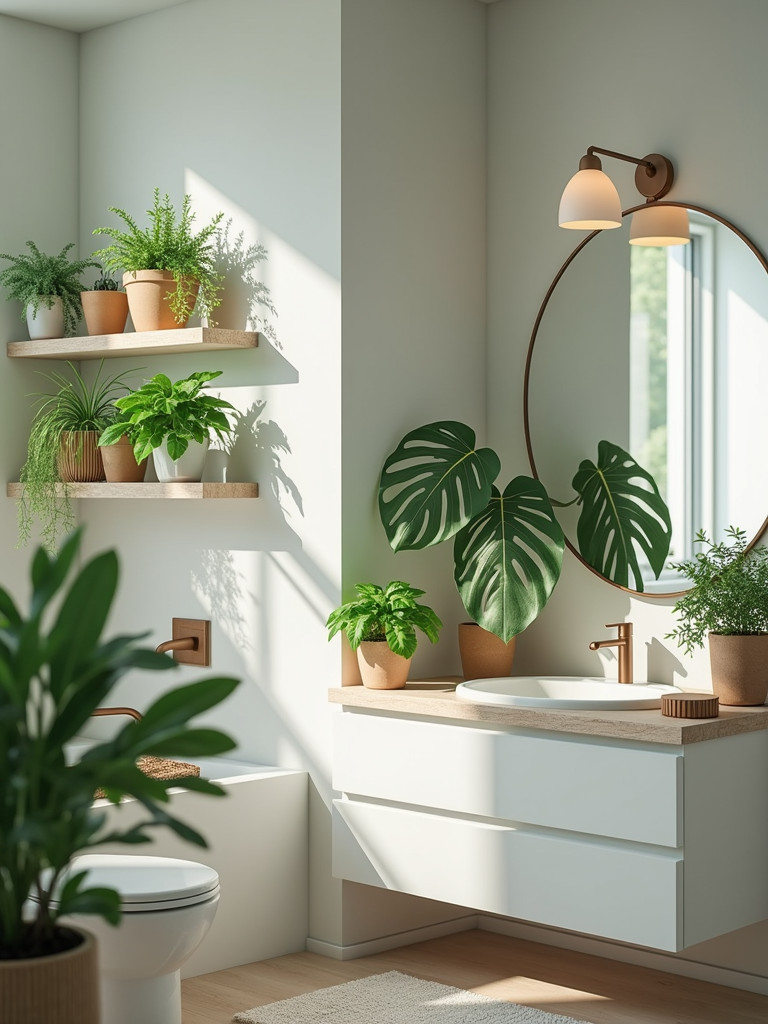
Success with bathroom plants requires thoughtful selection and placement. Focus on varieties that thrive in humid environments – ferns, peace lilies, and bamboo are excellent choices. For bathrooms with limited natural light, don’t worry – there are plenty of beautiful options that can flourish in these conditions. Start with one or two plants and gradually add more as you become comfortable with their care routines. My designer secret? Elevate your plants with decorative stands or wall-mounted planters to create visual interest at different heights.
Now that we’ve added some life to your space, let’s tackle one of the most important aspects of any bathroom renovation – smart organization.
It’s amazing how much larger and more luxurious a space can feel simply through thoughtful organization. I recently walked into a client’s generously sized bathroom that felt cramped and chaotic – not because of its dimensions, but due to clutter. When planning bathroom renovations on a budget, smart organization can transform your space without spending a fortune on new fixtures or features.
Start by removing everything from your bathroom and sorting items into three categories: daily use, occasional use, and rarely used items. Be ruthless – those half-empty bottles of shower gel from three years ago aren’t doing your space any favors. Invest in drawer dividers and clear containers to keep similar items together. One of my favorite organizing tricks? Use vertical space efficiently with drawer organizers or cabinet door racks. Remember, the goal isn’t just to hide everything away, but to create intuitive systems that make maintaining order effortless.
Now that we’ve created order from chaos, let’s focus on the finishing touches that can elevate your space – thoughtful accessories that won’t break your renovation budget.
Throughout my career, I’ve learned that accessories can make the difference between a bathroom that feels generic and one that feels personally curated. During a recent budget-friendly bathroom renovation, my client was amazed at how carefully selected accessories transformed her space without any major structural changes. The secret lies in choosing pieces that serve both functional and aesthetic purposes while maintaining a cohesive look.
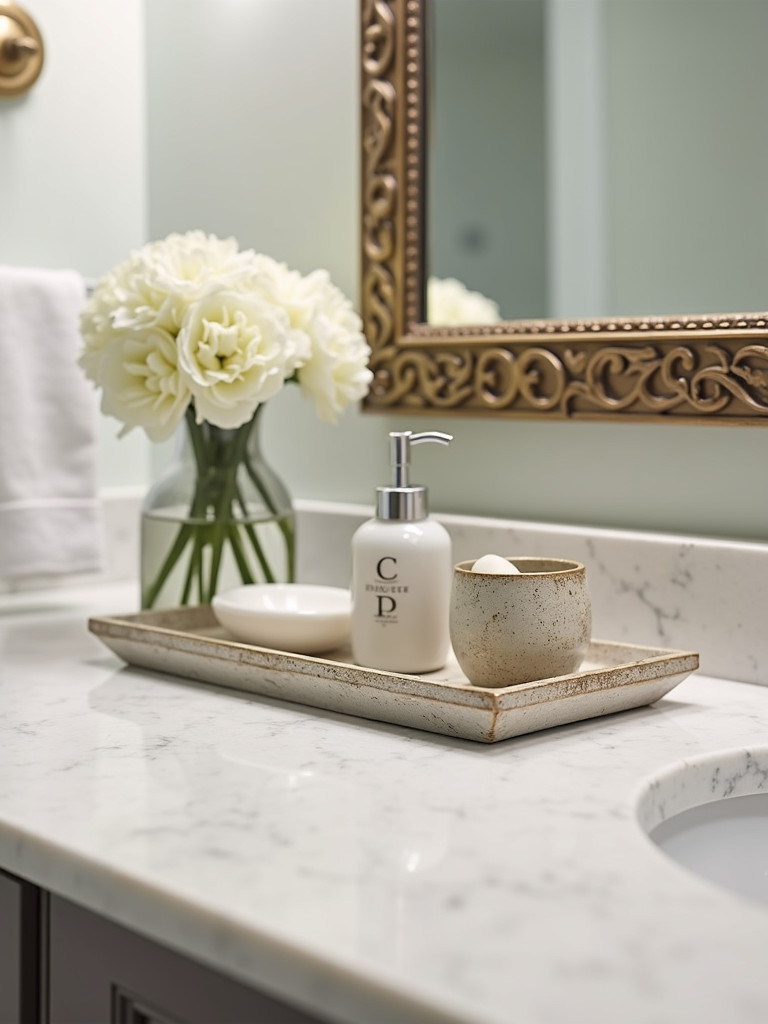
Think about creating a coordinated collection rather than selecting items individually. Start with the essentials – a soap dispenser, toothbrush holder, and tissue box cover – in finishes that complement your hardware and fixtures. Then, layer in personality through elements like a beautifully framed mirror or an elegant tray to corral counter items. Remember, in bathrooms, negative space can be just as important as the decorative elements you choose. Resist the urge to over-accessorize – sometimes less truly is more.
Speaking of personal touches, let’s explore a creative DIY project that can add unique style to your budget-conscious bathroom renovation.
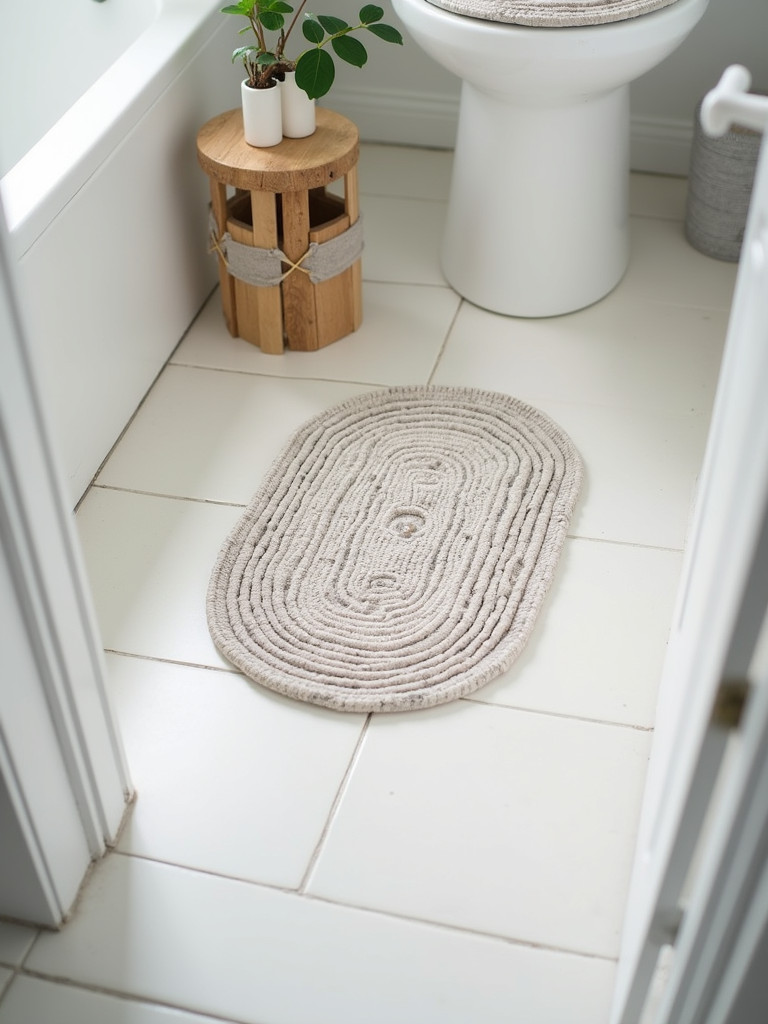
When exploring bathroom renovations on a budget, sometimes the most unique solutions come from getting creative. I recently worked with a client who couldn’t find the perfect bath mat to match her newly updated space. Together, we created a stunning custom mat that not only perfectly complemented her color scheme but also added a personal touch you simply can’t buy in stores.
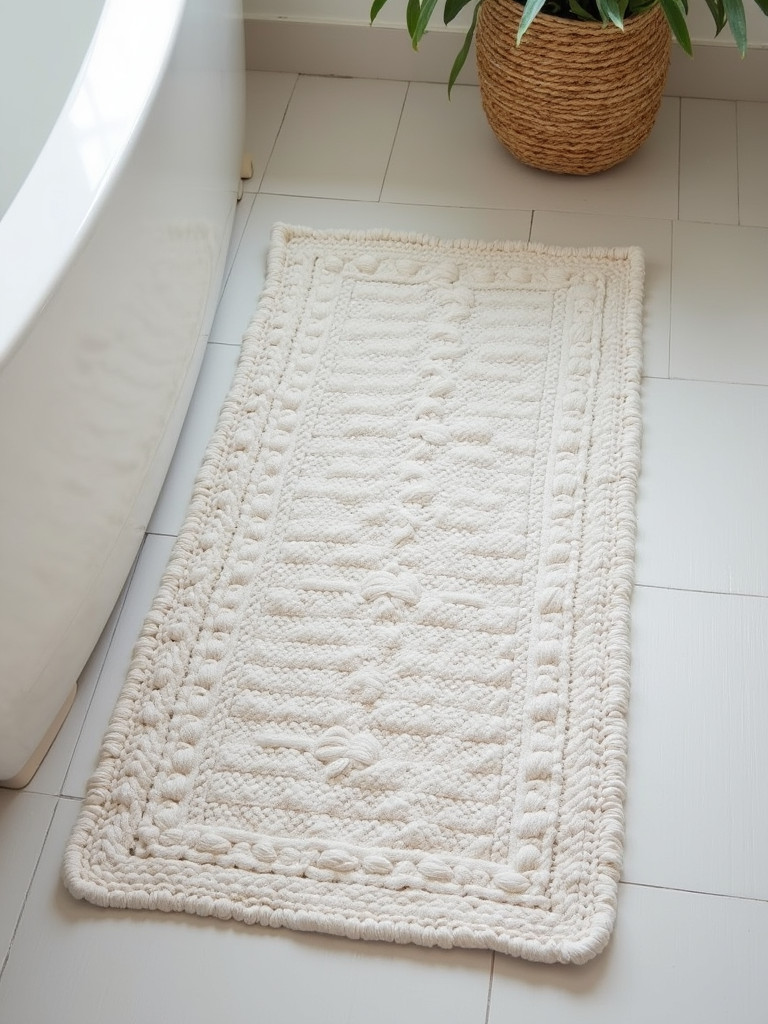
The beauty of DIY bath mats lies in their versatility and customization options. For beginners, I often suggest transforming old towels into a plush mat by cutting them into strips and weaving them together. More adventurous DIYers might enjoy creating a wooden bath mat using cedar or teak for a spa-like feel. Whatever method you choose, don’t forget to incorporate non-slip backing for safety. The result? A one-of-a-kind piece that perfectly fits your space and style.
Ready to tackle another transformative project in your budget-friendly bathroom renovation? Let’s explore how refinishing your bathtub can give you dramatic results without the dramatic price tag.
Sometimes the most impactful bathroom renovations on a budget come from reimagining what you already have. Take my recent client’s bathtub – it was dated and yellowed, but structurally sound. Instead of spending thousands on a replacement, we opted for refinishing. The transformation was remarkable, and the tub became a gleaming centerpiece that looked brand new for a fraction of the cost.
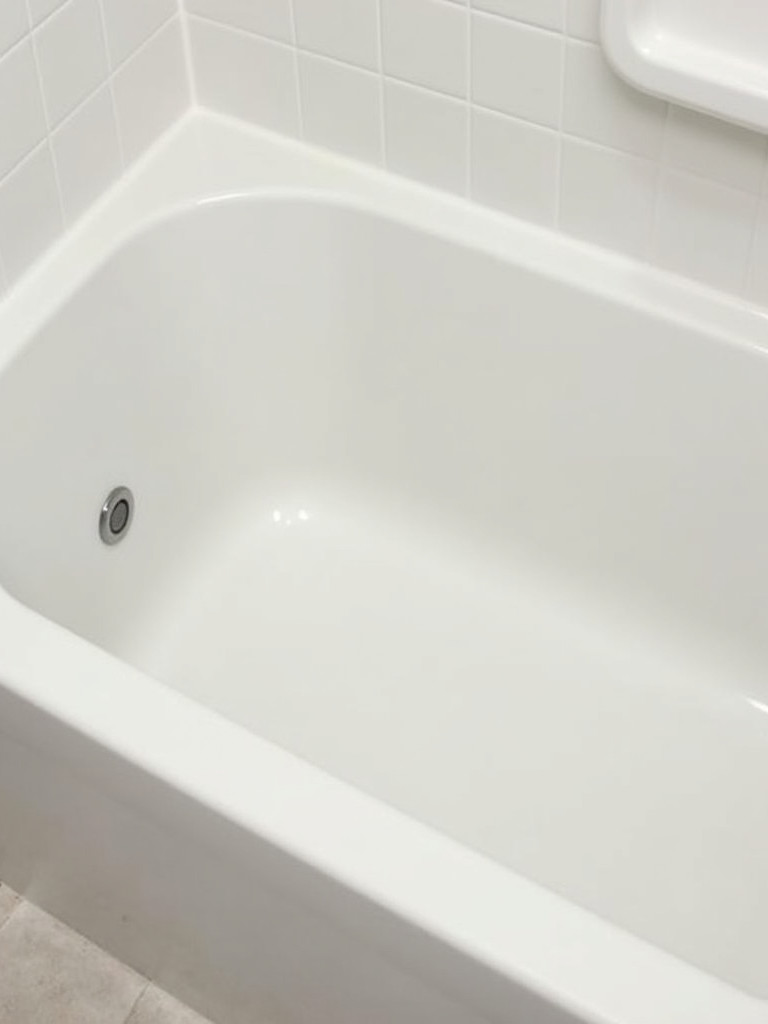
Before diving into this project, carefully assess your tub’s condition. Minor scratches and discoloration are perfect candidates for refinishing, while significant structural damage might require replacement. If you’re tackling this as a DIY project, proper ventilation and surface preparation are absolutely crucial. My pro tip? Take time to repair any chips or scratches before refinishing, and resist the urge to rush the curing process – patience here truly pays off in the final result.
Now, let’s talk about another way to update your bathroom’s look with minimal investment – transforming your cabinet hardware.
When working on bathroom renovations on a budget, I often tell clients that hardware is like jewelry for their cabinets – it can completely transform the look without breaking the bank. Last month, a client was stunned by how switching out her dated brass knobs for sleek matte black ones gave her entire vanity a high-end, custom look. The best part? The entire update cost less than a fancy dinner out.
Success with hardware updates lies in both selection and installation. Before falling in love with any particular style, measure your existing knobs and bring one to the store for comparison. While matching finishes create a cohesive look, don’t be afraid to experiment – those unique vintage knobs you found might become your favorite design element. Pro tip: If your new knobs don’t perfectly cover existing holes, decorative backplates can create a polished look without any extra work.
Looking for another quick way to transform your space? Let’s explore how peel and stick tiles can give you the look of a major renovation without the major expense.
Some of my favorite budget-friendly bathroom renovations have involved clever use of peel and stick tiles. Recently, I helped a client transform her rental bathroom with these innovative materials – the result was so impressive that her landlord asked for the product information! Today’s peel and stick tiles have come a long way, offering incredibly realistic looks that can mimic everything from classic subway tiles to intricate Moroccan patterns.

The key to success lies in proper preparation and application. Start with thoroughly cleaned and degreased surfaces – this step is crucial for proper adhesion. Begin installation from the center and work your way out to ensure a balanced look. My designer secret? Use a sharp utility knife for clean cuts around outlets and edges, and take time to plan your layout before committing – I always recommend doing a dry run first using a level to ensure straight lines.
Want to add personality to your space without major construction? Let’s explore how a thoughtfully curated gallery wall can transform your bathroom into a personalized retreat.
Don’t let limited funds restrict your creativity when planning bathroom renovations on a budget. During a recent project, my client worried her small bathroom felt sterile and impersonal until we created a carefully curated gallery wall. The transformation was remarkable – suddenly, her space had personality, depth, and became a natural conversation starter. With proper preparation and material selection, humidity doesn’t have to limit your artistic expression.
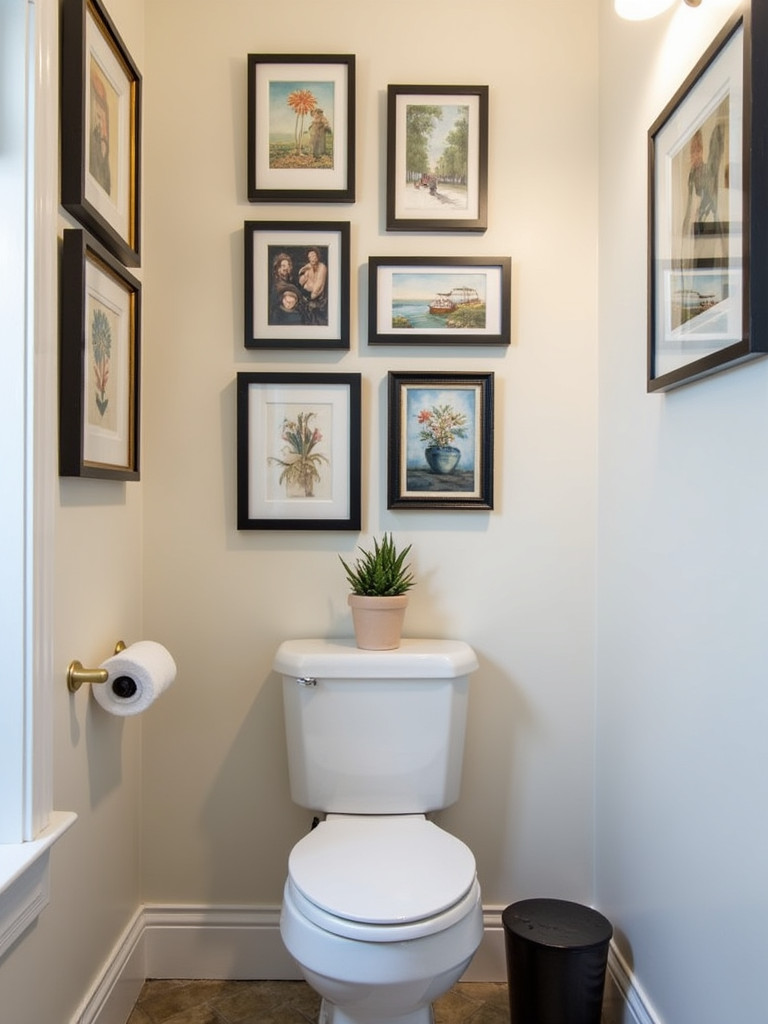
Success with bathroom gallery walls starts with smart planning and proper protection. Choose frames that can withstand moisture – painted wood or metal frames typically perform better than raw wood. For artwork, consider moisture-resistant prints or have special pieces professionally sealed. My favorite design trick? Lay out your entire arrangement on the floor first, snap a photo, and use it as a reference while hanging. This simple step helps avoid unnecessary wall holes and ensures a balanced composition.
Now, let’s explore how your shower curtain can become a stunning focal point in your budget-conscious bathroom makeover.
When tackling bathroom renovations on a budget, never underestimate the power of a well-chosen shower curtain. I recently helped a client transform her basic bathroom into a designer-looking space simply by selecting the perfect shower curtain. Think of it as a piece of art – it’s often the largest single design element in a bathroom and can set the tone for your entire color scheme and design direction.
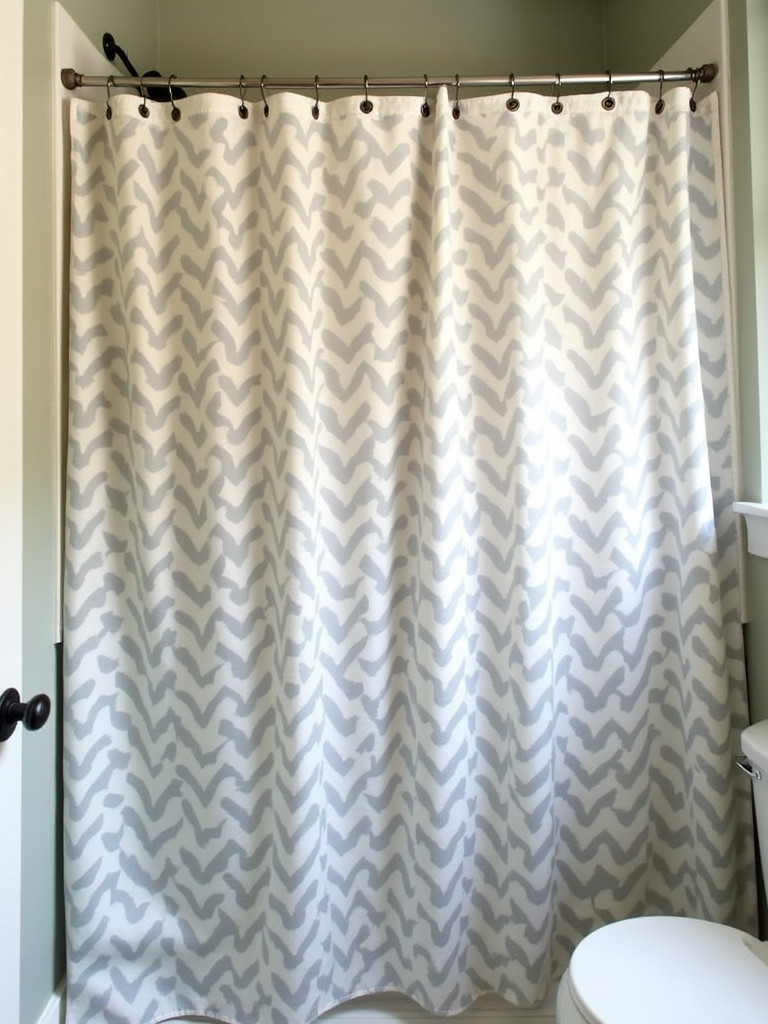
The secret lies in choosing both style and functionality. I always recommend pairing a fabric curtain with a separate waterproof liner – this allows you to wash the decorative curtain regularly while maintaining its appearance. Height matters too; hang your curtain rod close to the ceiling and select an extra-long curtain to create the illusion of higher ceilings. Want to really elevate the look? Try my favorite designer trick: use double shower curtains to create a more luxurious, hotel-like atmosphere, and don’t forget to upgrade your basic shower rings to decorative ones in a coordinating finish.
Let’s move on to a small but mighty update that can add both style and function to your space.
Sometimes the smallest details make the biggest impact in bathroom renovations on a budget. During a recent powder room update, my client was amazed at how switching from a basic plastic holder to a sleek brushed nickel version instantly elevated the entire space. It’s these thoughtful touches that can make a budget renovation look anything but budget-conscious.
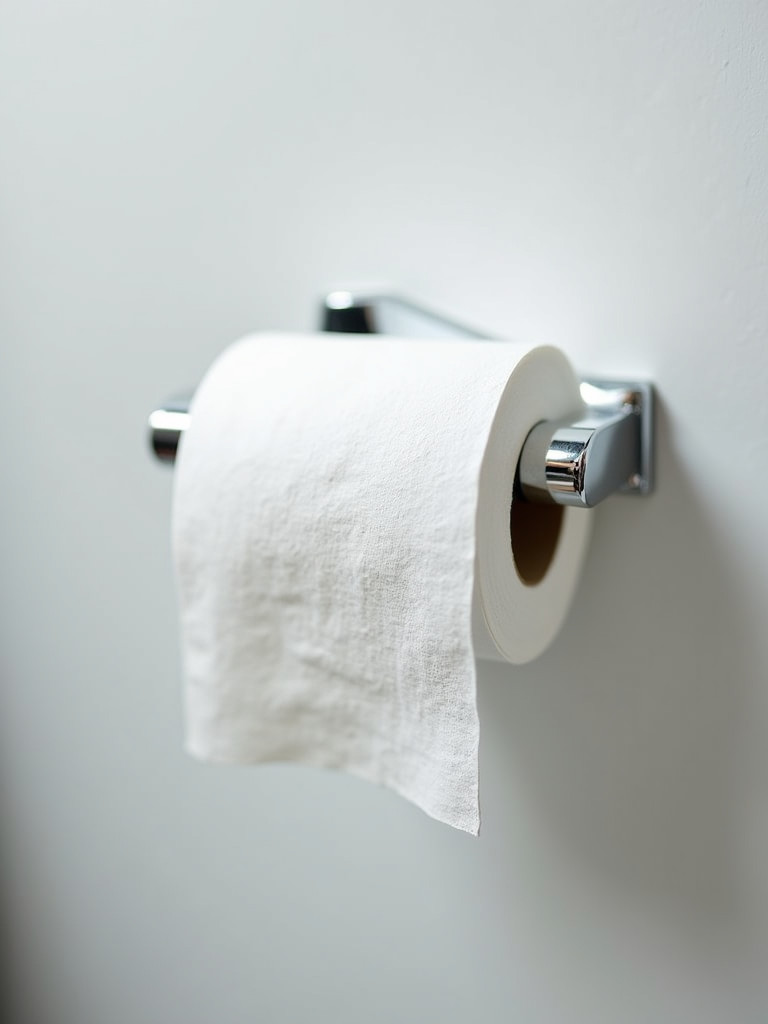
When selecting a new holder, consider both style and functionality. I always recommend models that make paper replacement effortless – those spring-loaded versions might look nice, but they can frustrate family members and guests alike. For installation, proper anchoring is crucial. Mount your holder approximately 26 inches above the floor for comfortable access, and always use appropriate wall anchors if you can’t find a stud. Here’s a designer secret: if your new holder doesn’t cover old mounting holes, a slightly larger mounting plate can hide any evidence of the previous installation.
Ready to tackle another small but impactful update? Let’s explore how a stylish soap dispenser can eliminate counter clutter and add a touch of sophistication.
In my experience with bathroom renovations on a budget, it’s often the smallest changes that can have an outsized impact on both functionality and style. Take the humble soap dispenser – I recently helped a client replace her collection of mismatched soap bottles with a single, elegant dispenser, and the transformation of her vanity into a spa-like vignette was remarkable.
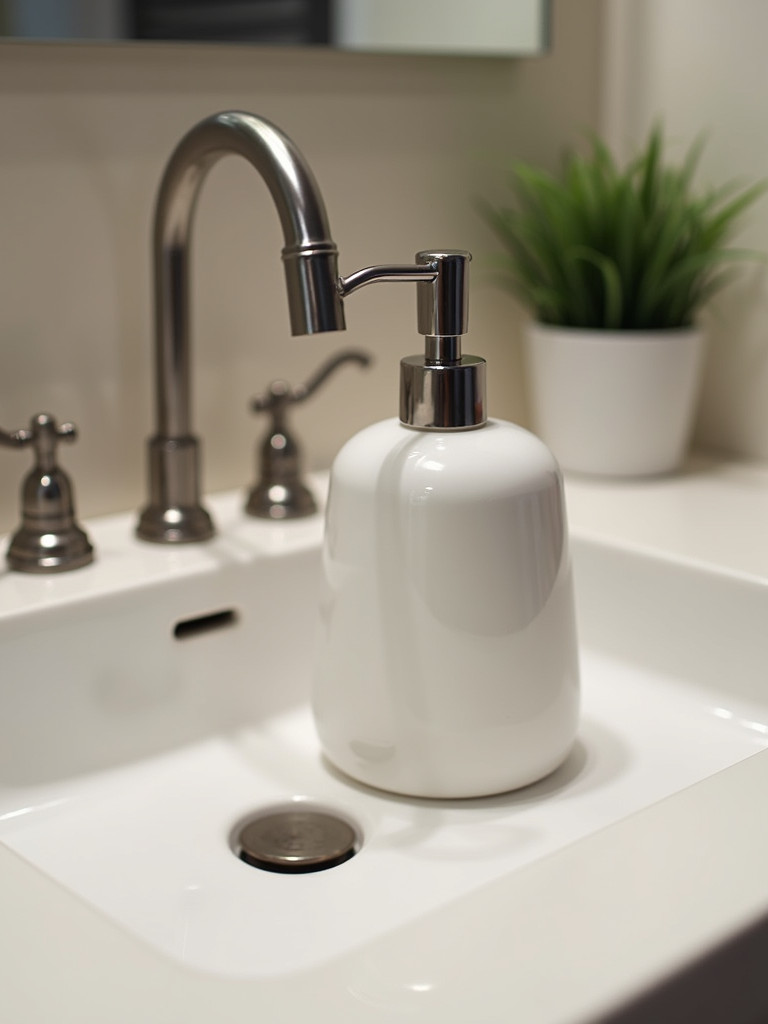
When selecting a dispenser, consider both material and design longevity. Glass or ceramic options offer timeless appeal and durability, while their weight helps prevent tipping. For families with young children, consider a touchless dispenser – they’ve come a long way in terms of style and can help keep surfaces cleaner. Want to create a truly coordinated look? Use a matching set of dispensers for hand soap, lotion, and hand sanitizer. The result is a cohesive, organized appearance that elevates your entire space.
Now, let’s explore one of my favorite solutions for combining style and function – strategic use of baskets.
When it comes to bathroom renovations on a budget, baskets are the unsung heroes of stylish storage solutions. I recently helped a client transform her cluttered bathroom by introducing a system of coordinated baskets, and the result was nothing short of magical. Not only did her space look more organized, but it functioned better for her entire family. The best part? This solution cost far less than installing new cabinets or building custom storage.
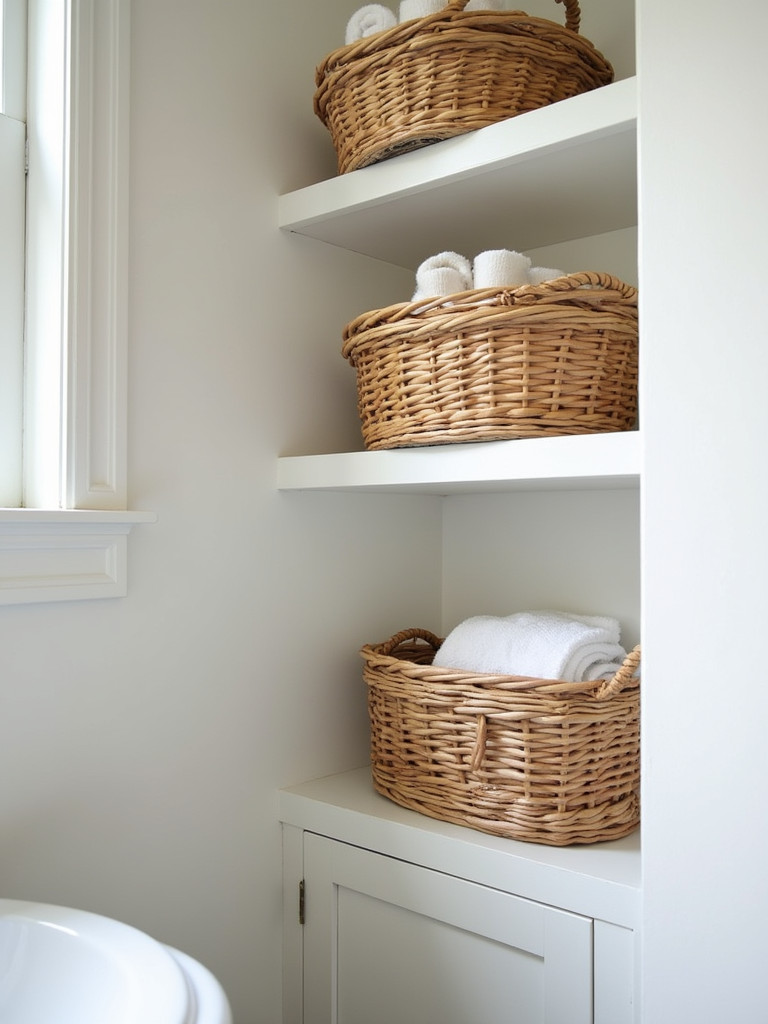
Success with basket organization lies in both selection and implementation. Choose baskets in coordinating materials and sizes to create a cohesive look, even if they’re not identical. Consider your specific storage needs – larger baskets work beautifully for towels and extra toilet paper, while smaller ones keep toiletries tidy and accessible. My favorite designer trick? Use lined baskets in bathrooms to protect items from moisture while maintaining a beautiful appearance. Don’t forget to label baskets if they’re storing items for different family members – elegant tags or small plaques can maintain the aesthetic while improving functionality.
Speaking of practical yet stylish updates, let’s explore how new towel bars can enhance both the function and aesthetics of your space.
Among the many bathroom renovations on a budget I’ve overseen, towel bar updates consistently offer one of the best returns on investment. Recently, I worked with a client whose family bathroom went from chaotic to organized simply by implementing a strategic towel bar system. Multiple bars at different heights, combined with a few well-placed hooks, created an organized system that the whole family actually maintained.
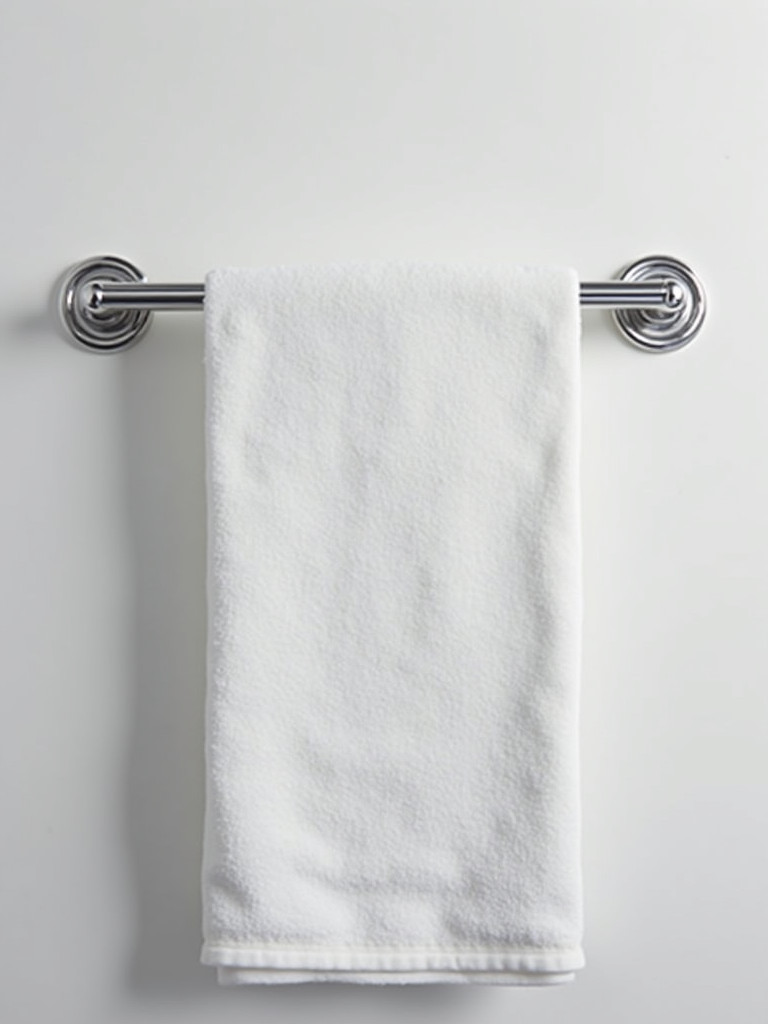
The key to success lies in both placement and selection. Choose finishes that complement your existing hardware, and consider installing multiple bars at different heights to accommodate various towel sizes and family members. Installation height is crucial – I typically recommend mounting towel bars about 48 inches from the floor for adult bathrooms, and lower for children’s spaces. Want to maximize your space? Try my favorite trick: install a double towel bar to provide twice the hanging space without taking up additional wall real estate.
Ready for another quick update that can make a significant impact? Let’s talk about how a new toilet seat can transform both the look and comfort of your bathroom.
In my years of helping clients with bathroom renovations on a budget, I’ve found that the simplest updates often yield surprising results. Take the humble toilet seat – during a recent renovation, my client was skeptical about this basic update until she saw how a sleek, soft-close seat transformed her dated toilet into something that looked remarkably more expensive. Sometimes, luxury lies in the details we interact with every day.
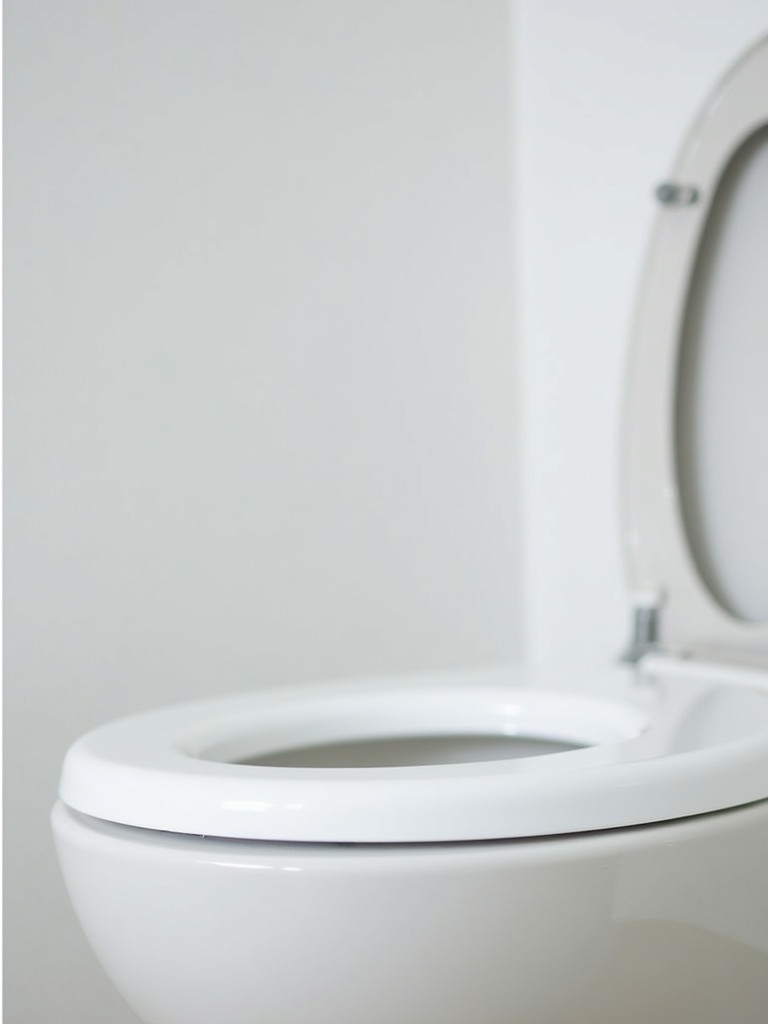
When selecting a new seat, consider both style and functionality. I often recommend soft-close mechanisms – they prevent slamming and create a more luxurious feel that belies their modest cost. Always measure your toilet bowl shape (round or elongated) before purchasing, and consider features like quick-release hinges for easier cleaning. Pro tip: look for seats with anti-microbial properties and built-in nightlights for added convenience. While installation is typically straightforward, remember to tighten the bolts enough to prevent shifting while still allowing for occasional adjustment.
Let’s add some comfort and style to your floor with our next budget-friendly update.
The right rug can transform a cold, sterile bathroom into a warm, inviting space without straining your renovation budget. I recently helped a client select a vintage-style rug for her modern bathroom – the combination of old and new created an unexpectedly gorgeous effect that made the space feel both personal and polished. It’s amazing how this simple addition can anchor your design and add a layer of comfort to your daily routine.
Material selection is crucial for bathroom rugs. Always choose washable, quick-drying materials specifically designed for bathroom use. Size and placement matter too – ensure your rug doesn’t obstruct door movement or create tripping hazards. One of my favorite design tricks is to layer a smaller, plush bath mat over a larger, flatter rug for both function and style. Never skip the non-slip pad underneath – it’s an inexpensive insurance policy against accidents.
For our final transformation in these bathroom renovations on a budget, let’s focus on creating the perfect ambiance through lighting.
Lighting can make or break a bathroom’s ambiance, and I’ve seen countless spaces transformed by thoughtful lighting updates. One of my most memorable projects involved helping a client create a spa-like atmosphere in her windowless bathroom through strategic lighting choices. By combining different types of lights – ambient, task, and accent – we created a space that felt bright and welcoming at any time of day, all while staying within her modest budget.
The key to successful bathroom lighting lies in layers. Start with good overhead lighting for general illumination, then add sconces or vanity lights for task lighting around the mirror. Installing a dimmer switch is an inexpensive way to adjust the mood – bright for morning routines, soft for relaxing evening baths. One of my favorite tips: use LED bulbs with a color temperature around 2700K-3000K, which provides flattering light that’s still bright enough for tasks like applying makeup. Don’t forget about proper placement – wall sconces mounted at eye level provide the most flattering light and minimize shadows.
After guiding countless clients through bathroom renovations on a budget, I’ve learned that creating a beautiful, functional space doesn’t require a complete demolition or a massive investment. Each of these 24 updates can stand alone as a meaningful improvement or be combined for a more dramatic transformation. The key is to approach each change with intention, focusing on updates that will make the biggest impact on your daily routine while respecting your budget.
Remember, successful bathroom renovations aren’t about trying to implement every possible change at once. Start with the updates that will make the most difference in your daily life, then layer in additional improvements as your time and budget allow. Whether you’re tackling a quick weekend project or planning a series of updates over time, these budget-friendly solutions can help you create a bathroom that feels both personal and polished.
Most importantly, don’t be afraid to make these ideas your own. The most successful renovations are those that reflect both your practical needs and personal style. With some creativity, careful planning, and attention to detail, you can transform your bathroom into a space you’ll love – without breaking the bank.