Physical Address
304 North Cardinal St.
Dorchester Center, MA 02124
Physical Address
304 North Cardinal St.
Dorchester Center, MA 02124

Transform your kitchen with expert renovation design tips. From layouts to materials, discover 20 proven strategies for creating your dream culinary space.
Of all the rooms in a period home, the kitchen is where the past and present collide most forcefully. It’s the working heart of the house, a place steeped in the daily rituals of generations past. But let’s be honest, you want a dishwasher that actually works and a refrigerator that doesn’t sound like it’s preparing for takeoff. I’ve spent the last twelve years helping homeowners navigate this very challenge: how to create a kitchen that serves a modern family without erasing the soul of a historic home.
It’s a delicate dance, isn’t it? You feel a sense of stewardship, a duty to preserve the wide-plank floors or the quirky built-in pantry. Yet, you also need a space that functions for your life, right now. It can feel like an overwhelming series of choices, where one wrong move could feel like a betrayal of the home’s character or a waste of a significant investment.
So, let’s walk through this together. This isn’t just a list of tips; it’s a strategic framework built from years of seeing what works—and what really, really doesn’t—in homes with history. We’ll get you to a kitchen that feels both authentic and perfectly, beautifully yours.
Before you even think about knocking down a wall or drooling over soapstone countertops, you need to have a brutally honest conversation with yourself. Why are you really doing this? The answer dictates everything that follows. Enthusiasm is great, but without a clear mission, “scope creep” can turn a planned project into a runaway train of expenses.
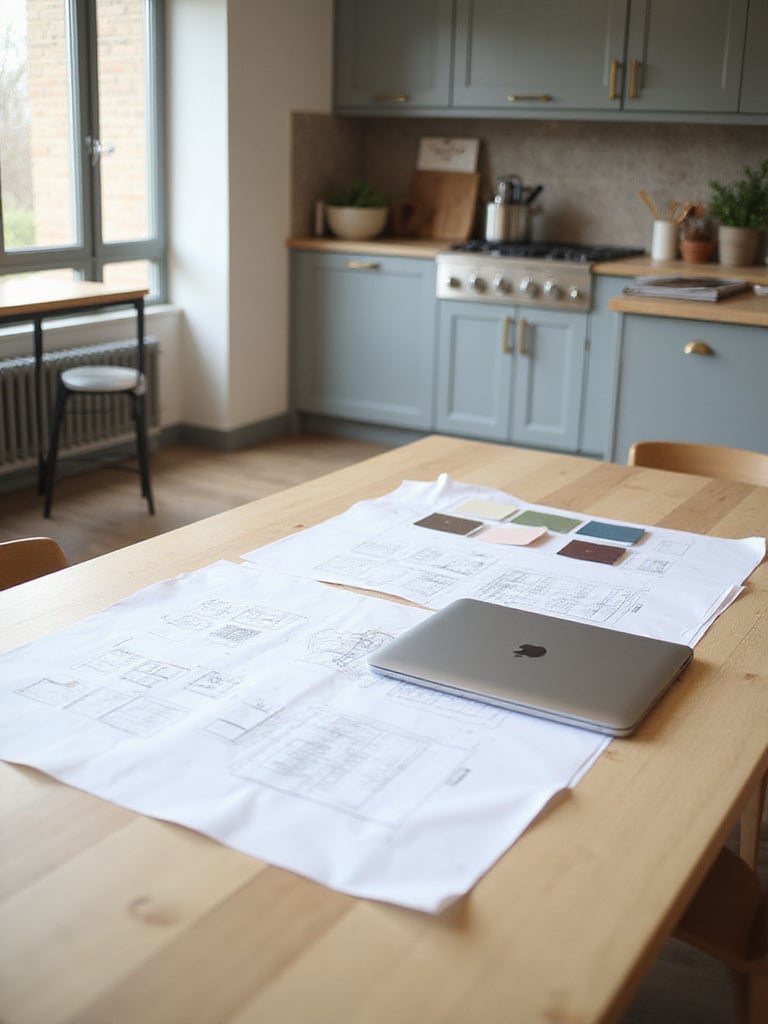
I once worked with a family in a 1920s Colonial. They initially said they wanted a “modern kitchen,” but after we sat down, their real ‘why’ emerged. It wasn’t about a sleek, minimalist look. Their true goals were: 1. Create a space where their kids could do homework without being underfoot during meal prep, 2. Preserve the stunning original butler’s pantry, and 3. Improve the workflow so two people could cook at once. Seeing it this way focused their budget on a smart island design and careful restoration, not on flashy, out-of-character finishes. A well-defined plan is your compass.
Defining your purpose isn’t just about spreadsheets; it’s about ensuring the final kitchen actually solves the problems that drove you to renovate in the first place.
Now, for the fun part. Before you change anything, you need to understand your current kitchen’s story. How does it fail you? Where are the daily annoyances? Spend a week as a dedicated observer of your own habits. This isn’t about how you think you should use your kitchen; it’s about how you actually use it.
Put a piece of masking tape on the floor every time you have to backtrack. Note where the clutter piles up. I had a client who was convinced they needed a bigger kitchen. But after we mapped their movements, we realized the problem wasn’t size—it was that the refrigerator was on the opposite side of the room from the main prep counter. Just relocating the fridge cut their meal-prep “mileage” by a third and made the whole space feel more intuitive. They didn’t need more square footage; they needed better choreography.
This step gives you a priceless, data-driven foundation for your new layout, ensuring the changes you make will have a real impact on your daily life.
Once you know your daily frustrations, you can start exploring layouts. But in a period home, you aren’t working with a blank canvas. You have constraints: load-bearing walls, existing plumbing stacks, beautiful old windows you’d never dream of moving. The trick is to see these not as limitations, but as creative starting points.

Galley kitchens are incredibly efficient in narrow spaces. L-shapes offer a great workflow and open up to adjacent rooms. But here’s what’s interesting—sometimes a small change can completely alter the feel. A client in a 1940s Cape Cod had a cramped, claustrophobic galley. We couldn’t expand, but by removing a non-load-bearing wall segment and adding a small peninsula, we achieved two things: we created sight-lines into the dining room, and we nearly doubled the usable counter space. The kitchen felt transformed, becoming the heart of the home instead of an isolated corridor.
Choosing a layout is about finding the harmony between your home’s existing architecture and the way your family needs to live within it.
This principle isn’t some new-fangled design trend; it’s been the bedrock of good kitchen design since the 1940s. The concept is simple: the path between your refrigerator (storage), your sink (cleaning/prep), and your stove (cooking) should form a functional triangle. Why? Because it mirrors the natural flow of making a meal: take food out, wash it, cook it.
“What really gets me is when I see a gorgeous, expensive renovation where the homeowner has to walk a marathon just to get from the fridge to the sink. Form must follow function, especially in the most functional room of the house.”
Now, don’t get obsessed with creating a perfect equilateral triangle. Think of it as a concept, not a rigid geometric rule. The total distance between the three points should ideally be between 12 and 26 feet. Any less and you’re cramped; any more and you’re running a race. The real goal is to keep this path clear of obstructions. The most common mistake? Placing a big, beautiful island right in the middle of it, forcing you to constantly walk around it.
Getting this basic flow right is the invisible foundation of a kitchen that just feels right to work in.
This is the stage where you get to dream, but with purpose. Before you create that Pinterest board, take a walk through your own house. Look at the details—the curve of the staircase newel post, the profile of the crown molding, the way the original window casings are constructed. This is your home’s native design language. Your job is to find kitchen inspiration that speaks it fluently.

I had clients with a stunning 1960s ranch who were initially drawn to the popular “modern farmhouse” look. To be fair, it’s a lovely aesthetic. But it would have felt completely alien in their house. After we spent time looking at original mid-century design, they had an “aha moment.” They realized they could get a modern, functional kitchen that actually celebrated their home’s roots. They ended up choosing flat-panel walnut cabinetry, sleek hardware, and a subtle Heath Ceramics tile backsplash. The result was breathtaking because it felt like a natural, authentic evolution of the house, not a trendy costume.
This deep dive ensures your renovation will feel like it truly belongs, destined to age as gracefully as the rest of your home.
As a hands-on homeowner, it’s tempting to want to design everything yourself. And you should be deeply involved! But there are moments when bringing in a professional—like a Certified Kitchen Designer (CKD) or an architect who specializes in old homes—is the smartest investment you can make. They aren’t there to impose their will; they’re there to solve problems you might not even see yet.

This is especially true with structural changes, complex code issues, or simply maximizing a tricky space. A family I worked with was trying to DIY the design for their galley kitchen. They were stuck, trying to cram standard-sized cabinets into a space with wonky, out-of-plumb walls. A designer pointed out that by going with semi-custom cabinets, they could go all the way to their 9-foot ceiling and use a narrow pull-out pantry in a 9-inch gap they’d written off as useless space. That one suggestion increased their storage by over 30% in the same footprint.
Professionals bring a toolkit of solutions learned over hundreds of projects. Their expertise can save you from costly mistakes and unlock potential you didn’t know your kitchen had.
Countertops are a huge part of your kitchen’s visual and functional landscape. This is not the place to chase fleeting trends. You want a material that can stand up to decades of use and that complements your home’s character.

Natural stones like soapstone or honed marble are beautiful choices for period homes; they develop a patina over time that feels earned and authentic. I particularly love soapstone in Victorian or Colonial kitchens; its soft, dark surface just feels right. But you have to be okay with its character—it scratches and dings, but those marks become part of its story. If you’re someone who needs perfection, engineered quartz is a fantastic, low-maintenance alternative. There are now quartz designs that mimic the subtle veining of natural stone beautifully.
Your countertops are a long-term commitment. Choose a partner that will age gracefully alongside your historic home.
Cabinets are the single biggest visual element in your kitchen. They’re not just boxes for storage; they are the architecture of the room. The goal is to design cabinetry that feels like it could have been original to the house, while still providing all the modern storage you need.

Start with an inventory. No, really. Take everything out of your current cabinets and figure out what you actually need to store. This will inform your design. Maybe you need deep drawers for pots and pans instead of awkward lower cabinets. I designed a kitchen for a passionate baker in a bungalow, and we incorporated vertical dividers for her cookie sheets and custom pull-outs for her stand mixer and food processor. It made her life so much easier. The style of the cabinet doors is also critical. A simple Shaker-style door is a workhorse that fits in almost any home from the 19th century onward, while a more detailed raised-panel door might feel more at home in a formal Georgian or Victorian house.
Well-designed cabinetry will feel less like an installation and more like a beautiful, functional piece of furniture that has always belonged in the room.
If cabinetry is the architecture of your kitchen, lighting is its soul. Good lighting can make a small kitchen feel spacious and a large kitchen feel cozy. A single, glaring overhead light—so common in older kitchens—is a recipe for a dreary, inefficient space. You need to think in layers.

I tell my clients to plan for three types of light:
A couple I worked with in a 1970s split-level home used this perfectly. They had dimmable recessed lights for general lighting, sleek LED under-cabinet strips for chopping veggies, and a fantastic, period-appropriate sputnik chandelier over their peninsula that served as a beautiful focal point. This gave them ultimate control, from bright and functional for cooking to soft and atmospheric for entertaining.
A well-lit kitchen is a chameleon, able to transform from a bright workshop to an intimate gathering space at the touch of a switch.
Kitchen flooring has one of the toughest jobs in the house. It has to withstand dropped pots, spills, constant foot traffic, and frequent cleaning—all while looking good and feeling comfortable underfoot.

For historic homes, wood is often the most authentic choice. If you are lucky enough to find original wood floors hiding under layers of linoleum, refinishing them can be a spectacular reward. If you’re installing new, engineered hardwood is often a more stable choice for kitchens than solid hardwood, as it handles moisture fluctuations better. But don’t discount other materials. Marmoleum (a natural linoleum) comes in fantastic colors and patterns and is perfectly appropriate for homes from the 1920s through the 1960s. For a Tudor or Spanish Colonial, terra-cotta or patterned cement tiles can be stunning.
The right floor is a quiet, hardworking foundation that grounds your entire kitchen design in both beauty and practicality.
This is where the magic—and often, the most debate—happens. You want a powerful, modern dishwasher and a high-performance induction cooktop, but you’re living in a home built a century ago. How do you make them play nicely together?

The key is integration, not dominance. A giant, gleaming stainless-steel refrigerator can suck all the historic character out of a room. This is where panel-ready appliances are your absolute best friend. By fitting your dishwasher and refrigerator with custom cabinet fronts, they simply disappear, allowing the cabinetry to be the star. For the range, which is harder to hide, consider brands that offer classic colors—a beautiful cream or slate blue Ilve or Lacanche range can become a stunning, period-appropriate focal point. And for the microwave? Get it off the counter. Hide it in a pantry or install a microwave drawer in your island.
It’s a balancing act, for sure. But when done right, you get the best of both worlds: a kitchen with 21st-century performance and 19th-century soul.
I can’t stress this enough: proper ventilation is not just about getting rid of the smell of burnt fish. It’s about protecting your health and your investment. An effective range hood pulls grease, steam, and airborne cooking particles out of your home. Without it, a sticky, greasy film builds up on your new cabinets, walls, and ceiling, and moisture can lead to mold and mildew.

Recirculating fans (the kind that don’t vent to the outside) are largely useless. They just filter some of the grease and blow the steam and odors right back into your room. You need a hood that is ducted to the exterior. The power of a hood is measured in CFM (cubic feet per minute). Your appliance supplier can help you calculate the CFM you need based on your range’s output. And here’s an insider tip: for a quieter system, look for a model with an external or in-line blower, which places the noisy motor in your attic or outside the house instead of right above your head.
Think of your ventilation system as the lungs of your kitchen—out of sight, but absolutely essential for a healthy, comfortable home.
The backsplash is a fantastic opportunity to inject personality and tie all your design elements together. It has a practical job—protecting the wall behind your sink and stove from splashes and splatter—but its aesthetic role is just as important.

For period homes, you can’t go wrong with classic subway tile. But “classic” doesn’t have to mean “boring.” A handmade tile, like those from Fireclay Tile or Heath Ceramics, has subtle variations in color and texture that give it incredible depth and character. The way you lay the tile (a traditional brick pattern, a herringbone, a vertical stack) can also dramatically change the look. Beyond tile, beadboard is a charming, cost-effective option for a farmhouse or cottage-style kitchen, while a solid slab of the same stone as your countertop creates a seamless, dramatic look.
Your backsplash is your chance to add that final, perfect touch that makes the kitchen uniquely yours.
Cabinet pulls, knobs, and faucets are the finishing touches that can elevate your entire kitchen. Think of them as the jewelry of the room. This is a place where you can feel the quality. The weight of a solid brass knob or the smooth operation of a well-made faucet sends a daily signal of craftsmanship and care.

Consistency is key here. Try to stick to one or two metal finishes to create a cohesive look. In a historic home, unlacquered brass is a beautiful choice because it patinates over time, developing a warm, lived-in glow. Polished nickel has a warmer, more traditional feel than chrome, and matte black can provide a handsome, modern counterpoint in a more transitional design. Look for styles that echo your home’s era—bin pulls for a farmhouse, glass knobs for a 1930s home, or simple brass latches for a Colonial kitchen.
These small details have a huge impact, providing the final layer of polish and personality that completes your vision.
A beautiful kitchen that doesn’t function is just a pretty room. The secret to a truly great kitchen is thoughtful, accessible storage. The goal is to banish countertop clutter and make it easy to find what you need when you need it. This requires thinking about what goes inside the cabinets before you even finalize the layout.

Modern storage hardware can revolutionize an old kitchen’s functionality. My must-haves for almost every project are deep drawers for pots and pans—they are infinitely more useful than cavernous lower cabinets where things get lost in the back. Other game-changers include pull-out pantries for narrow spaces, corner systems like a Lemans unit to make blind corners accessible, and drawer organizers for everything from spices to cutlery to cooking utensils.
This isn’t about having more storage; it’s about having smarter storage that makes your daily life easier and more efficient.
As kitchens have become larger and more open, the simple work triangle has evolved. A more sophisticated way to think about layout now is in “zones.” This is about grouping tasks and the items needed for them in logical areas. This approach reduces unnecessary movement and allows multiple people to work in the kitchen at the same time without getting in each other’s way.

For example, you might have:
In a large open-plan kitchen I designed, the island became the dedicated prep zone. The wall behind it was the cooking zone, and the area to the side was the cleanup zone. This natural flow allowed the family to cook together seamlessly, turning meal prep from a solitary chore into a collaborative family activity.
A renovation is a perfect opportunity to make choices that are better for the environment and for your family’s health. “Sustainable” isn’t just about recycled materials; it’s about durability, resourcefulness, and creating a healthy indoor environment.

This can be as simple as choosing low-VOC (volatile organic compound) paints and finishes, which don’t off-gas harmful chemicals into your home. It can mean choosing appliances with a high Energy Star rating to reduce your energy consumption. One of my favorite sustainable choices is using reclaimed wood. I worked on a farmhouse kitchen where we used salvaged chestnut from an old barn for Open Shelving. Not only did it keep that beautiful wood out of a landfill, but its rich patina and history brought a level of soul and character to the kitchen that you simply can’t buy new.
Building with conscience adds another layer of meaning to your renovation, creating a space that nurtures both your family and the planet.
Your house has a history, but so do you. The most memorable kitchens are the ones that reflect the unique personality of the family that lives there. This is what transforms a well-designed space into a true home.

This goes beyond just hanging your kid’s artwork on the fridge. It’s about intentionally designing a space for the things that matter to you. I worked with a family who had an extensive collection of beautiful pottery they’d picked up on their travels. We designed a section of open shelving with integrated lighting specifically to display their collection, turning their memories into a central feature of the kitchen. For another client who loved to bake with her grandmother’s recipes, we created a special nook with a marble slab (perfect for rolling dough) and a built-in home for her cherished, flour-dusted cookbook.
These personal touches are what make a kitchen feel like it couldn’t belong to anyone else but you.
This is decidedly the least glamorous part of any renovation, but it’s one of the most important. Navigating building permits and codes can feel like a bureaucratic nightmare, but it’s there for a crucial reason: your safety. Codes ensure that any electrical, plumbing, or structural work is done correctly and safely.

Almost any kitchen renovation that involves moving walls, changing plumbing locations, or updating electrical wiring will require a permit from your local building department. Don’t be tempted to skip this step. Working without a permit can lead to fines, difficulties selling your home down the road, and—most importantly—it could void your homeowner’s insurance if something goes wrong. A qualified, licensed contractor will be familiar with local codes and can handle the permitting process for you. It’s one of the best reasons to hire a pro.
Getting the paperwork right isn’t just about following the rules; it’s about protecting your family and your single largest financial investment.
Finally, a dose of realism. No matter how well you plan, your renovation will take longer and cost more than you initially hope. That’s just the nature of the beast, especially in an old house. The key to staying sane is to build a realistic timeline and a robust contingency fund from the very beginning.

When creating a schedule, ask your contractor about lead times. Custom cabinets can take 8-12 weeks to arrive. Some appliances might be backordered. Build these waiting periods into your timeline. Then, add a buffer of a few weeks for the inevitable surprises. The 15-20% contingency fund we talked about earlier is your financial buffer. It’s not “if” you’ll use it; it’s “when.” On a recent project, demolition revealed an old, leaky plumbing stack that wasn’t up to code. It was an unexpected expense, but because the homeowners had a contingency fund, it was a manageable problem, not a budget-busting crisis.
Good project management is what turns a great design into a successfully completed project, minimizing stress and ensuring a smooth journey from demolition day to your first meal in your beautiful new kitchen.
A kitchen renovation in a period home is so much more than a construction project. It’s an act of archeology, a puzzle of preservation, and a deeply personal creative endeavor. When you peel back layers of old flooring or uncover a hidden detail behind a wall, you’re connecting with the home’s history and the lives that were lived within its walls. The goal isn’t to erase that history, but to add your own chapter to it.
The most rewarding projects I’ve been a part of are those where the homeowners found that perfect balance—where modern convenience serves to highlight, not overwhelm, the home’s original character. It requires patience, a willingness to listen to what the house is telling you, and an investment in quality where it matters most. Your kitchen is an investment in your family’s daily happiness and your home’s future. By planning thoughtfully, you can create a space that is not only beautiful and functional but also a true and lasting tribute to the spirit of your home.


