Physical Address
304 North Cardinal St.
Dorchester Center, MA 02124
Physical Address
304 North Cardinal St.
Dorchester Center, MA 02124
Build the ultimate outdoor kitchen with these 24 expert tips. Learn to choose climate-ready cabinets, optimize layout, and integrate features for lasting performance.
Picture this: You’ve got the 120-inch outdoor screen fired up for a movie night. The projector is humming, the surround sound is perfectly calibrated, and Top Gun: Maverick is about to hit that first breathtaking aerial sequence. You reach into your outdoor kitchen cabinet to grab the popcorn bowls, and the door groans, hangs askew, and basically sighs with the kind of weary resignation that kills the whole vibe. The illusion is shattered. Your outdoor entertainment oasis suddenly feels… cheap.
That’s what people always get wrong. They think an outdoor kitchen is just about the grill. But the cabinets? That’s the set dressing. It’s the production design. It’s the behind-the-scenes infrastructure that makes the whole show run smoothly. Get it wrong, and your blockbuster experience turns into a low-budget flop, fast. It’s not just about looks; it’s about building a stage for your life that can withstand the elements and still look stunning for the premiere, every single time.
So, let’s cut through the noise. Here’s the real story on how to build an outdoor kitchen with cabinets that are ready for their close-up.
Think of this as pre-production. This is where you write the script, scout the location, and storyboard every scene. Rushing this phase is the single biggest mistake you can make. Every decision here sets the stage for a blockbuster hit or a disappointing dud.
You wouldn’t shoot a desert scene in a rainforest, right? Same principle. You have to cast your materials for the environment they’re going to live in. People see a pretty picture online and think they can just copy-paste it into their backyard in Miami or Phoenix or Seattle. That’s a recipe for disaster. Intense sun is a villain that fades and cracks. Humidity and salt air are a corrosive force that eats metal for breakfast.
Here’s the real talk from guys who fix this stuff for a living: “While 304 stainless steel is common, coastal homeowners must invest in 316 marine-grade stainless steel… It’s a minor upcharge for massive long-term benefit.” I saw a client’s beautiful dark-gray cabinets turn into a chalky, warped mess in two Arizona summers because they weren’t truly UV-stabilized. It was an expensive reshoot, let me tell you. Know your enemy—UV, salt, moisture, ice—and choose a material designed to fight it.
So before you fall in love with a look, you have to be brutally honest about your climate. Your long-term success story starts right here, preventing a tragic ending in just a few years.
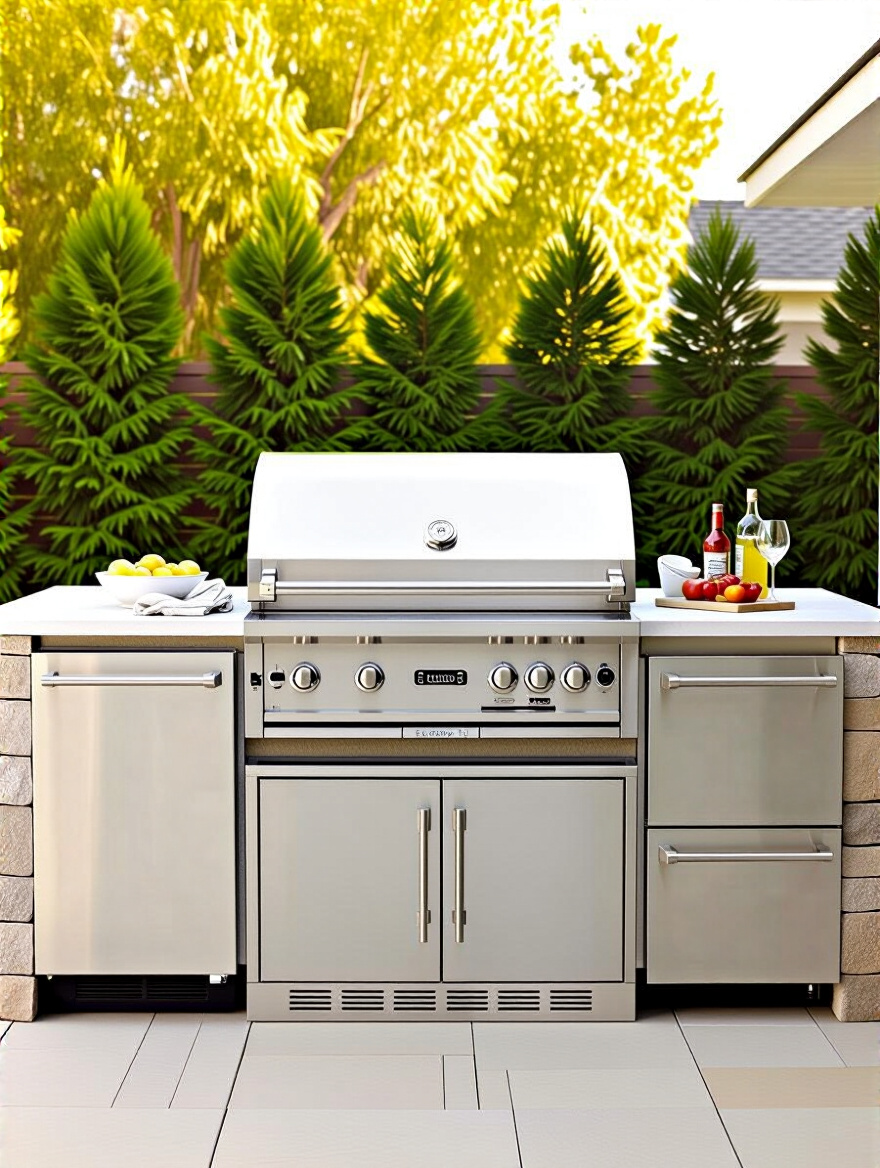
This is all about choreography and blocking. Where do you move? Where do you stand? How many steps does it take to get from the fridge to the prep counter to the grill? A bad layout creates a frustrating, clumsy dance. A great layout is an effortless, fluid scene where everything you need is exactly where you expect it to be. The classic “work triangle”—fridge, sink, grill—is your starting point.

Don’t just think about the cook. Think about the whole cast. When you have guests over, where do they go for a drink without bumping into the person manning the grill? You need dedicated zones: Hot (grill), Cold (fridge), Wet (sink), and Prep (counter space). And the golden rule is “landing zones.” You need empty counter space right next to the grill for a hot platter, and right next to the fridge for unloading groceries. It seems obvious, but I see it ignored all the time.
Thinking through this flow state doesn’t just make cooking easier; it makes the whole experience feel more professional and less stressful, turning you into the calm director of your own culinary masterpiece.
Can we talk about my biggest pet peeve? It’s seeing a gorgeous, ten-thousand-dollar grill setup surrounded by plastic tubs because nobody planned for storage. It’s like having a world-class actor deliver their lines next to a pile of garbage. Your tongs, your pizza peel, your smoker bisquettes, your serving platters, your trash—it all needs a home. Out of sight.
So before you order a single cabinet, make an inventory list. A real one. Get specific. Measure your biggest platter. Think about where the propane tank for the side burner will live. A seasoned designer I know says it best: “True functionality begins by mapping out every utensil, every plate, and every consumable.” Then you buy the cabinets to fit the stuff, not the other way around. My advice? Figure out what you need, then add 15% more space. You’ll thank me in two years when you buy that new pellet smoker.
Proper storage is the unseen hero of a great outdoor kitchen. It’s the difference between a pristine set and a cluttered mess.
This is the stuff nobody thinks about until their expensive cabinet doors start warping or their grill’s warranty is voided. Trapped heat and moisture are silent killers. Your grill, your outdoor fridge, your ice maker—they all generate heat and condensation. Without a way for that hot, wet air to escape, you’re creating a little oven/sauna right inside your cabinetry.
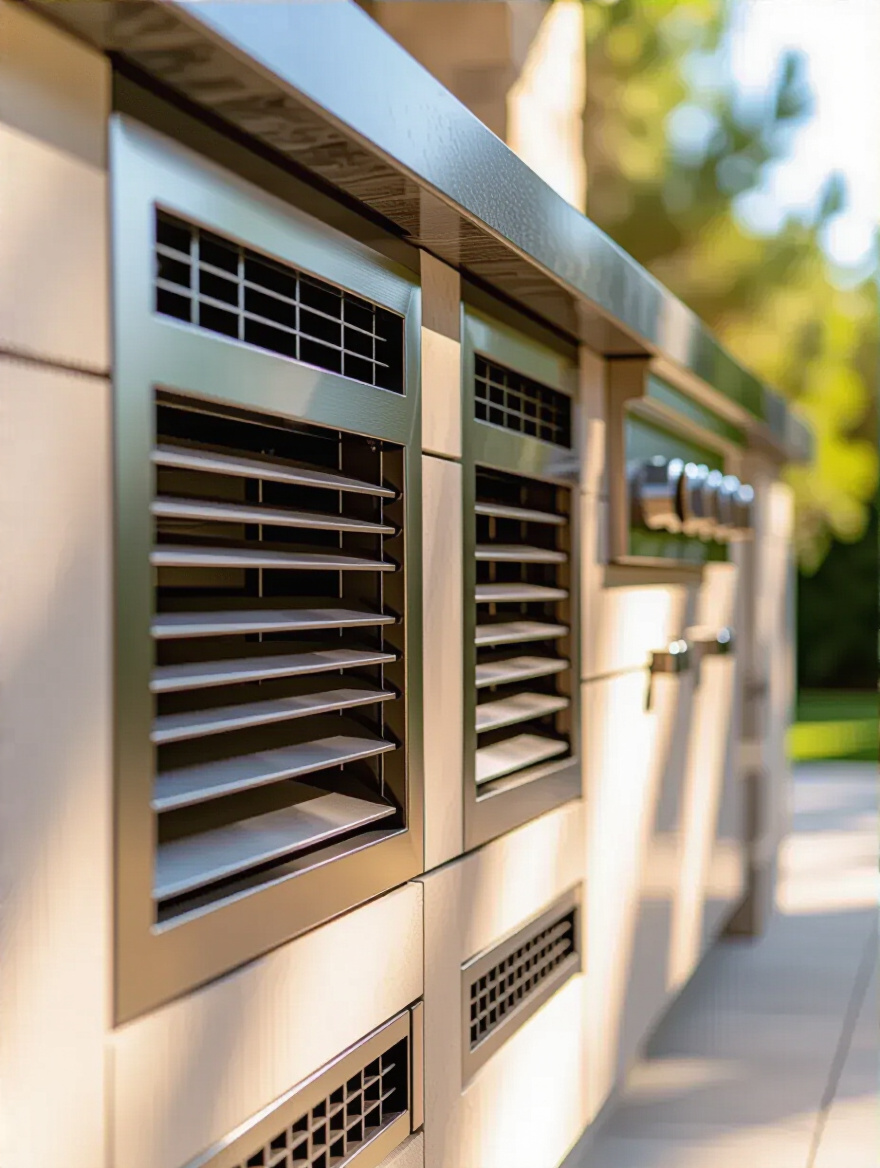
The solution is simple: vents. But they have to be placed correctly to create airflow—think low for cool air intake, high for hot air exhaust. Every appliance manufacturer will tell you exactly what you need in their manual. Ignoring this is just lazy. I once saw a beautiful set of polymer doors—a material famous for being weatherproof—bow out like a sad cartoon because they were installed on an unvented grill island. The trapped heat and Florida humidity destroyed them.
So, listen to the engineers. Read the manual. Add the vents. And for the love of god, put fine mesh screens behind them to keep critters from turning your cabinets into a five-star resort.
A great experience is one you don’t have to think about. It just works. That’s ergonomics. It’s designing a space for your body, not forcing your body to adapt to the space. Counter heights should be comfortable for the primary user. Drawers should be full-extension so you aren’t on your knees digging into the back of a dark cabinet.
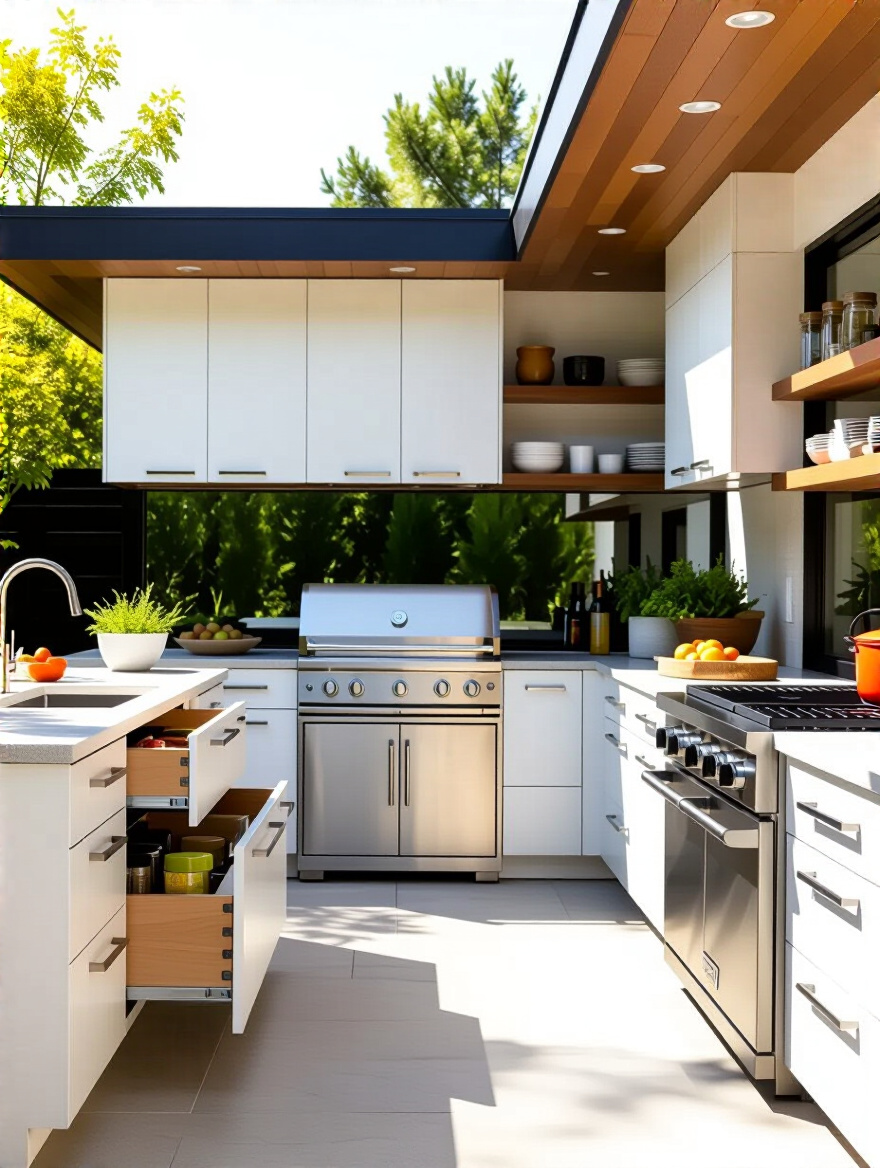
I’m a huge believer in drawers over doors for base cabinets. Pull-out drawers bring the entire contents out to you. No more archaeology expeditions to find that one specific marinade brush. And if you’re investing in this space, spend the extra money on quality hardware. Soft-close full-extension slides are a non-negotiable part of a premium build. They’re smoother, safer, and they just feel right.
This isn’t about luxury for luxury’s sake. It’s about reducing friction. Every moment you spend fighting your setup is a moment you’re not enjoying the experience.
Let’s talk money. This is where dreams meet reality. Everyone says they want the best, but not everyone wants to pay for it. The truth is, “you get what you pay for” is brutally honest when it comes to outdoor equipment. That cheap option you found online? It’s cheap for a reason. It will likely rust, fade, or fall apart in a few seasons, and you’ll be paying to replace it.
A good rule of thumb is that your cabinets and countertops will eat up about 30-40% of your total outdoor kitchen budget. When you’re budgeting, don’t just think about the cabinets themselves. You have to account for shipping, installation labor, countertops, utility hookups (gas, electric, water), and always, always have a 15% contingency fund. That’s your “in case of emergency” money for when the crew hits unexpected bedrock while digging a trench. I’ve seen that contingency fund save a project more times than I can count.
Be a smart producer. Plan your budget down to the last line item so there are no surprises during the shoot.
This is the fun part: casting and production design. What is your outdoor kitchen going to look and feel like? The materials you choose define not only the aesthetic but, more importantly, how much work you’ll have to do to keep it looking good.
If you want the unkillable character actor of outdoor cabinets, this is it. Marine-Grade Polymer, or HDPE, is basically a high-tech, solid plastic that’s born for abuse. It’s the same stuff they build playground equipment and boats out of. It’s non-porous, so water, humidity, and spilled wine literally can’t get in. It won’t rot, swell, or delaminate. Ever. The color is solid all the way through, so a scratch won’t reveal a different color underneath.
I used to be a snob about polymer, thinking it felt cheap. I was wrong. The high-end stuff today is heavy, dense, and comes in amazing textures and colors that look and feel premium. A client of mine in a punishing, sun-beaten climate has had his HDPE cabinets for eight years, uncovered, and they look exactly the same as the day they were installed. A quick wipe-down is all the maintenance they’ve ever needed. It’s the definition of a low-maintenance, high-performance material.
Just make sure the hardware is also marine-grade stainless steel. A tank-like cabinet with cheap hinges is a rookie mistake.
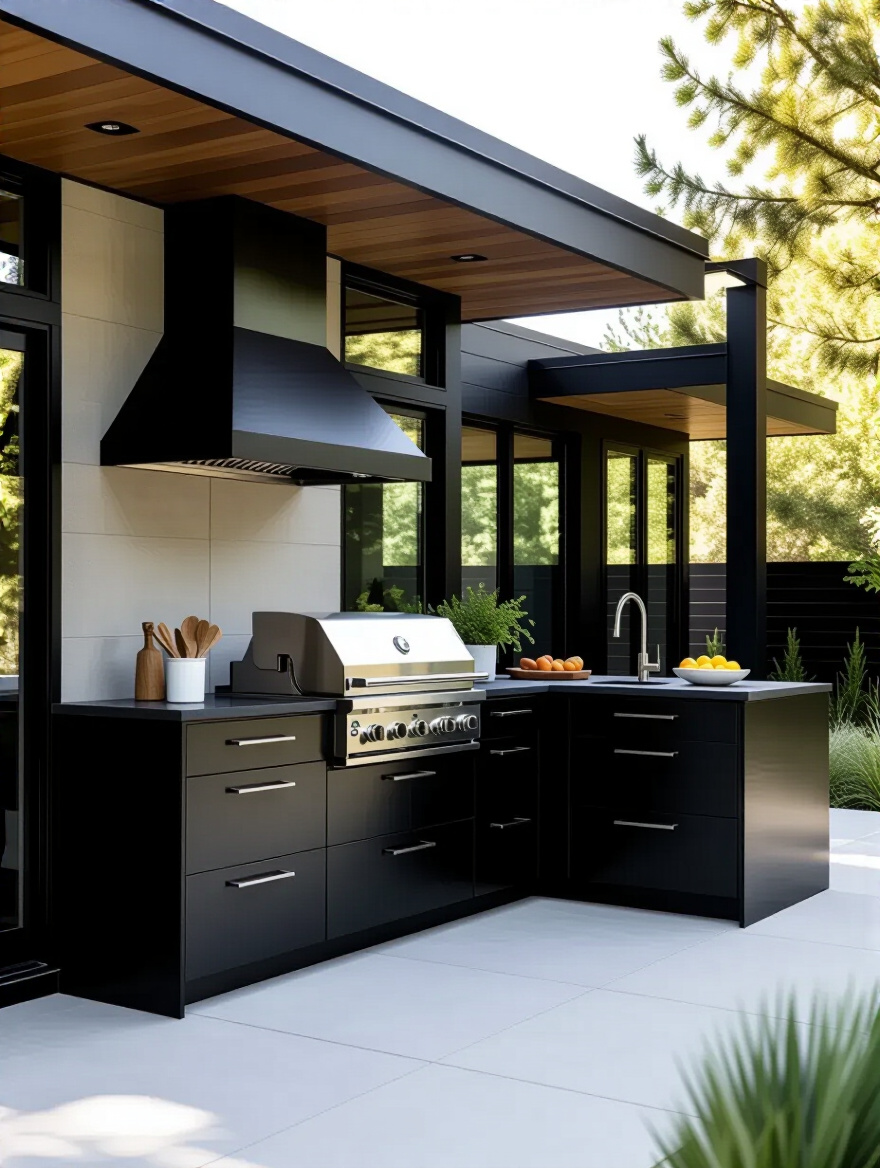
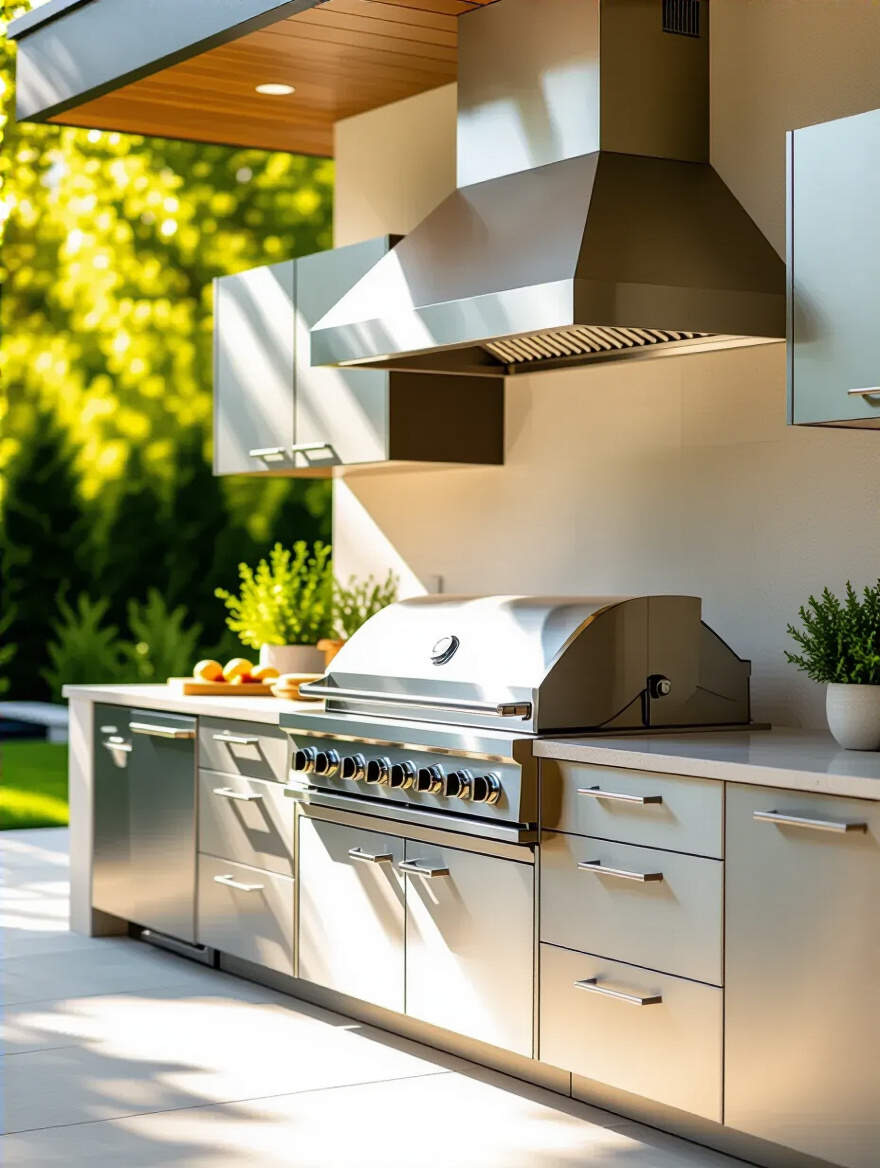
Stainless steel is the cool, sleek hero of the modern outdoor kitchen. It’s hygienic, timeless, and gives off a professional chef vibe that’s hard to beat. But here’s the secret the spec sheets don’t always scream at you: not all stainless is created equal. If you live anywhere near the coast or a saltwater pool, you must insist on 316 “marine-grade” stainless steel. Standard 304 will develop ugly little rust spots called “tea staining” when exposed to salt air. 316 has an extra element, molybdenum, that makes it dramatically more corrosion-resistant.
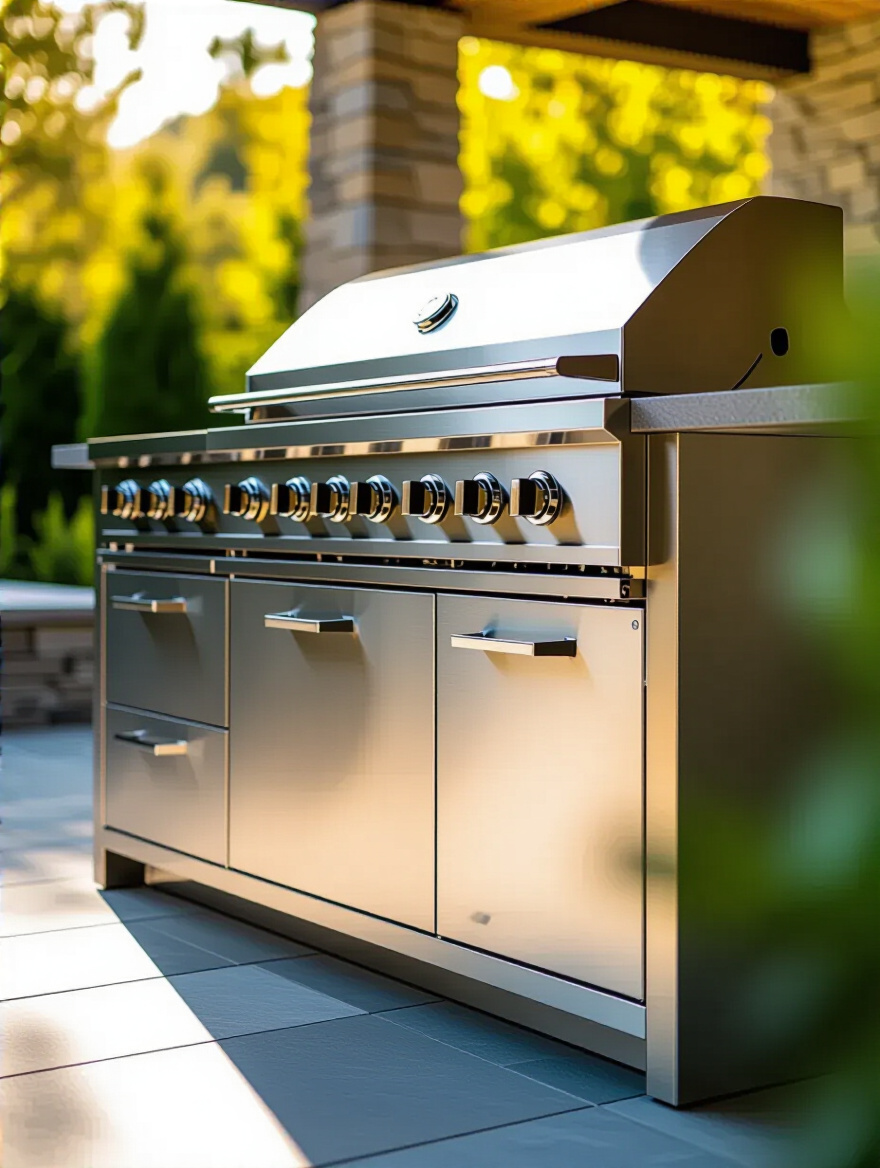
Another thing to look for is the construction. I’m a fan of fully welded frames. It just creates a more rigid, solid box that feels substantial and is better sealed against the elements. And remember, stainless steel’s greatest strength (its sleek surface) is also its weakness: it shows every fingerprint and smudge. Think of it as a high-performance sports car—it looks amazing, but you’ve got to keep it polished to maintain that “just detailed” perfection.
It’s a high-maintenance star, but when it’s clean, nothing looks better on camera.
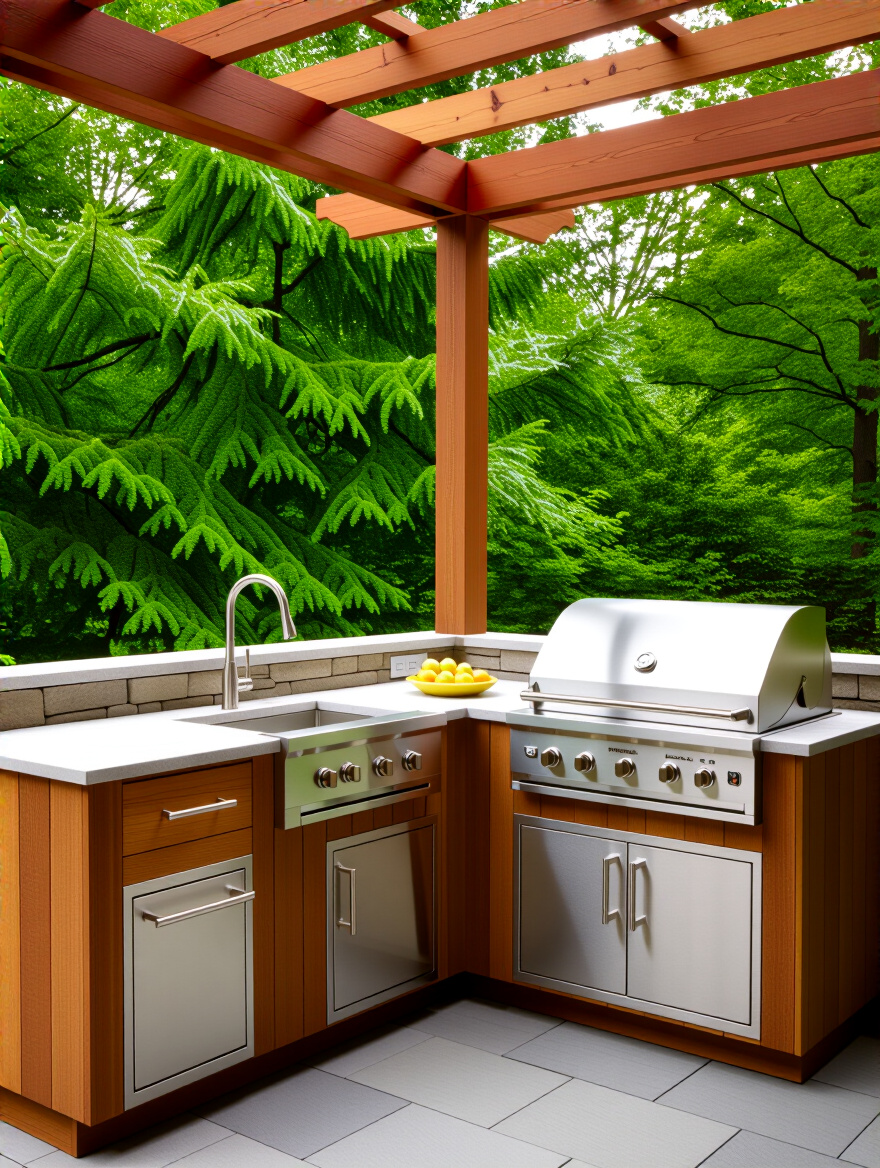
There’s a romance to real wood that no other material can replicate. Teak, Ipe, Sapele—these dense, oily tropical hardwoods bring a warmth and organic beauty that’s pure prestige cinema. They feel solid, they look incredible, and they connect the built environment to the natural one. If you go this route, look for an FSC certification, which means it’s been harvested responsibly.
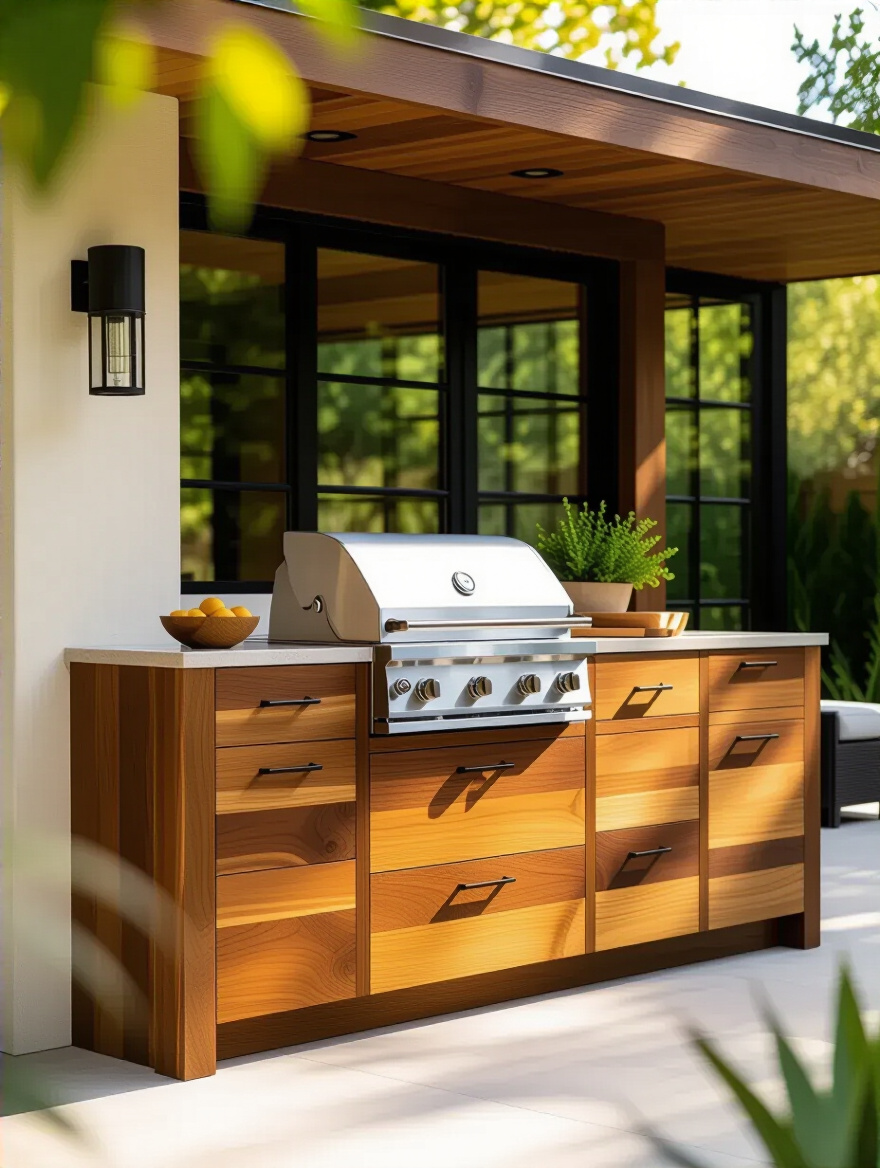
But wood comes with a script. It demands a commitment from you. These hardwoods are naturally resistant to rot and insects, but to keep them looking rich and colorful, you need to treat them. You’ll be oiling or sealing them every year to protect them from the sun’s UV rays, which will otherwise turn them a silvery gray. Some people love that patina, and that’s fine. But if you want to keep that deep, warm wood tone, you have a yearly date with a can of sealant and a rag.
It’s a labor of love, but for those who want that timeless, classic aesthetic, it’s worth the effort.
Think of powder-coated aluminum as the ultimate chameleon. It’s a material that can play any role. It’s incredibly strong for its weight, which makes installation easier, and it’s naturally rust-proof. The real magic, though, is the powder-coating. It’s not paint. It’s a dry powder that’s electrostatically applied and then cured under heat, creating a finish that’s tougher and more durable than any liquid paint.
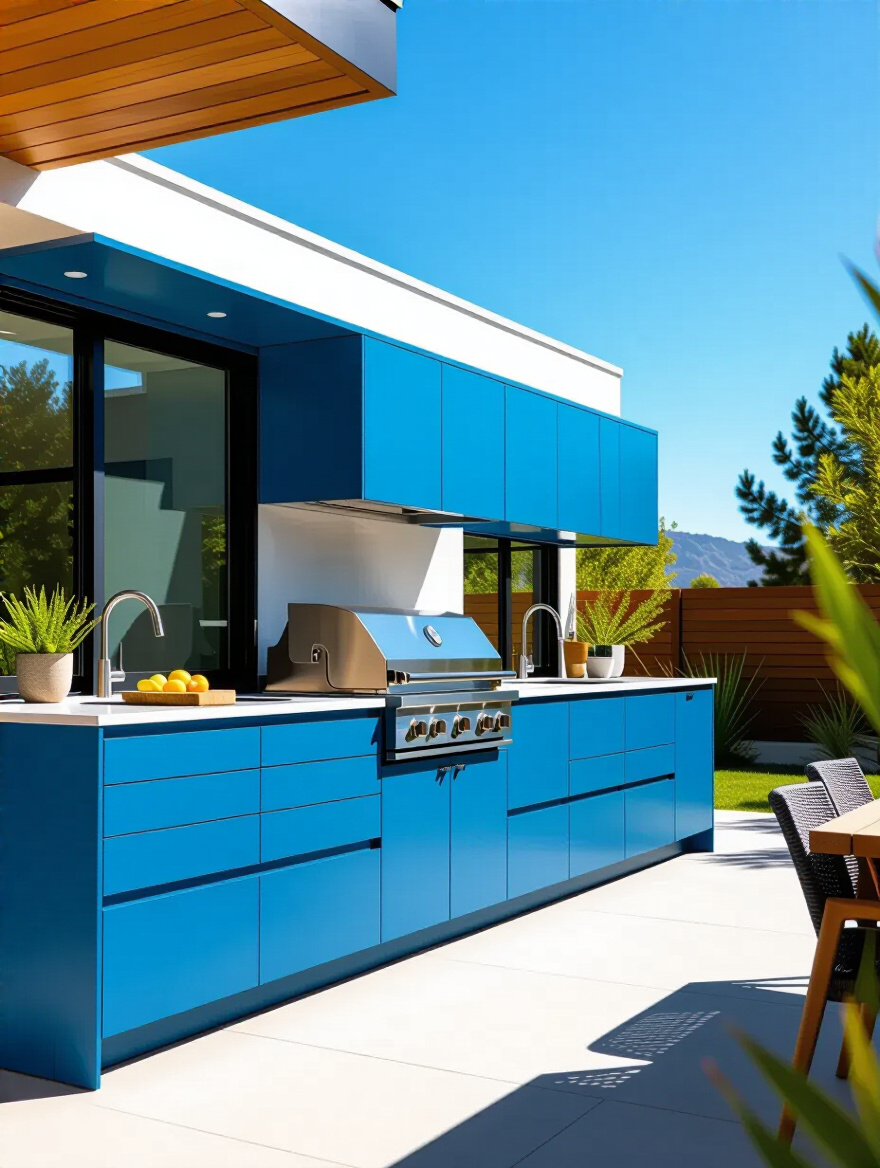
This gives you an almost infinite color palette. You can match your home’s trim color perfectly or go for a bold, dramatic accent. The key is to ask about the quality of the coating. Insist on a finish that meets AAMA 2604 or, even better, AAMA 2605 standards. That’s an architectural-grade rating that certifies it will stand up to years of sun and weather without fading or chalking. It’s like a THX certification for your cabinet finish—it means something.
Lightweight, strong, and available in any color you can dream of. It’s the ultimate choice for custom design flexibility.
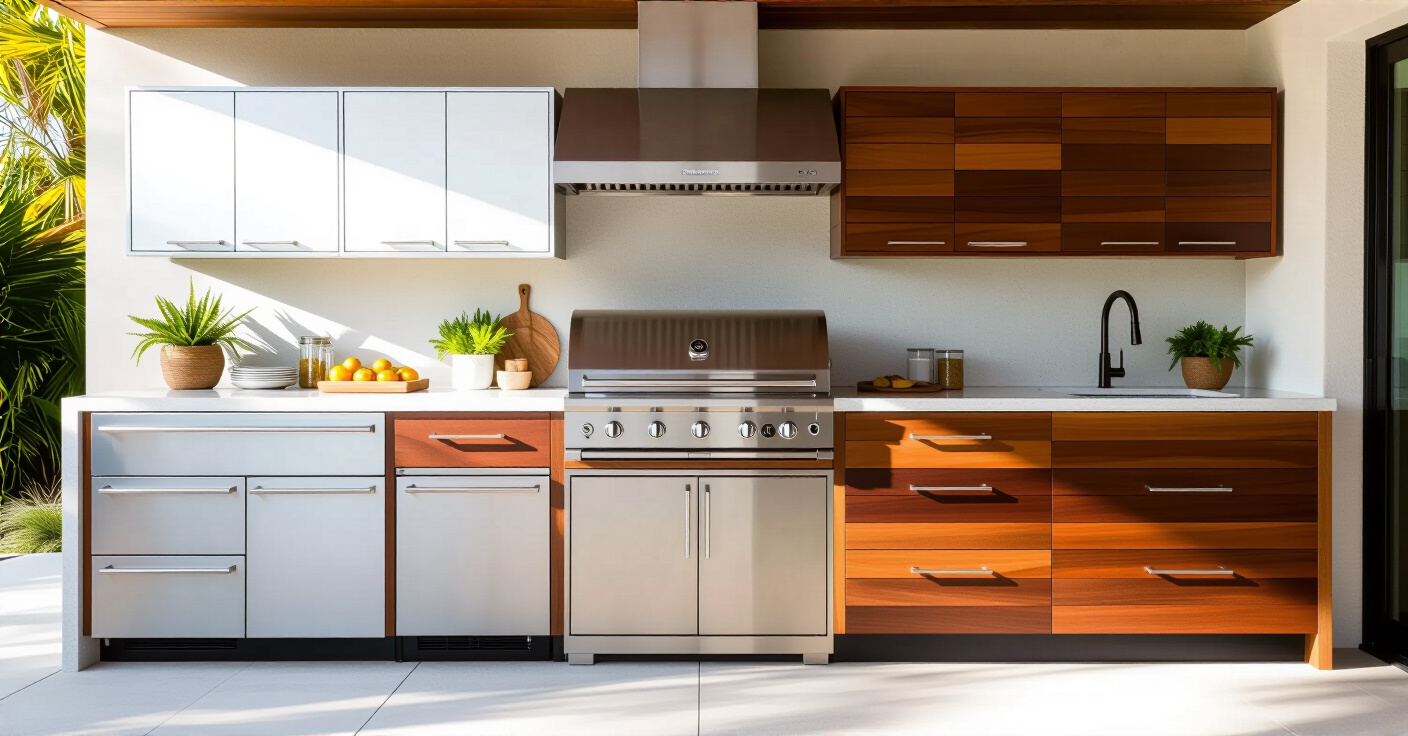
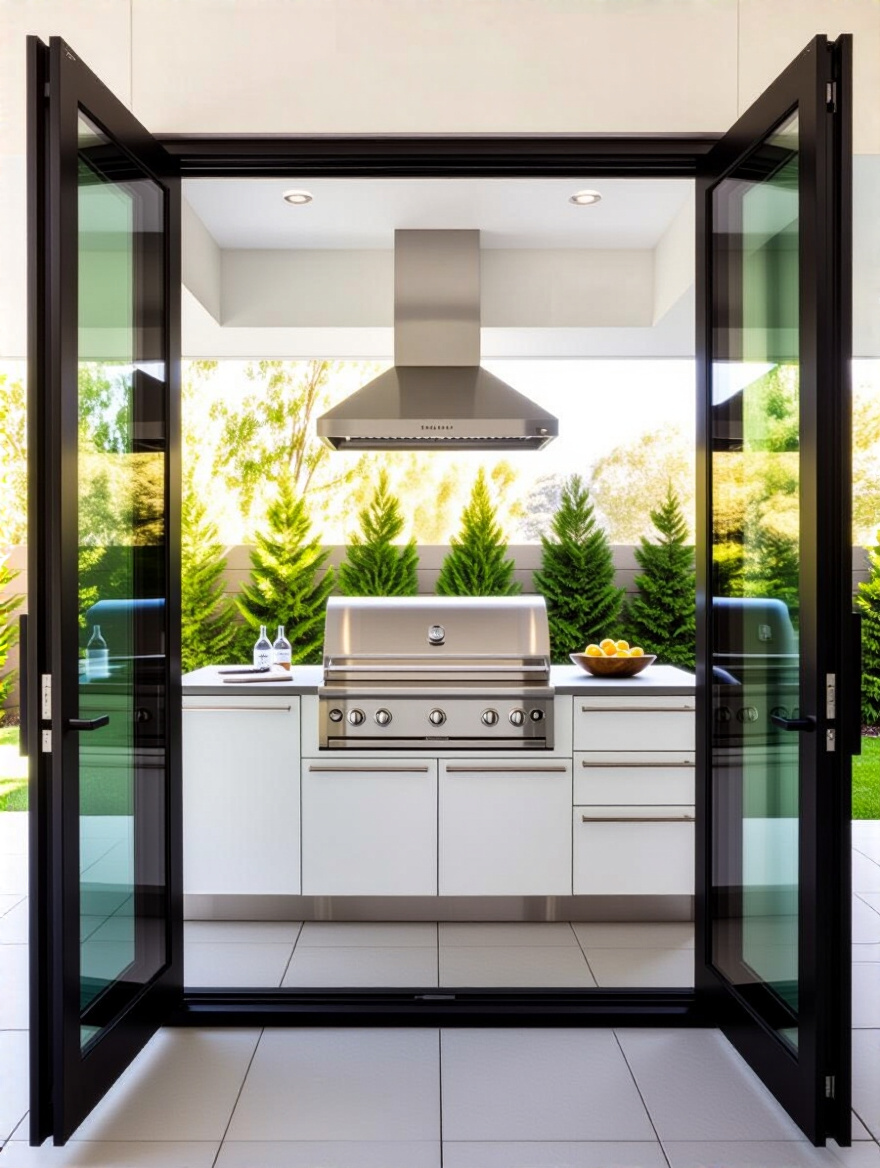
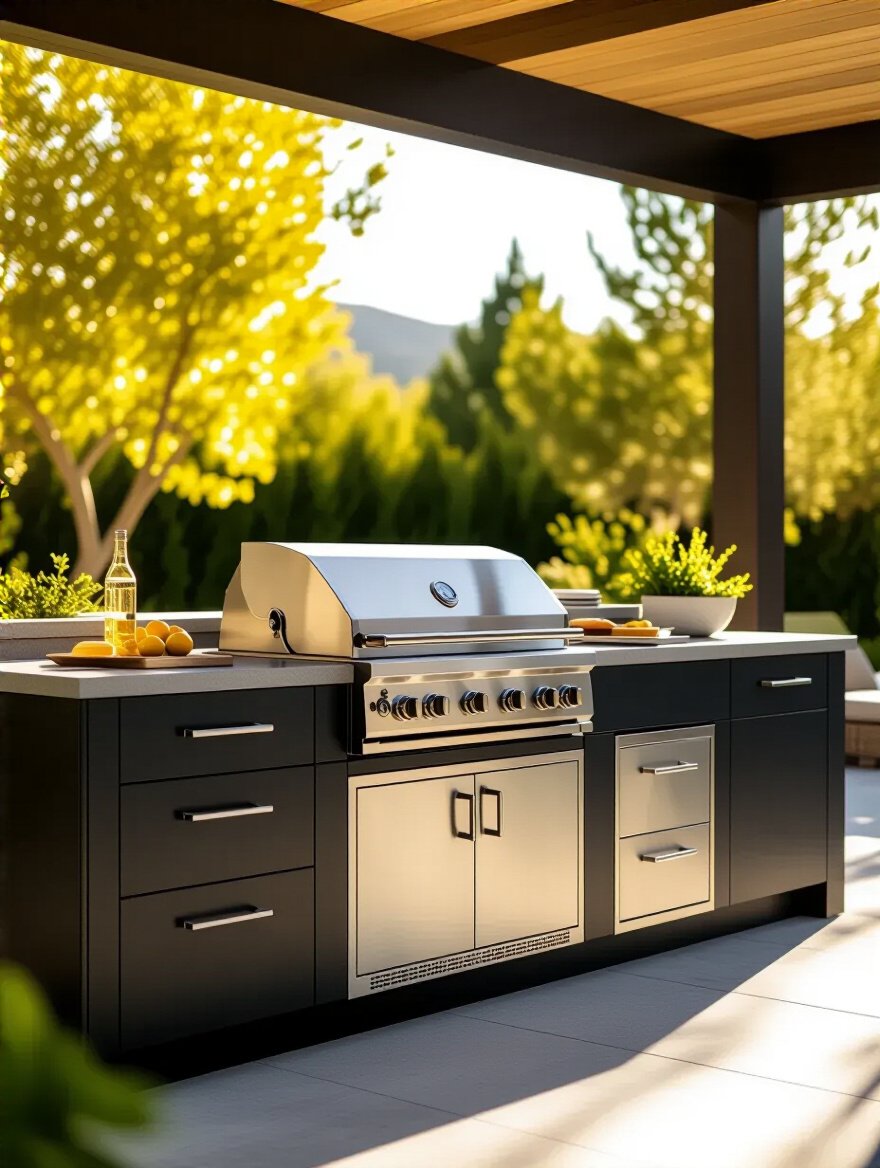
This seems basic, but it’s amazing how often it gets missed. Your outdoor kitchen shouldn’t look like a spaceship landed next to your traditional brick colonial. It’s an extension of your home. The production design needs to be cohesive. The goal is to create a seamless flow from indoor to outdoor, so it feels like one large, unified living space.
Take cues from your house. What are the dominant materials? The colors of the trim, the style of the windows? If you have a sleek, modern home, go for frameless cabinets with flat-panel doors and minimalist hardware. If you have a rustic, craftsman-style home, maybe a framed cabinet with a shaker-style door in a wood or a textured polymer makes more sense. Create a mood board. Pull samples. See how they look next to your home’s existing materials before you commit.
When the style is in sync, it elevates the entire property and makes the outdoor space feel intentional and master-planned.
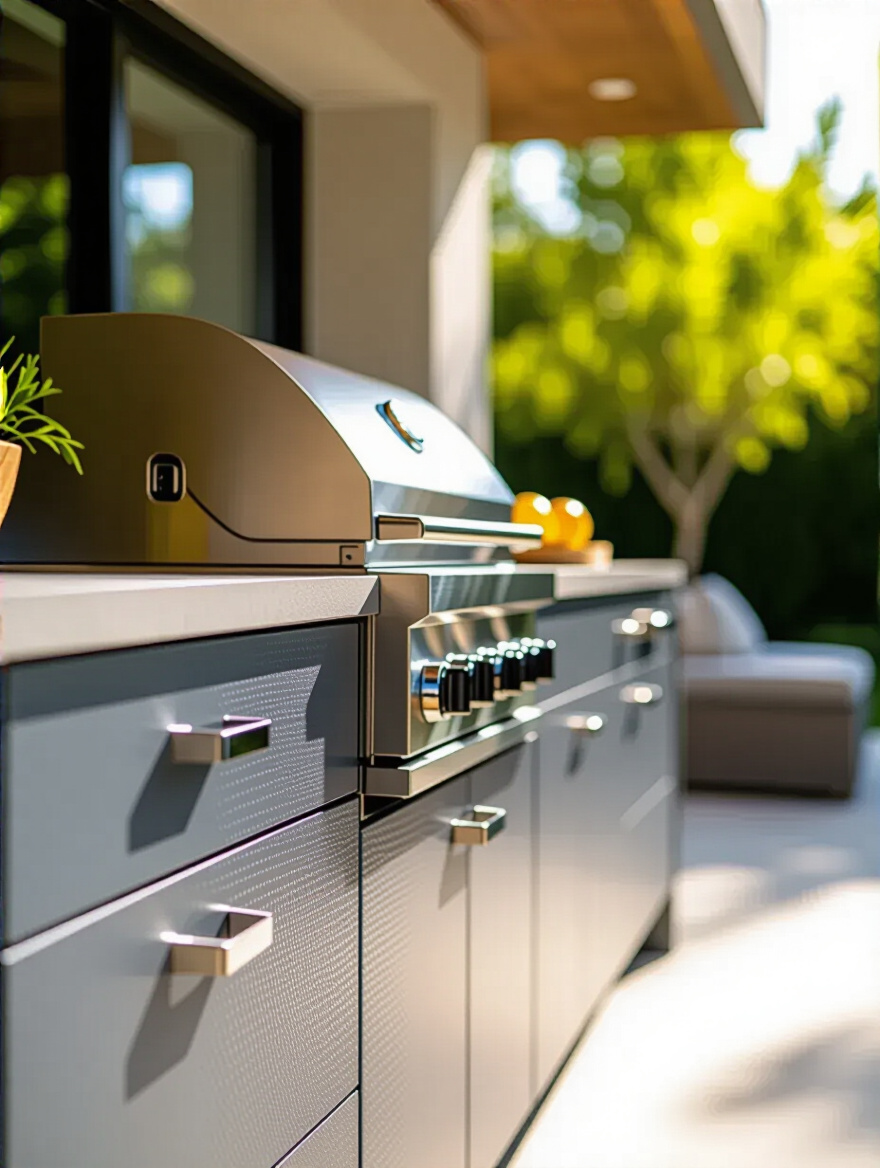
This is an insider-baseball detail that has a huge impact on both looks and function. Framed cabinets have a face frame on the front of the cabinet box where the doors hang. It’s a more traditional look. Frameless cabinets (or “Euro-style”) are essentially just the box, with the doors covering the entire front. This creates a sleeker, more modern look with very tight, consistent gaps between doors and drawers.
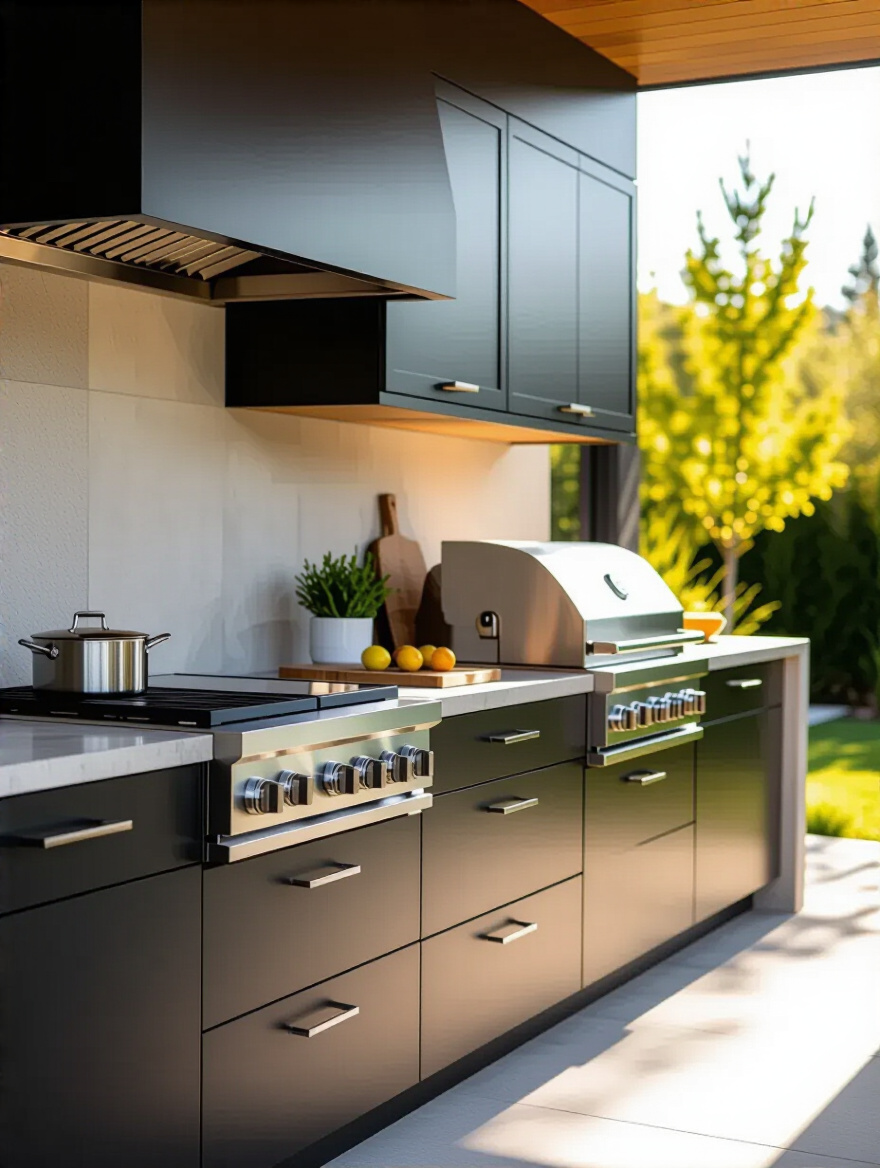
But here’s what really matters: access. Because frameless cabinets don’t have that front frame, you get full, unobstructed access to the entire interior. That means you get about 10-15% more usable storage space, and it’s way easier to fit in bulky items like a propane tank or an oversized serving platter. I almost always recommend frameless for outdoor use. The enhanced access and clean, modern look just work better for the kind of streamlined functionality you want outdoors.
It’s a small choice that makes a big difference in the day-to-day user experience.
We’re in the production phase now. The crew is on set. This is where execution matters. All the brilliant planning in the world is useless if the installation is sloppy.
This is non-negotiable. If your cabinets aren’t perfectly level, nothing else will work right. Doors won’t hang straight, drawers will stick, and worst of all, your expensive stone countertop could crack under its own weight because it’s not evenly supported. Your patio might look flat, but I guarantee you, it’s not.
Installation starts with finding the highest point and establishing a perfectly level line from there. Professionals use a self-leveling laser for this, and it’s worth its weight in gold. They work from that line, shimming each cabinet box with weather-proof composite shims until every single one is perfectly level and plumb, both front-to-back and side-to-side. Then, and only then, do they screw the cabinets to each other.
I saw a DIY job where the owner skipped this. He couldn’t get his countertop installed and had to pay a pro crew to come in, uninstall everything, and start over. Do it right the first time. The stability of your entire kitchen rests on this single step.
Running utilities outdoors is a serious business. This is not a DIY job. You need licensed plumbers and electricians, period. Water, gas, and electricity are a dangerous combination if not handled by a pro who understands outdoor-specific codes and materials. All wiring needs to be in buried conduit, outlets must be GFCI-protected and have “in-use” weather covers, and gas lines need to be properly sealed and pressure-tested.
The biggest mistake I see is not planning for enough power. People install two outlets and then a year later they want to add a blender, a warming drawer, and string lights, and they’re out of juice. My pro tip: while the trenches are open and the electrician is there, have them run an extra circuit or two. Capping off an extra gas or water line for a future pizza oven or bar sink is also a brilliant, cost-effective move.
Future-proofing your utilities during the initial build is one of the smartest investments you can make.
This is one of those small details that elevates the entire experience from good to great. Soft-close hinges and drawer slides have a tiny hydraulic damper that catches the door or drawer in the last few inches of travel and closes it slowly and silently. No more “SLAM!” It’s the difference between a cheap car door and a luxury car door. It’s about refinement.

Beyond the satisfying quiet, it also saves wear and tear on the cabinets themselves by eliminating the constant impact. In an outdoor setting where people might be less gentle than they are indoors, this feature is even more critical. It’s also a safety feature, preventing pinched fingers. Make sure the mechanisms themselves are made from stainless steel so they don’t become the first thing to rust.
It’s a small upcharge for a huge upgrade in the perceived quality and daily enjoyment of your kitchen.
Nothing ruins a beautiful outdoor scene like an overflowing, free-standing plastic trash can attracting flies. It’s a design crime. The solution is elegant and simple: integrated pull-out trash and recycling bins, hidden away inside a cabinet. They keep the mess out of sight, contain odors, and keep pests away.
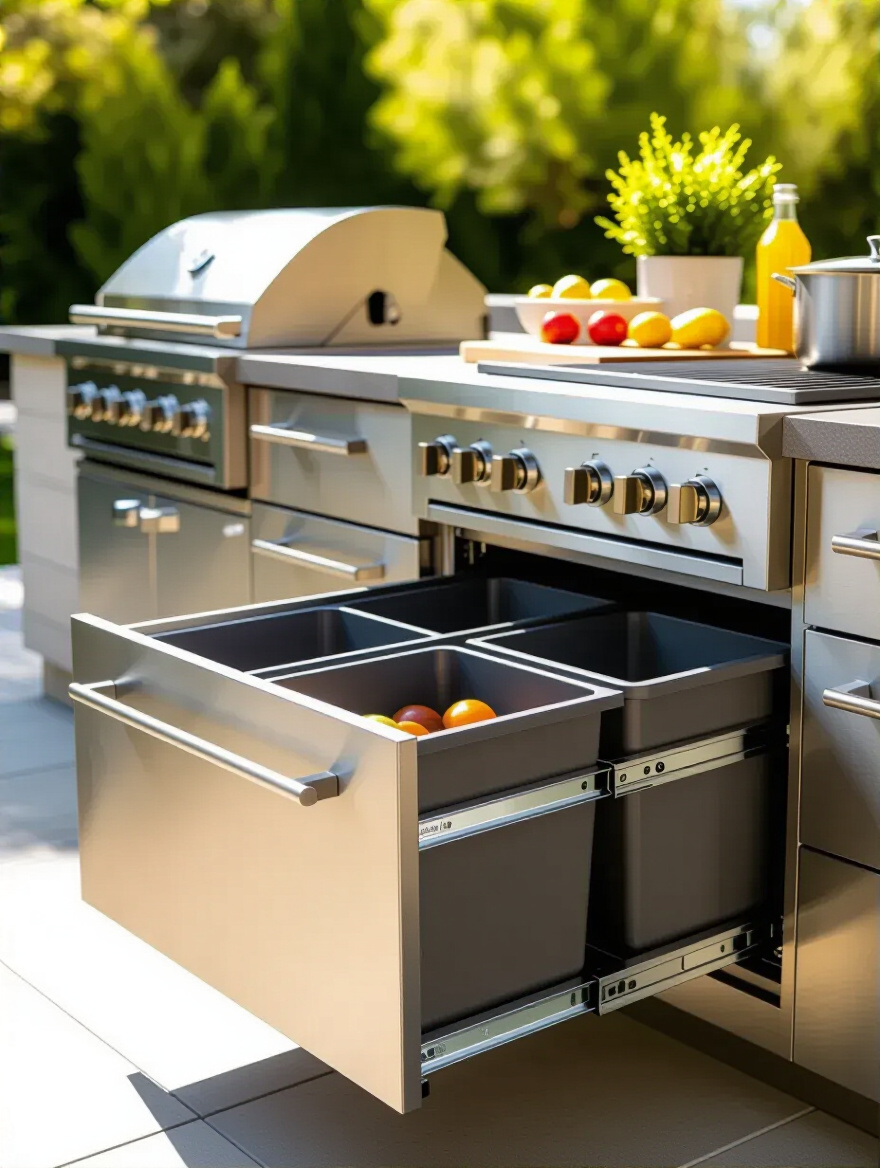
Position the pull-out near your main prep area or sink for maximum convenience. You want to be able to swipe scraps right off the counter and into the bin. Choose a system built with durable, weather-resistant materials, and make sure the cabinet it’s in has a tight-fitting door. This is one of those features that, once you have it, you’ll wonder how you ever lived without it.
It’s the invisible clean-up crew that keeps your set looking pristine during the entire production.
Opening a drawer to find a jumbled, chaotic pile of expensive grill tools is a moment of pure frustration. Specialized inserts are the answer. These are dividers and organizers, often made from marine-grade polymer or stainless steel, that create a designated spot for every single tool. Long slots for tongs and spatulas, small compartments for thermometers and lighters.
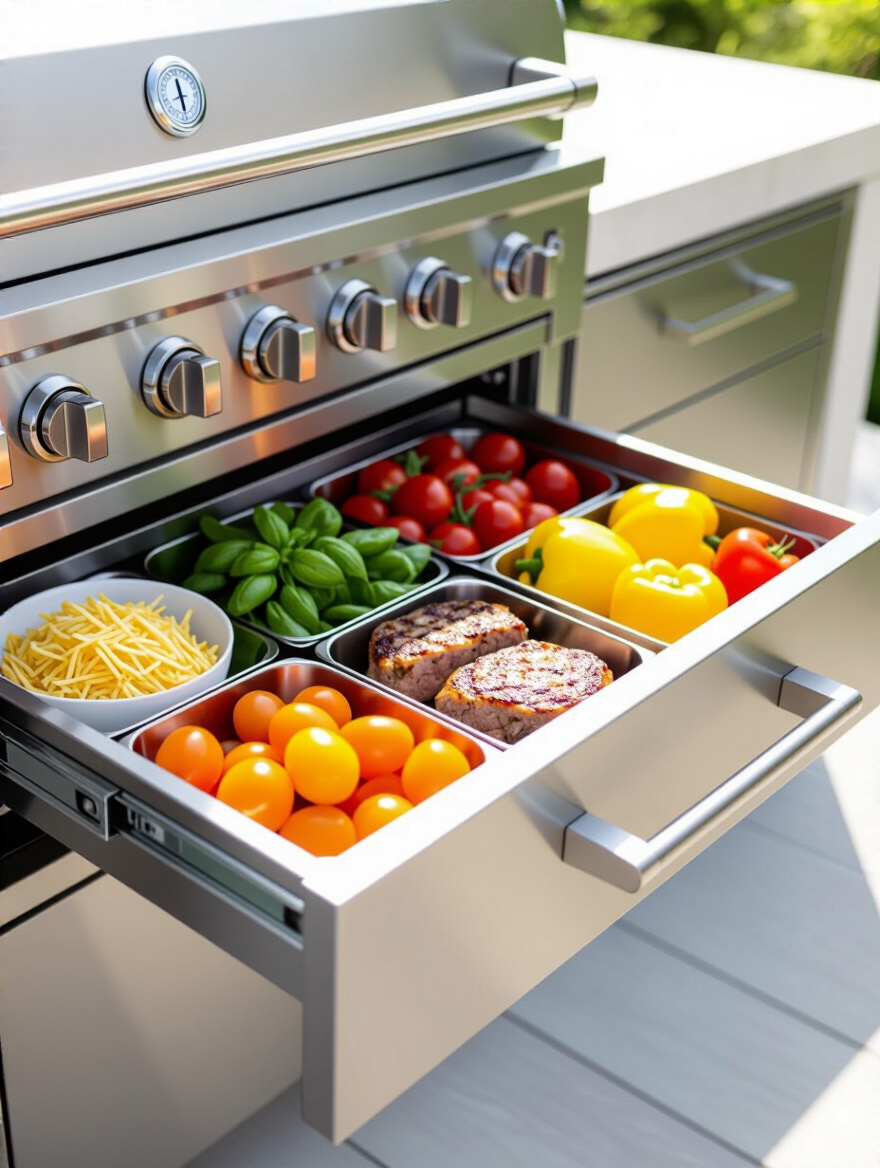
This isn’t just about being neat. It’s about efficiency and protection. You can find exactly what you need, when you need it, without digging. And your tools aren’t banging against each other, which keeps them from getting scratched and damaged. You’re creating a professional-grade workstation. I love using deep drawers with two-tiered inserts—it’s an incredibly efficient way to store a ton of gear in a small footprint.
This is the kind of pro-level detail that separates the serious entertainers from the amateurs.
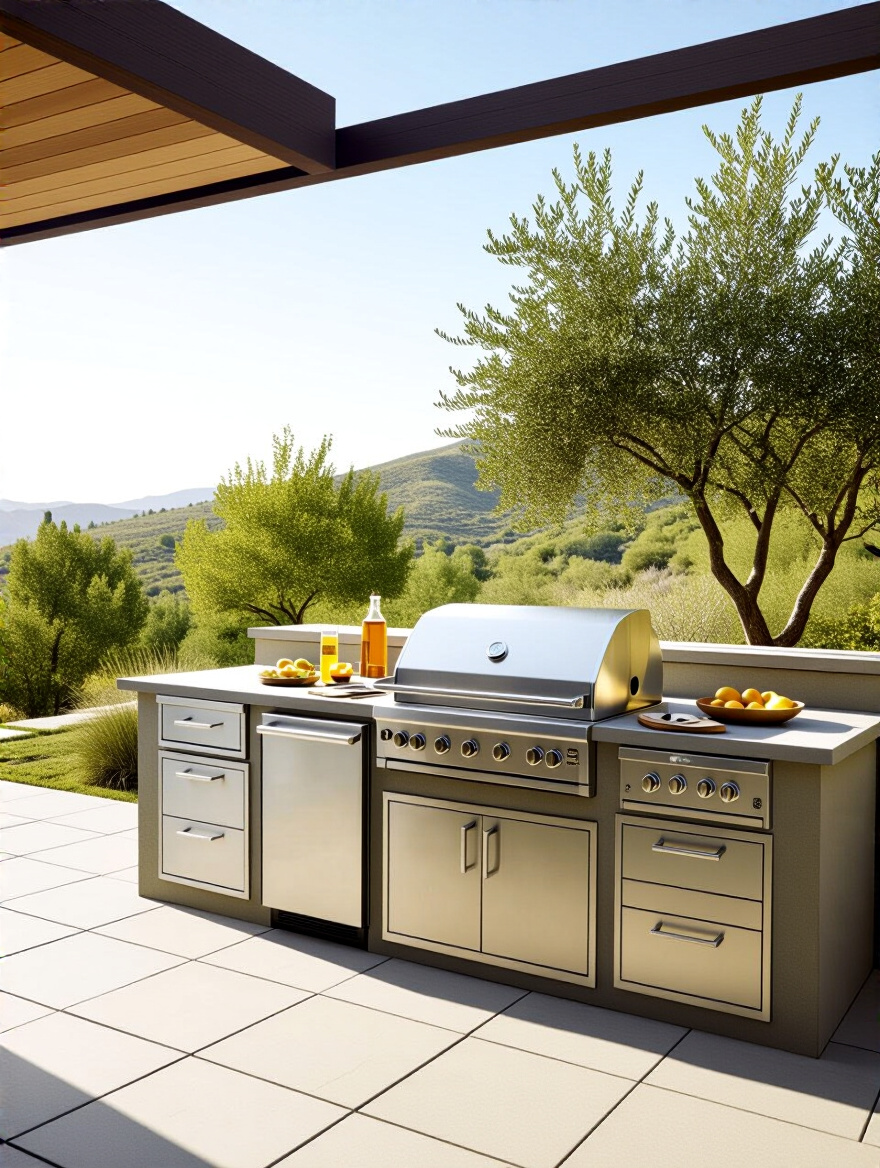
The sun is the ultimate antagonist for anything you put outdoors. Even the most UV-resistant materials will eventually feel the effects of a relentless, direct solar beating. So, if you have the choice, don’t put your kitchen in the spot that gets blasted by the brutal afternoon sun all day.
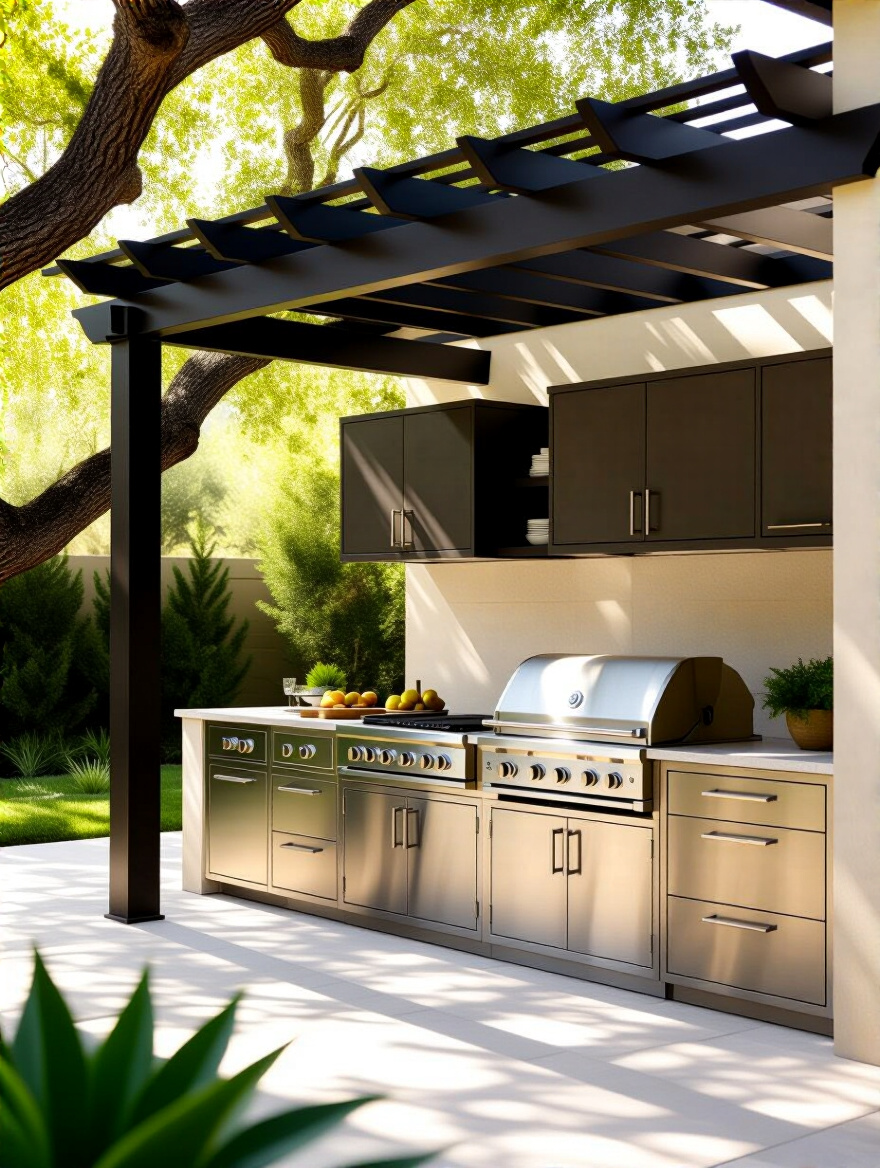
Use the architecture of your home for shade. Tuck the kitchen under an eave, on a covered patio, or on the north-facing side of your house. If that’s not an option, you need to create your own shade. A pergola, a retractable awning, or even a shade sail can make a massive difference in protecting your investment. I’ve seen two identical sets of cabinets, one in full sun and one in shade—after five years, the difference in color and finish integrity was staggering.
Use shade as a defensive weapon. It’s the single most effective thing you can do to prolong the life and looks of your outdoor kitchen.
The film is in the can, but the work isn’t over. Post-production is about preserving your creation and adding the finishing touches that make it truly special. A little bit of maintenance goes a long way.
You have to clean your outdoor kitchen. Dust, pollen, bird droppings, and greasy residue from the grill will build up. If you let it sit, it becomes much harder to remove and can even damage the finish. A simple weekly wipe-down with a microfiber cloth and a mild soap-and-water solution is usually all it takes.
The key is to use the right cleaner for your material. For stainless steel, use a dedicated stainless cleaner and wipe with the grain. Never use anything abrasive, like a scouring pad—you’ll scratch the finish and ruin its protective layer. I tell my clients to create a small “cleaning kit” with all the right supplies and keep it in one of the cabinets. If it’s right there and convenient, you’re more likely to actually use it.
Think of it as detailing your car. A little bit of regular attention keeps it looking brand new for years.
Critters love outdoor kitchens. They see them as a 24-hour-diner with cozy nesting spots. You have to be proactive about locking them out. This means sealing every possible entry point. Go over your finished kitchen with a fine-toothed comb and a tube of outdoor-grade silicone sealant.

Pay close attention to where pipes and conduits enter the cabinets. Seal around every single one. Check the seams where cabinet modules meet each other and where they meet the ground or a wall. It’s a tedious job, but it’s essential. As I mentioned before, putting fine stainless steel mesh behind any ventilation openings is a non-negotiable step to allow air in but keep bugs out.
An impenetrable fortress is your goal. Don’t give pests an open invitation to the party.
Your hardware—the hinges, handles, and drawer slides—are the moving parts, and they take the most abuse. Once a year, you need to give them a detailed check-up. Open every door, pull out every drawer, and look closely for any signs of rust or corrosion.
If you catch a small spot of surface rust early, you can usually clean it off with a non-abrasive pad and a good stainless cleaner. After cleaning, apply a thin coat of marine-grade wax or a silicone-based lubricant. This adds a protective barrier against moisture. It’s the little preventative measures that save you from having to do a costly and annoying hardware replacement down the road.
This 30-minute annual task can add years to the functional life of your cabinets.
The moment you see a scratch or a chip, you need to fix it. A breach in the protective finish—whether it’s the powder coat on aluminum or the passive layer on stainless steel—is an open wound. It’s an invitation for moisture and corrosion to get in and start doing serious damage under the surface.
Most quality cabinet manufacturers offer touch-up kits that perfectly match your finish. Get one when you order your kitchen and keep it handy. When you get a ding, clean the area, let it dry completely, and apply the touch-up paint immediately. It’s a five-minute fix that can prevent a massive failure later on. A small, ignored chip on a powder-coated door can lead to bubbling and peeling across the whole panel.
Think of it as digital touch-up for your real-life set. Fix the flaws before they’re noticeable to the audience.
Lighting is everything. It’s the difference between a functional workspace and a magical, atmospheric environment. Integrated LED lighting can completely transform your outdoor kitchen at night. Low-voltage LED tape lighting tucked under the countertops is perfect for task lighting. Small puck lights inside glass-front cabinets or down by the toe-kicks can add dramatic accent layers.
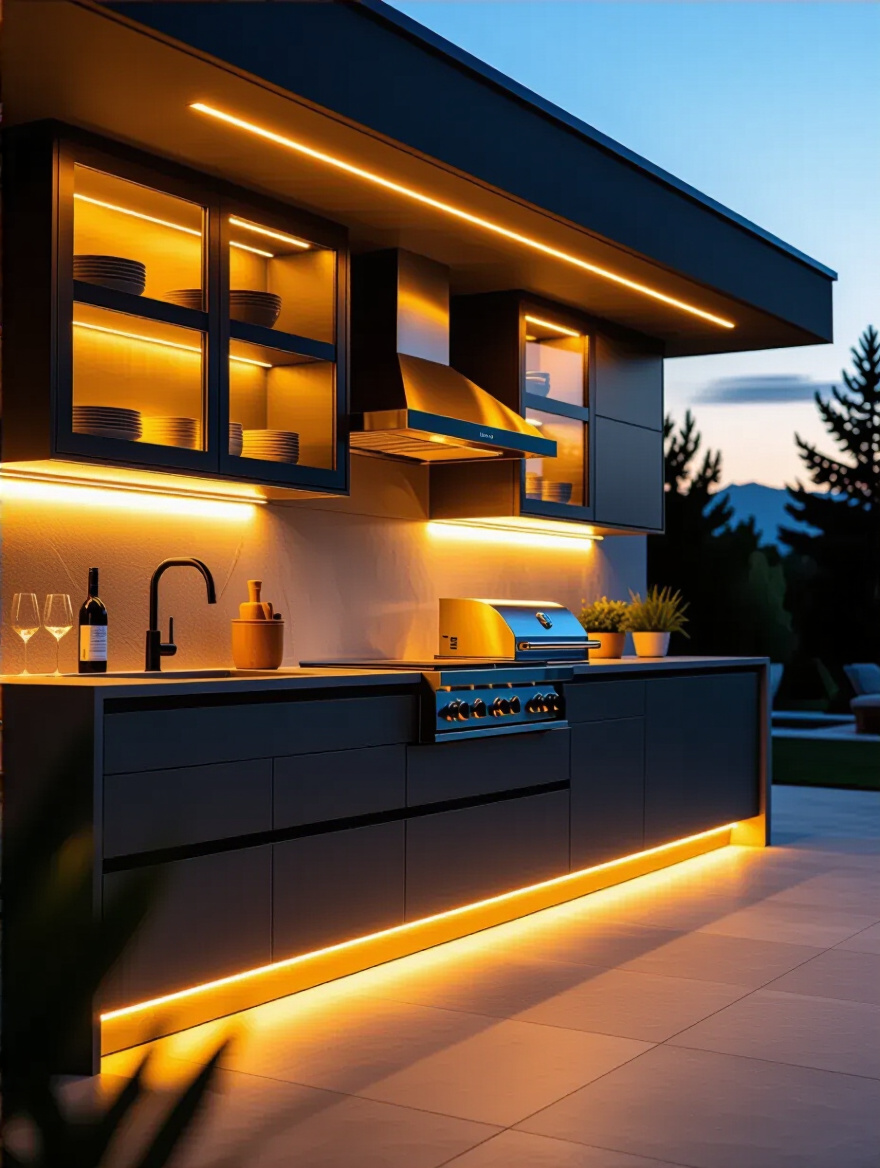
I’m a huge fan of layering your light sources and putting everything on dimmers. This gives you complete control over the mood. You can have it bright and functional when you’re cooking, then dim everything down to a soft, ambient glow when it’s time to eat and relax. Use warm-white LEDs (around 2700K-3000K) to create an inviting, cozy feel. And of course, make sure every single fixture and wire is rated for outdoor, wet-location use.
Good lighting is the final, essential element that brings your outdoor cinema to life after the sun goes down.
This is a pro-level move that will change the way you entertain. A warming drawer is exactly what it sounds like: a drawer designed to hold cooked food at a perfect, food-safe temperature until you’re ready to serve it. This is a game-changer. It means you can grill your steaks, get a perfect medium-rare, and then hold them in the drawer while you finish the vegetables.
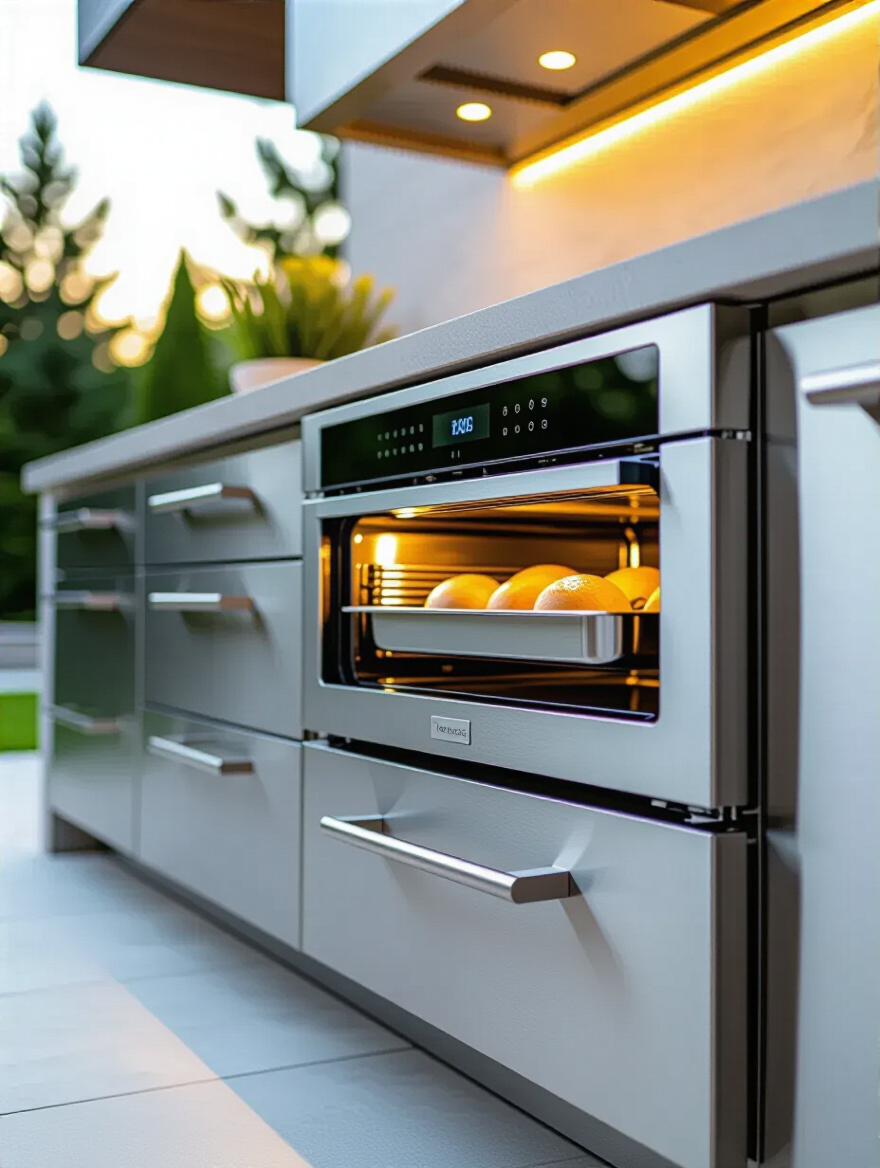
Everything comes out to the table hot, at the same time. The frantic rush to coordinate all the food is gone. It frees up grill space and dramatically reduces the stress of hosting. They’re also fantastic for proofing bread dough, warming plates, or even keeping towels warm on a chilly night. It’s a piece of gear that, once you use it, you’ll find a dozen other uses for.
It’s the ultimate behind-the-scenes tool that ensures every meal you serve gets a standing ovation.
Building an incredible outdoor kitchen isn’t a one-step process; it’s a production. It starts with a smart script (your plan), moves through casting and set design (your materials), and depends on expert execution (your installation). But the effort is more than worth it.
By focusing on quality materials built for your climate, a workflow that feels effortless, and the little details that elevate the experience, you’re not just building a place to cook. You’re crafting a permanent stage for connection, entertainment, and memory-making. You’re building an extension of your home where life’s best scenes will play out. Now that you have the director’s notes, you’re ready to create your own masterpiece.