Physical Address
304 North Cardinal St.
Dorchester Center, MA 02124
Physical Address
304 North Cardinal St.
Dorchester Center, MA 02124
Discover 19 expert tips for choosing, maintaining, and styling white kitchen cabinets. Learn design secrets, cleaning strategies, and maintenance plans for lasting beauty.
As a designer who specializes in spaces for children, I spend most of my days thinking about playrooms and growth-adaptive bedrooms. But here’s a little secret: the most important “educational space” in any home is almost always the kitchen. It’s where science experiments happen in the form of baking, where art projects take over the island, and where countless conversations unfold over bowls of cereal. So when parents ask me for the one design choice that can handle all that life while still looking incredible, I don’t hesitate.
White kitchen cabinets.
I know what you’re thinking. White? With kids? Is she crazy? I get it. The vision of pristine, bright cabinets is powerful, but it’s immediately followed by a mental flash of sticky fingerprints, splattered spaghetti sauce, and maybe even a stray crayon mark. The magic—and the challenge—is that white shows everything. But what I’ve learned after nearly a decade of designing for real families is that this can actually be a good thing.
This isn’t just another gallery of pretty pictures. This is a real-world guide to choosing, living with, and absolutely loving your white kitchen cabinets. We’ll talk about everything from picking the right shade to what to do when that grape juice spill inevitably happens. Let’s create a kitchen that’s not just beautiful, but brilliantly, messily, wonderfully alive.
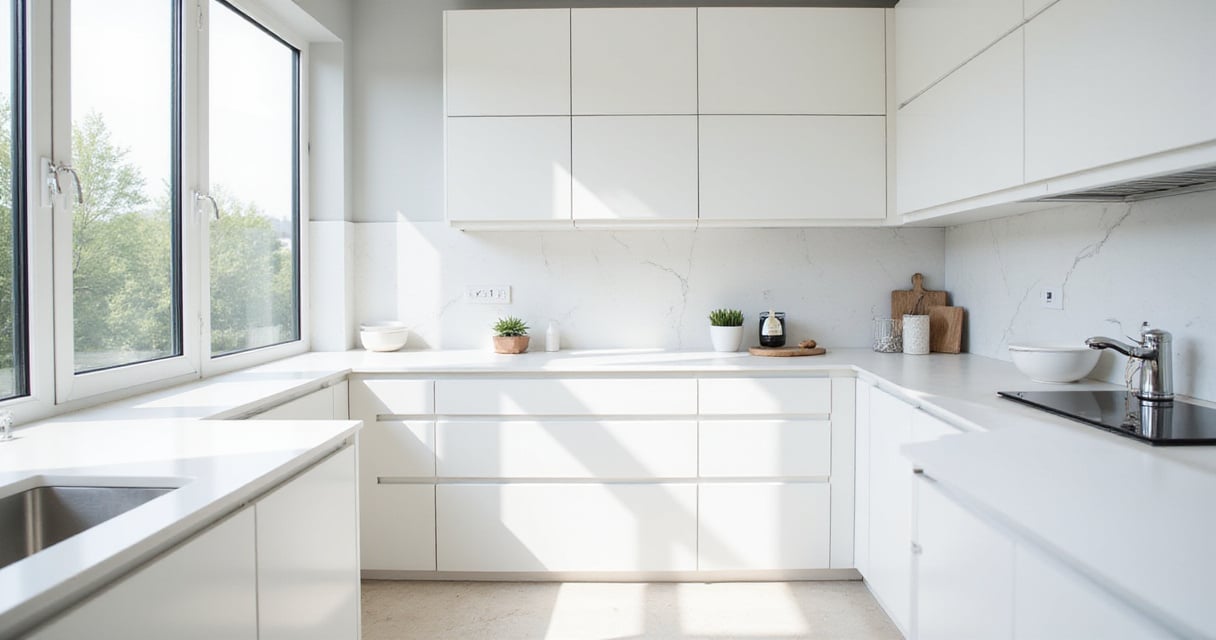
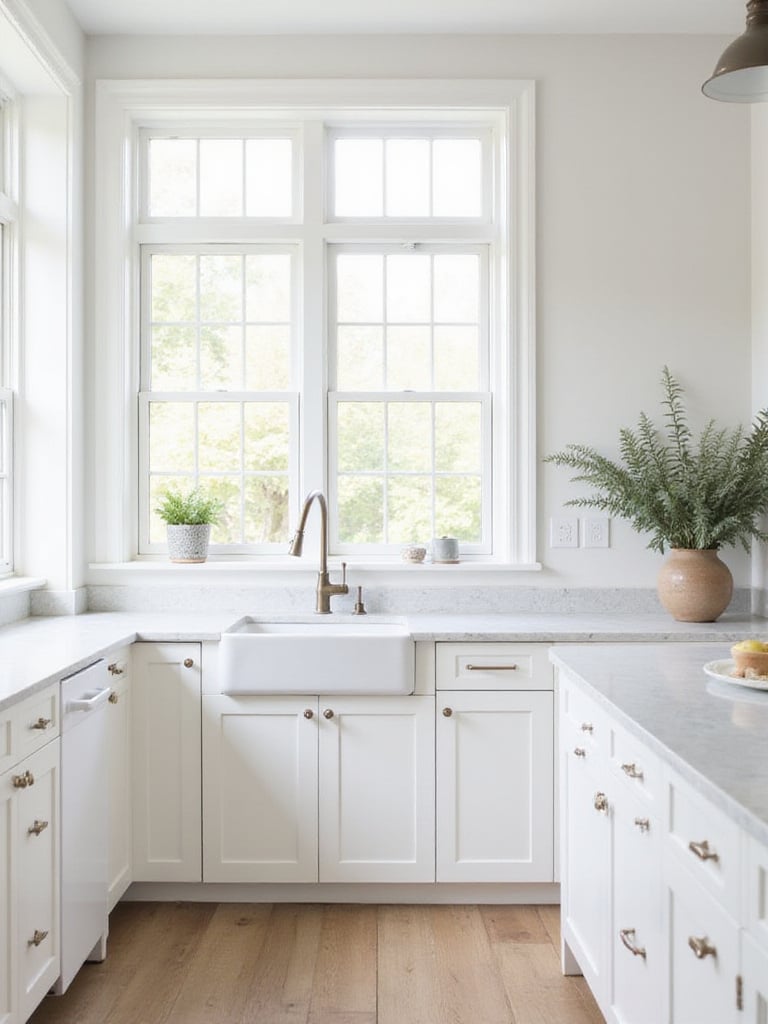
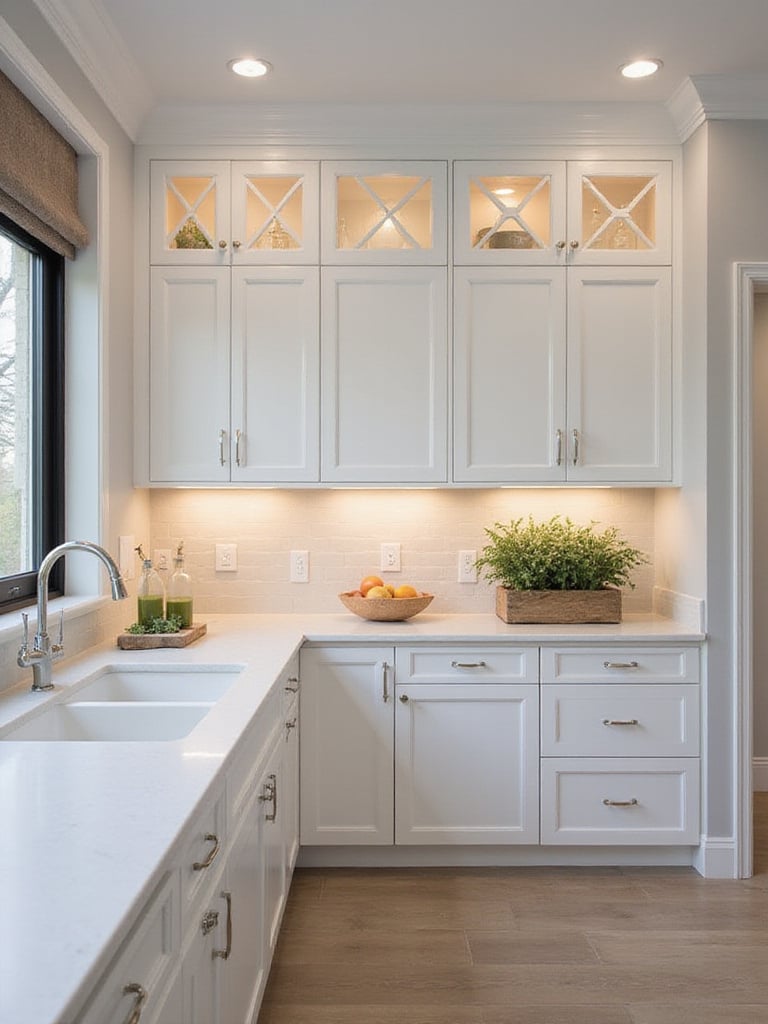
It’s true, white kitchens have moved beyond a simple trend and have become a modern classic. There’s a reason over 40% of renovating homeowners still choose white. It’s not just because it looks clean and fresh on Instagram; it’s about how it feels. As a designer rooted in child development, I’m fascinated by how our environment affects our mood. A white kitchen is like a blank canvas for your day. It’s energizing in the morning and feels calm and uncluttered at night, even when there are toys on the floor. They bounce light around like crazy, making even a small, chaotic kitchen feel bigger and more manageable.
Their real superpower, though, is their incredible versatility. A white kitchen can be a cozy farmhouse hub, a sleek modern space, or a warm traditional gathering spot. It all comes down to the details you choose to pair with them. This is huge for families, because your style and needs will change! The hardware and decor that worked when you had toddlers can be easily swapped out for a more “grown-up” look when they’re teenagers, all without a massive renovation. It’s the ultimate growth-adaptive choice.
“A white kitchen offers a psychological ‘clean slate.’ In a busy family home, that feeling of a fresh start every morning is priceless.”
This adaptability is what gives white cabinets their staying power. You’re not just investing in a look for today; you’re creating a flexible foundation that will serve your family for years to come.
Before you commit, let’s have a frank chat about the realities. Falling in love with the idea of a bright white kitchen is easy. Living with it requires a little bit of know-how. I once worked with a family who installed a stunning, pure white kitchen. For the first month, the mom confessed she was a nervous wreck, following her kids around with a microfiber cloth. She was trying to maintain a level of perfection that just isn’t compatible with family life. The breakthrough came when we talked about shifting expectations. Her kitchen wasn’t a showroom; it was the heart of her home.

The pros are obvious and amazing. White kitchens feel optimistic. They make it easier to see what you’re doing, whether you’re chopping veggies or helping with a tricky math problem. And honestly, seeing messes immediately means you wipe them up immediately, which can actually lead to a cleaner kitchen overall. But the main con is just as clear: they are not forgiving. They will show every fingerprint, every drip of coffee, and every splatter from the blender. There’s no hiding!
Consider these real-life factors:
The decision boils down to this: Are you ready to embrace both the beauty and the responsibility? My client with the two toddlers? She established a simple five-minute “cabinet wipe-down” routine every evening, and now she says she wouldn’t have it any other way.
Okay, this is where it gets tricky, but also fun. Please, please do not just go to the store and pick a color called “Pure White” and call it a day. “White” is a whole world of different shades with sneaky little undertones of blue, yellow, gray, or even green. And how that white looks has everything to do with the light in your specific kitchen. The exact same white paint can look crisp and perfect in one home and dingy or sterile in another.
The direction your windows face is the biggest factor. North-facing rooms get cool, indirect light, which can make a cool-toned white feel almost clinical. Here, a warmer white (think creamy or with a touch of beige) will feel more balanced. South-facing rooms are blessed with warm, bright light all day, which can make those same creamy whites look too yellow. A crisper, more neutral white often works best here. Getting this right is critical to creating a space that feels inviting for homework, morning coffee, and everything in between.
“Your kitchen light is the secret ingredient. You have to see how a white paint sample ‘reacts’ to it throughout the day before you can commit.”
Here’s my non-negotiable process for choosing the right white. No shortcuts!
The goal is to find a white that feels just right during your family’s peak kitchen hours. You’ll know it when you see it.
The finish on your white cabinets is arguably more important than the exact shade of white you choose. This is your first and best line of defense against, well, life. It’s what stands between your cabinet and that spilled juice box. Investing in a durable, high-quality finish is the difference between cabinets that look great for two years and cabinets that look great for twenty.
If you’re buying new, a factory-applied finish like a conversion varnish is the gold standard. It’s baked on in a controlled environment, creating an incredibly hard, non-porous surface that’s tough to scratch and easy to clean. If you’re painting existing cabinets, don’t just use regular wall paint. You need a high-quality paint specifically formulated for cabinetry, like Benjamin Moore’s ADVANCE or Sherwin-Williams’ Emerald Urethane Trim Enamel. These cure to a much harder, more durable finish.
Now, let’s talk about sheen. I’m going to be blunt here: for a family kitchen with white cabinets, a matte finish is a very, very bad idea. It looks beautiful and hides imperfections, but it’s more porous and notoriously difficult to clean. You will scrub a spaghetti sauce splatter and be left with a permanent faint orange shadow. It’s just not worth the heartbreak. A semi-gloss or satin finish is the sweet spot. It offers excellent cleanability without being so shiny that it shows every single fingerprint and glare.
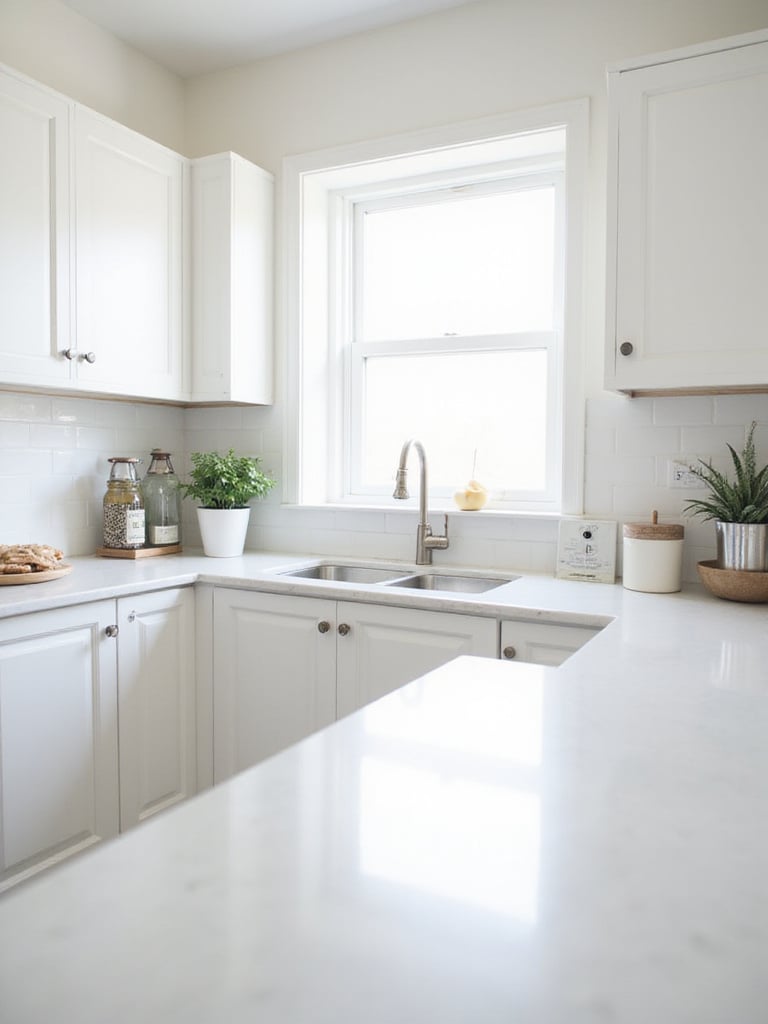
With your white cabinets as a beautiful, neutral backdrop, your countertops get to be the star of the show! This is where you can inject a ton of personality and make a major statement about your kitchen’s style. Do you want dramatic and sophisticated? Bright and airy? Warm and rustic? The countertop is your answer.
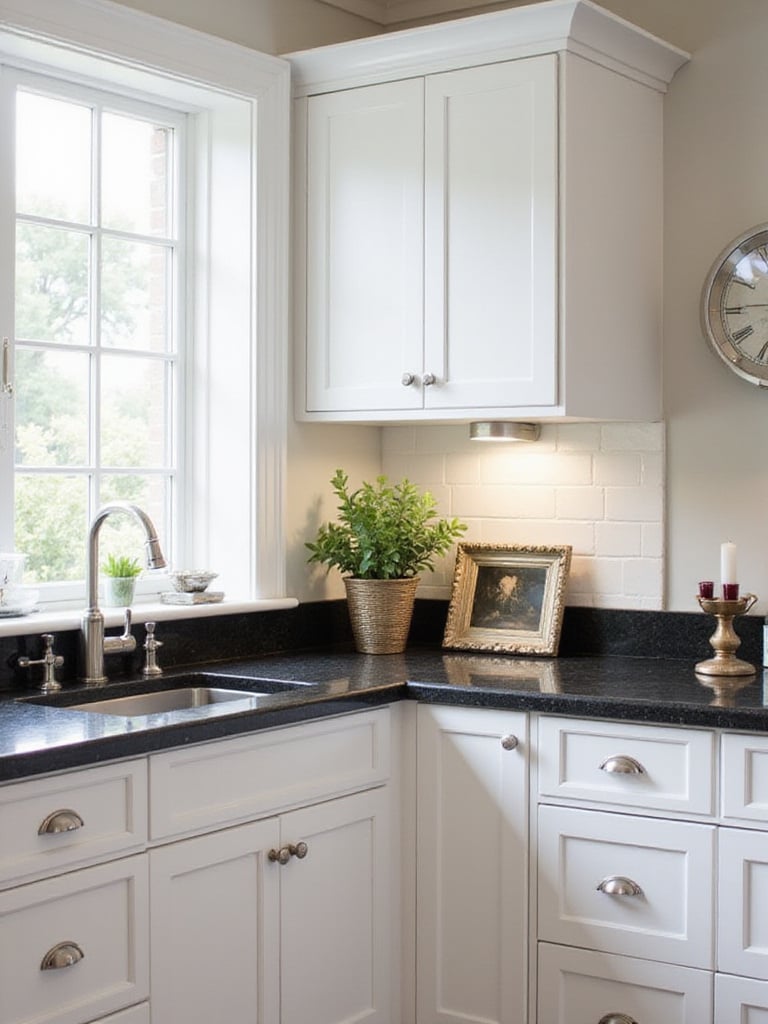
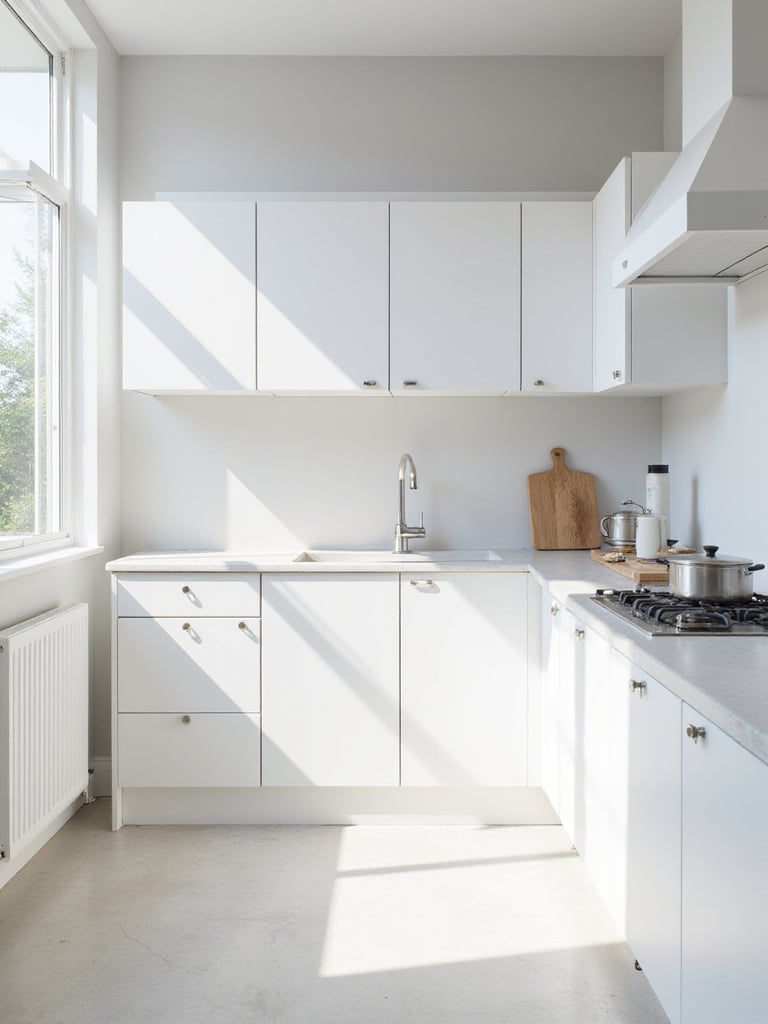
A dark countertop, like black granite or deep charcoal quartz, creates a stunning, high-contrast look. What I love about this for families is that dark, patterned surfaces are fantastic at hiding crumbs and daily smudges. It gives the space a bit of drama while being incredibly practical. On the other hand, a light countertop—like a white quartz with subtle gray veining—creates that seamless, bright-on-bright look that makes a kitchen feel enormous and full of light. This is a great choice if you want to maximize that open, airy feeling.
But let’s not forget the power of warmth. A butcher block or wood countertop introduces a natural, organic texture that instantly makes a crisp white kitchen feel more welcoming and approachable. I designed a kitchen for a family who loved to bake, and we did a big butcher block island. It became the designated spot for rolling out dough with the kids, and the inevitable dings and scratches just added to its character over time. For the perimeter, we used a super-durable quartz for easy cleanup. Don’t be afraid to mix materials! The key is to choose a surface that supports how your family actually lives.
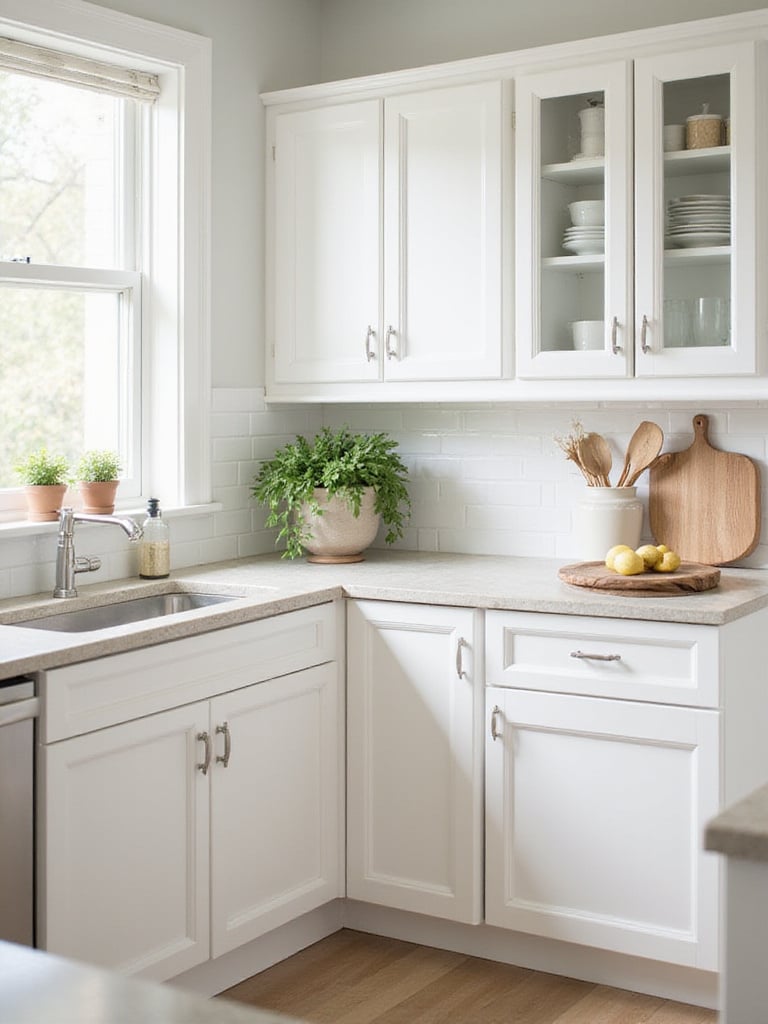
If countertops are the star of the show, the backsplash is the supporting actor that can steal every scene. This is your chance to have some fun! Because your white cabinets are so neutral, they won’t compete with a bold color, an interesting pattern, or a cool texture. This is the perfect place to inject your family’s personality into the kitchen.
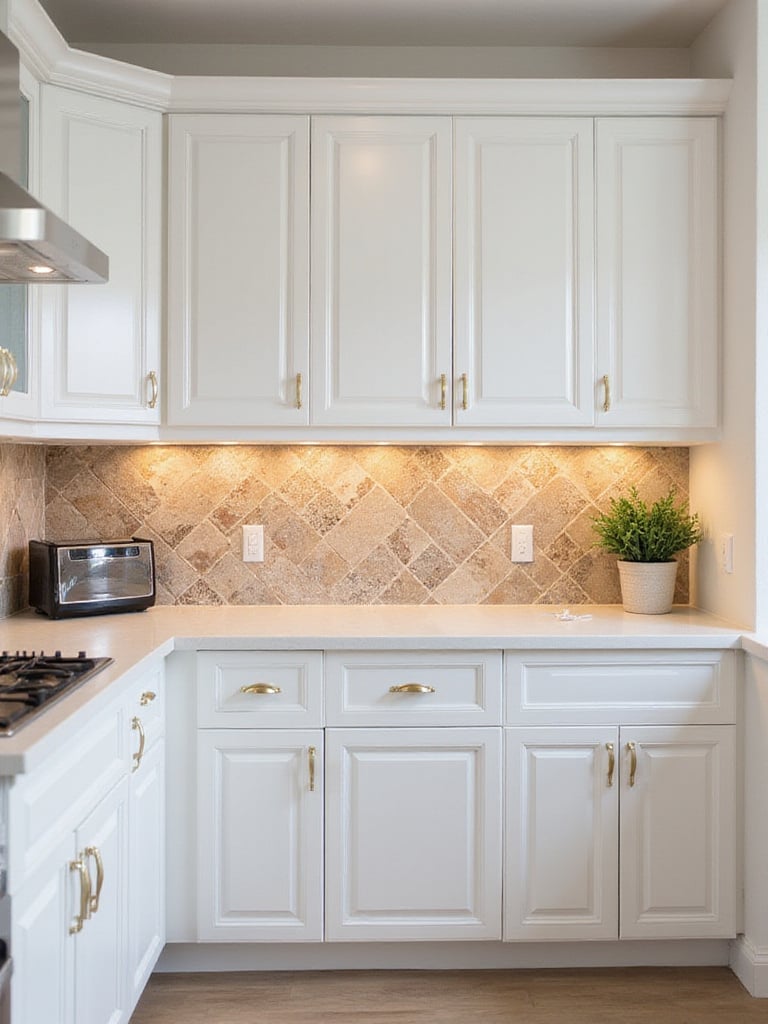
You can use the backsplash to introduce a pop of color—maybe a soft blue or a calming sage green in a classic subway tile. Or you can go for a statement with a graphic, geometric pattern that becomes an instant focal point. Texture is another great way to add interest. A handmade Zellige tile has beautiful, subtle variations that give the wall a shimmering, tactile quality. Sleek, back-painted glass is another fantastic option for a more modern look, and it’s a dream to clean—there are no grout lines!
When thinking about materials, cleanability is still king. Glazed ceramic or porcelain tiles are workhorses—they’re durable, stain-resistant, and easy to wipe down. Natural stone is gorgeous, but be mindful that materials like marble need to be sealed regularly and can be susceptible to stains from acidic things like lemon juice or vinegar. Whatever you choose, consider taking the backsplash all the way up to the ceiling behind open shelves or around a window. It’s a designer trick that makes the whole space feel more custom and finished.
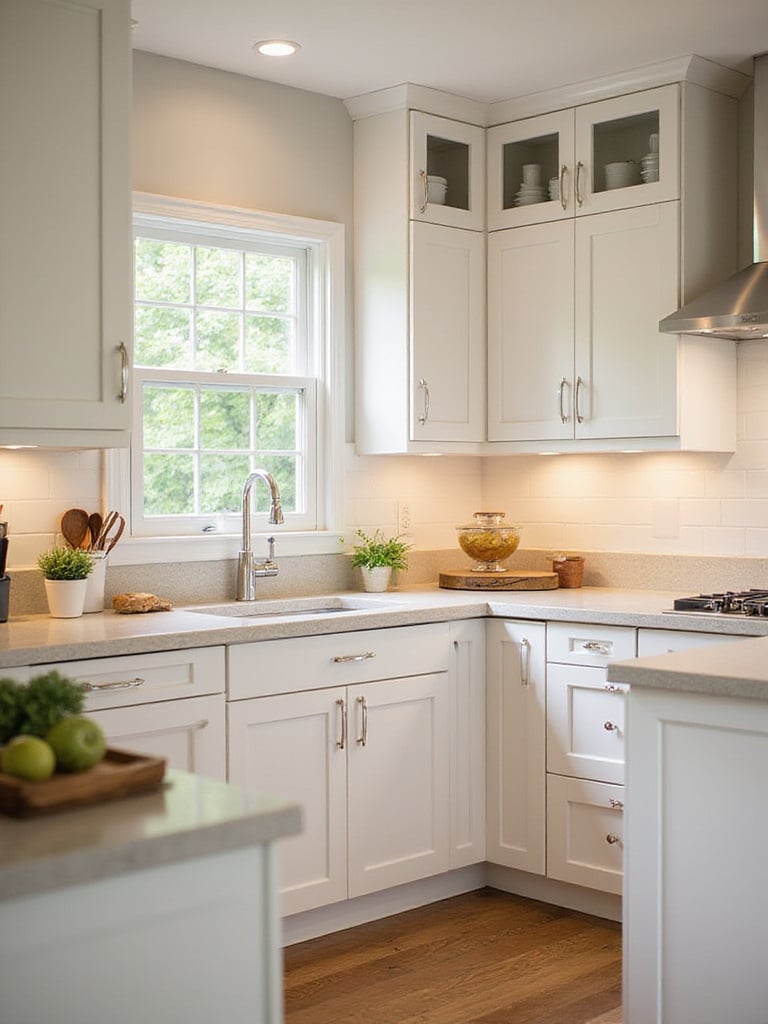
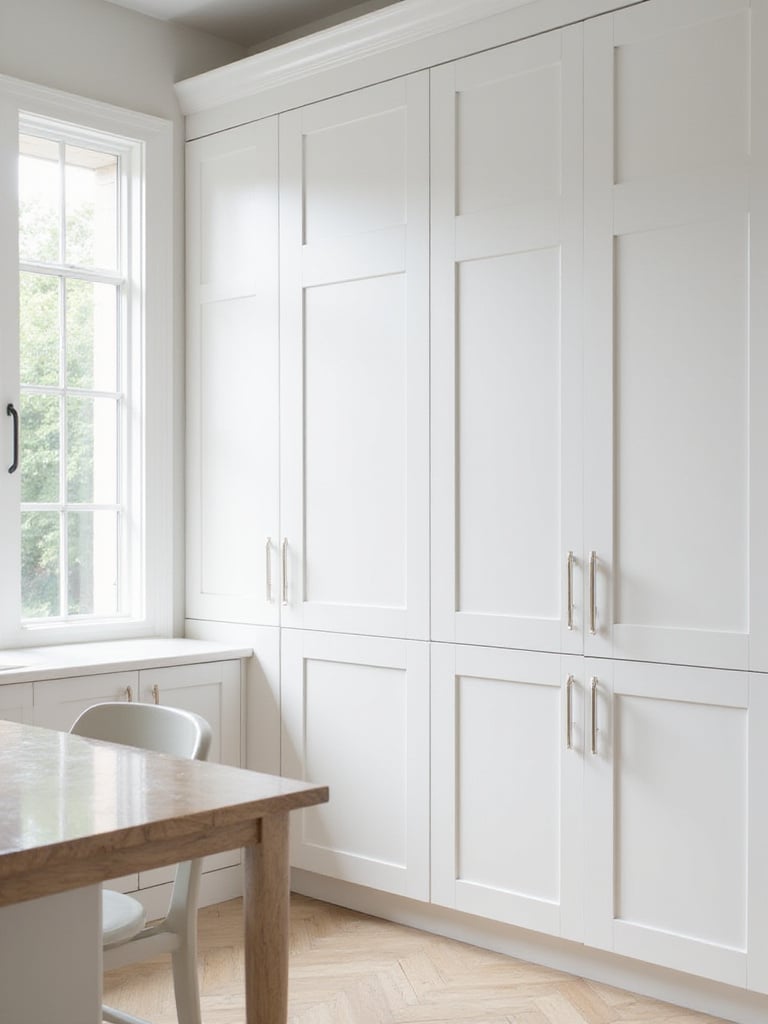
Never underestimate the power of hardware. It is truly the jewelry of your kitchen. These small pieces have a massive impact on the overall style and feel of your space. Think about it: a simple white Shaker cabinet can feel modern, traditional, or farmhouse-chic based entirely on the pulls and knobs you choose. The best part? It’s one of the easiest and most affordable things to change later on.
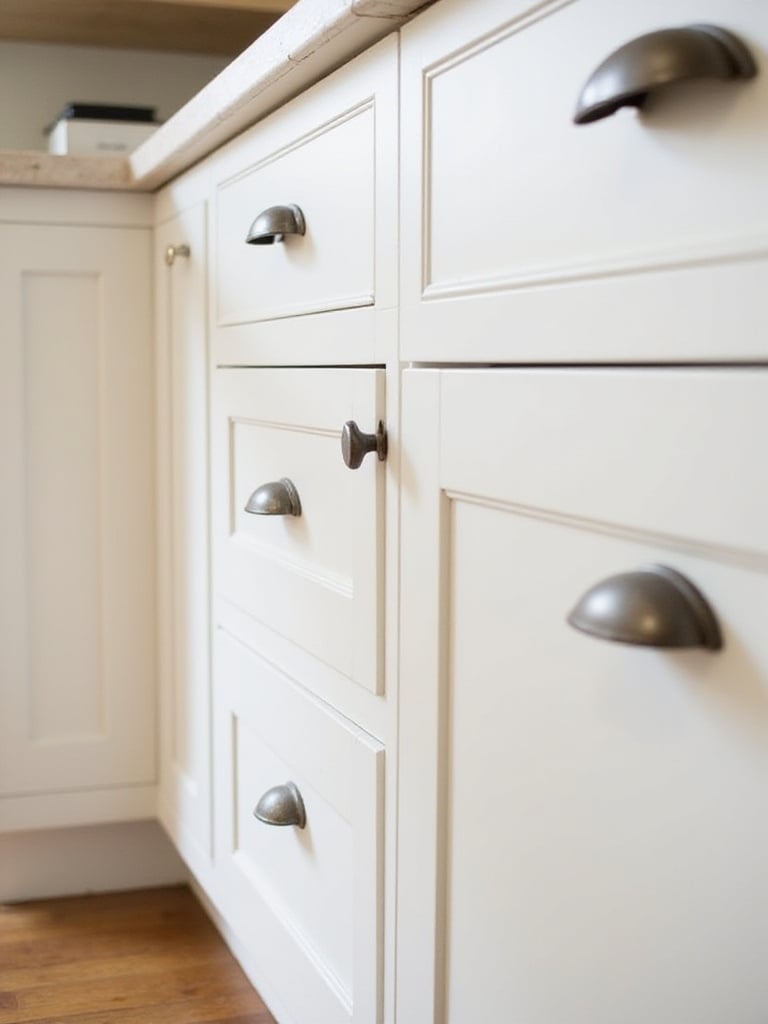
The finish you choose sets the tone. Matte black hardware provides a crisp, graphic contrast that works beautifully for both modern and farmhouse styles, and it’s fantastic at hiding fingerprints—a huge plus for families. Brushed brass or gold tones add a layer of warmth and sophistication, especially when paired with warmer white cabinets. Polished nickel or chrome lean more traditional or contemporary and keep the space feeling cool and clean.
Beyond the finish, think about the shape. Long, simple bar pulls create clean lines and a modern feel. Bin or cup pulls give off a classic, almost vintage vibe. Knobs can be simple and understated or ornate and traditional. I always tell my clients to “test drive” their hardware. Go to a showroom and actually grab the pulls and knobs. You and your family will be touching these things dozens of times a day. They need to feel good in your hand! There’s nothing worse than a pull with a sharp edge that you’re constantly catching your pocket on.
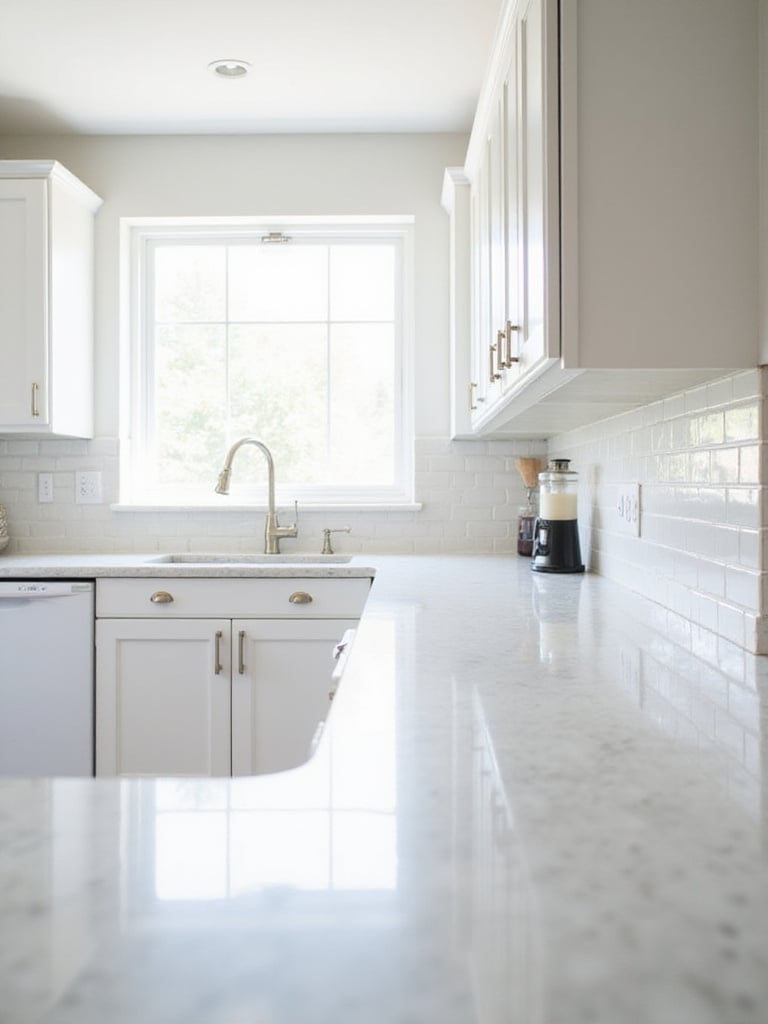
Your flooring is the literal foundation of your kitchen’s design. It grounds the entire space and plays a huge role in the final look and feel. With bright white cabinets, your floor can either continue that light, airy feeling or provide a rich contrast that makes the white pop even more.
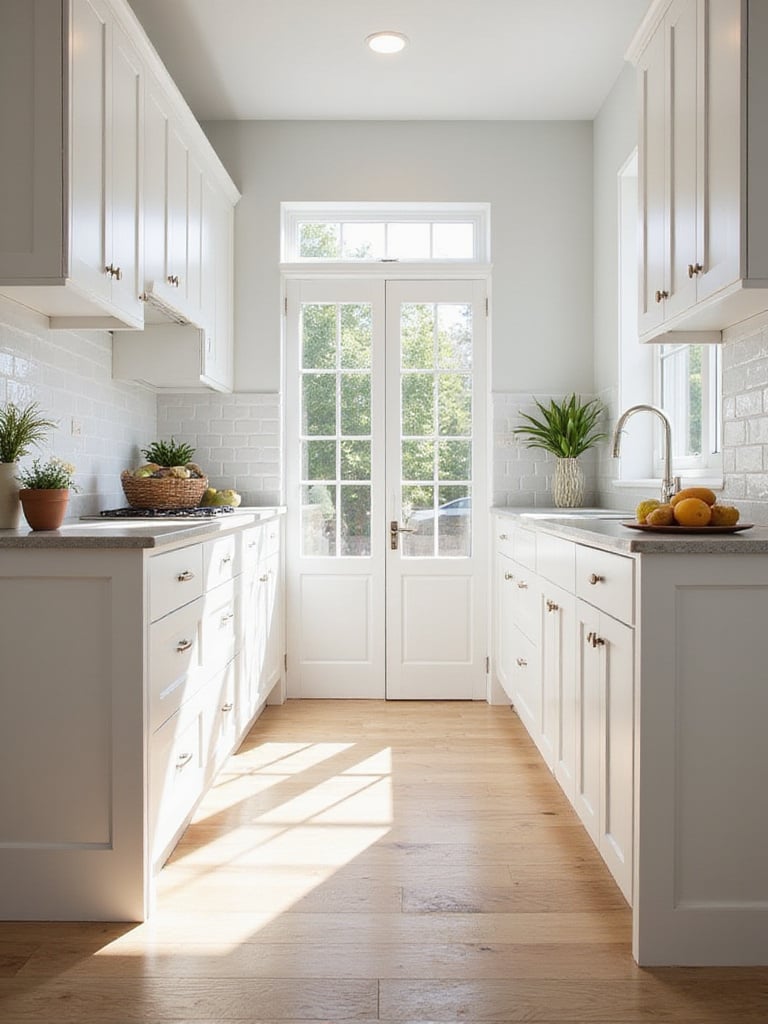
Dark wood floors are a classic choice for a reason. They create a gorgeous, dramatic contrast with white cabinets and bring a ton of warmth into the space, preventing it from feeling too sterile. A medium-toned wood is also a beautiful, timeless option that feels warm and inviting. If you want to lean into the bright and airy aesthetic, a light-colored floor, like pale oak or even a large-format light gray tile, will work wonderfully.
But for families, we have to talk practicality. Let me introduce you to my best friend: Luxury Vinyl Plank (LVP). Today’s LVP looks incredibly realistic, mimicking wood or stone beautifully. But it’s waterproof, scratch-resistant, and much softer underfoot than tile, which is great for long cooking sessions or for little ones who might take a tumble. It’s the unsung hero of family-friendly flooring.
“Your kitchen floor needs to be ready for anything: spilled milk, dropped forks, and muddy paws. Choose durability first, and then find the beauty within that choice.”
Whatever material you choose, bring samples home. Lay them on the floor and look at them next to your cabinet and countertop samples. A floor looks completely different horizontally on the ground than it does vertically on a display wall in a store.
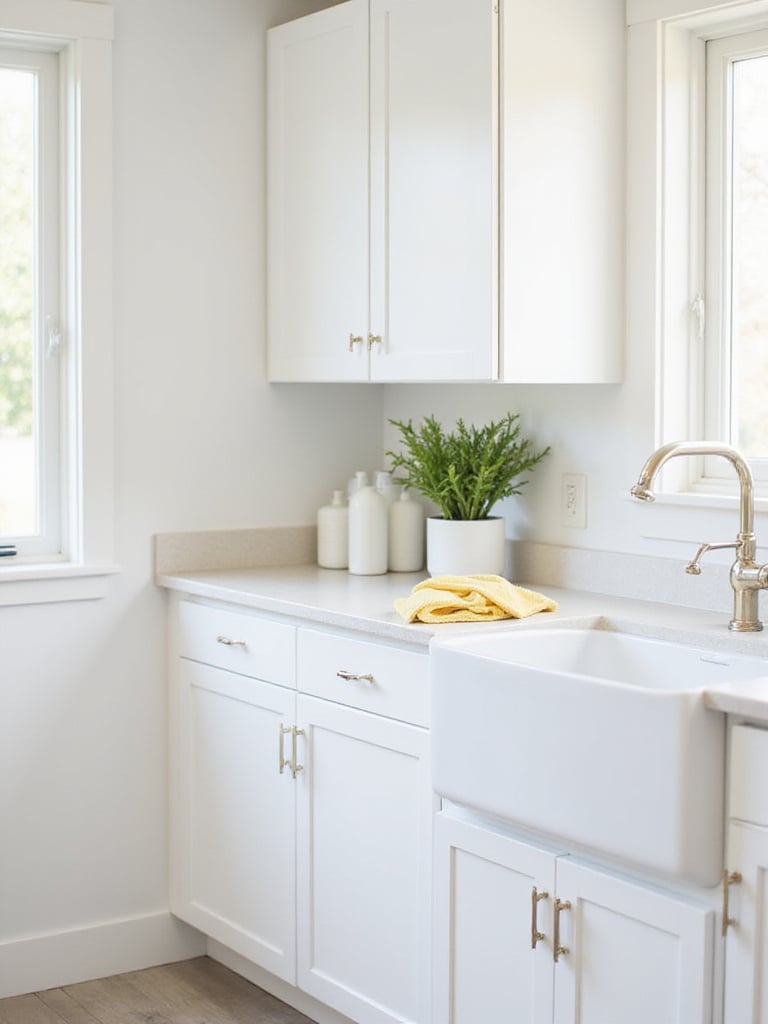
Okay, here’s the secret to living happily with white cabinets: build a simple cleaning routine into your daily life. It sounds daunting, but I promise it’s not. We’re talking five minutes, max. The key is to deal with messes as they happen and prevent the slow, sneaky buildup of grime. Remember how I said white showing everything is a good thing? This is why. You see the splatter, you wipe the splatter. Done.
Keep your tools handy. A designated microfiber cloth and a small spray bottle of gentle cleaner should live under your sink, ready to go. You don’t need harsh chemicals. My go-to recipe is simply a bottle of warm water with a single drop of gentle dish soap (like Dawn). It’s effective enough to cut through daily grease and grime without damaging your cabinet’s finish.
The best time to do this is during your natural kitchen cleanup routine. After you’ve loaded the dishwasher and wiped the counters in the evening, take 60 extra seconds and wipe down the cabinet fronts around the handles, the trash pull-out, and the area around the stove. That’s it! This tiny habit prevents the accumulation of oils from your hands and cooking residue that can attract dirt and become a bigger cleaning job down the line. It quickly becomes second nature, just like wiping the counter.
Even with the best daily habits, bigger messes are going to happen. Someone will splash tomato sauce, or a mysterious sticky handprint will appear. Don’t panic! The absolute most important rule is to act fast. A fresh stain is a thousand times easier to remove than one that has had time to set.
Always start with the gentlest method first. Grab your trusty microfiber cloth and warm, soapy water. Gently wipe the spot. You’d be surprised how often this is all you need. If the stain is a bit more stubborn, it’s time to bring out the secret weapon: a paste made of baking soda and water. It’s a mild abrasive that can lift stains without scratching your finish. Apply the paste to the spot, let it sit for a minute or two, and then gently wipe it away with a damp cloth. This works wonders on greasy splatters and many food stains.
For specific kid-related disasters, like a rogue crayon or marker, a little rubbing alcohol on a cotton swab can often do the trick. Just be sure to test it in an inconspicuous spot first (like the inside of a cabinet door) to make sure it doesn’t affect your finish. After you’ve successfully removed the stain, always give the area a final wipe with a clean, damp cloth and then dry it thoroughly to prevent any water spots.
One of the biggest fears people have about white cabinets is that they’ll turn yellow over time. This is a valid concern, but it’s also largely preventable. Yellowing is usually caused by two main culprits: prolonged exposure to direct sunlight and the gradual buildup of airborne grease and grime from cooking.
Your number one defense is a good quality range hood. Use it! Every single time you cook—especially if you’re frying or searing—turn on that fan. It will pull grease and moisture out of the air before they have a chance to settle on your beautiful white surfaces. If your kitchen gets a lot of intense, direct sunlight, consider adding a UV-protective film to the windows. It’s virtually invisible but will dramatically reduce the sun exposure that can break down paint finishes over time.
Regular cleaning also plays a huge role. That daily wipe-down we talked about prevents the micro-layer of grease from building up. If you do notice a slight dinginess appearing, the baking soda paste we discussed earlier can often help lift that surface-level discoloration. Choosing a high-quality, non-yellowing paint or finish from the start is also a critical preventative step. Don’t cheap out on the paint!
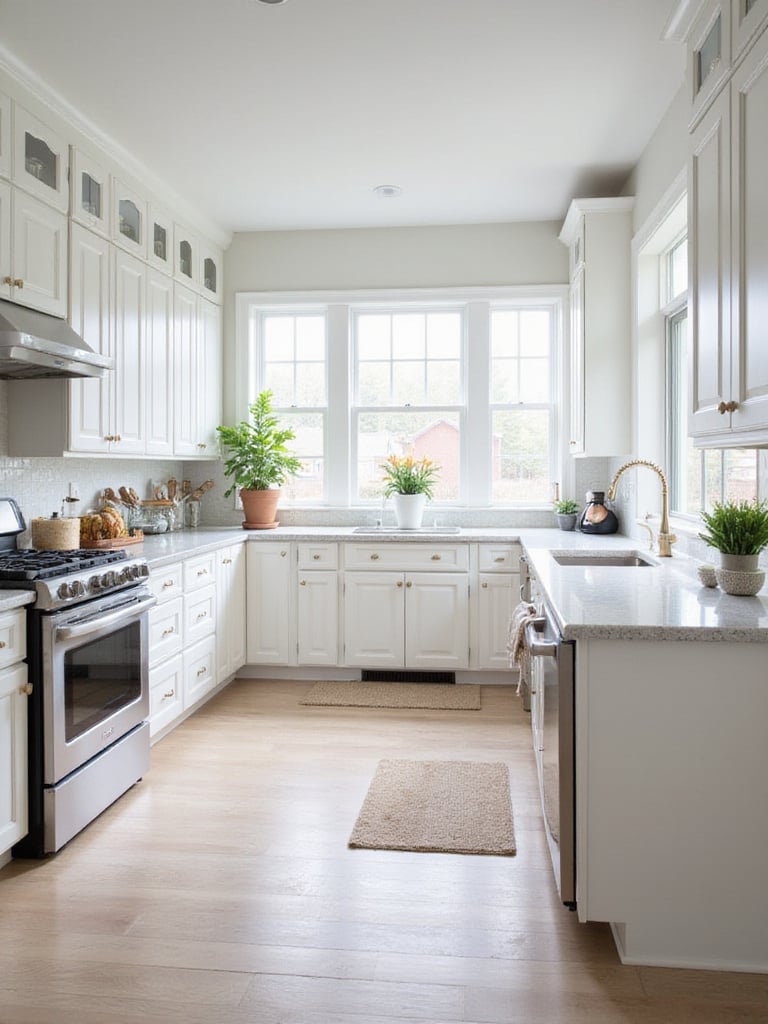
You chose white cabinets to make your kitchen bright, so let’s make sure your lighting plan does them justice! The right lighting can take a white kitchen from nice to absolutely stunning. It’s all about creating layers of light that work together to make the space functional and beautiful at any time of day.
There are three main layers of light you need to think about:
Here’s a pro tip: put everything on a dimmer. Dimmers are a game-changer for families. You can have the lights on full blast when you’re cooking and the kids are doing homework, and then dim them down for a calm, relaxing family dinner or a late-night chat over a cup of tea. It allows your kitchen to have different moods that adapt to your family’s needs throughout the day.
If you’re investing in a new kitchen, you want a look that feels fresh and relevant for years, not something that will feel dated in five years. The key to achieving a timeless look with white cabinets is to focus on classic silhouettes and quality materials.
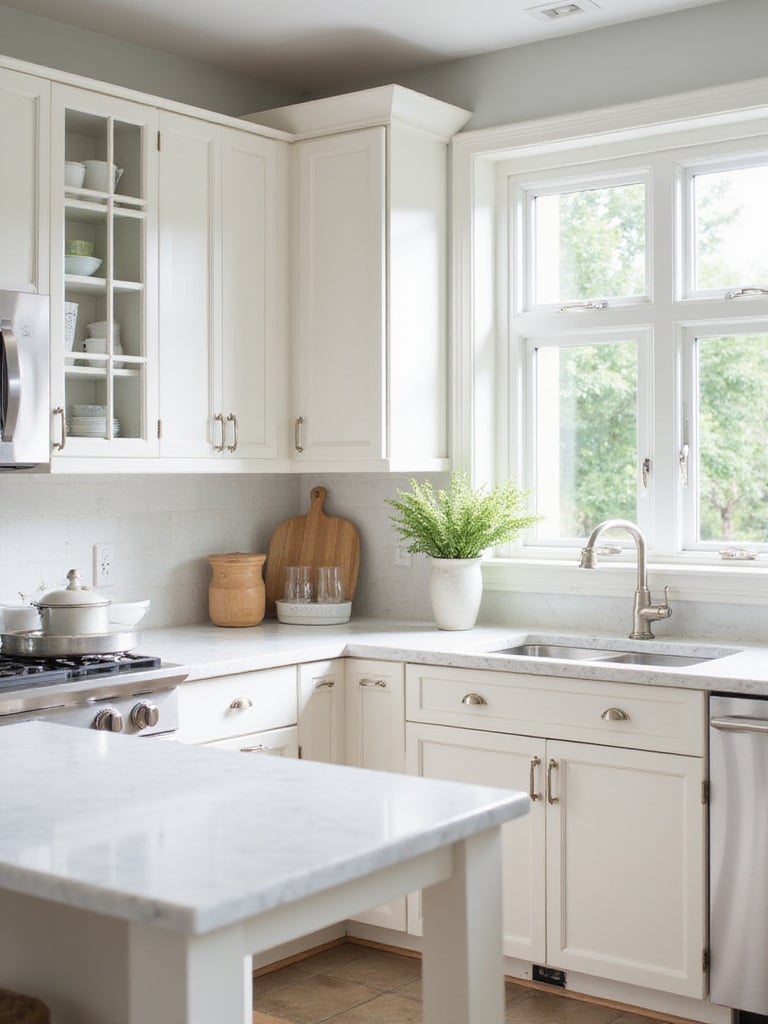
When it comes to the cabinet doors themselves, you can’t go wrong with a Shaker-style door. It has been popular for over a century for a reason. Its simple, clean lines work with virtually any style, from traditional to contemporary. A simple flat-panel or slab door is another excellent choice for a timeless, modern look. Try to avoid anything overly ornate or with trendy details that might scream “2020s” in a decade.
Pair these classic cabinet styles with equally timeless materials. Natural stone countertops, a simple ceramic subway tile backsplash, and hardwood floors are all elements that have proven their staying power. They age gracefully and develop a patina over time, rather than just looking worn out. This approach creates a solid, neutral foundation that you can easily update with new paint colors, hardware, or decor as your tastes change, ensuring you’ll love your kitchen for the long haul.
A kitchen renovation is a major investment, so it’s important to understand where the money goes. When it comes to cabinets, the cost can vary dramatically based on whether you choose stock, semi-custom, or fully custom options.
The white finish itself doesn’t usually add a significant cost, but don’t forget to budget for installation, which is a big piece of the puzzle. While it might be tempting to save money by doing it yourself, I strongly advise professional installation, especially for white cabinets where every tiny gap and imperfection is more visible. A pro will ensure everything is perfectly level and secure, protecting your investment. And don’t forget the hardware! It can range from a few hundred to a few thousand dollars, so factor that in from the start.
This is a crossroads many homeowners face: do you give your existing cabinets a facelift with paint, or is it time to rip them out and start fresh? The right answer depends entirely on the condition of your current kitchen.

Painting is a fantastic, budget-friendly option if—and this is a big if—your existing cabinets are structurally sound, made of good quality material (solid wood is ideal), and the layout of your kitchen already works for your family. A professional paint job can completely transform a kitchen for a fraction of the cost of replacement. But be warned: a good paint job is all about the prep work. It involves intense cleaning, sanding, priming, and multiple coats of high-quality paint. It’s a labor-intensive process.
It’s time to replace your cabinets if the boxes are falling apart, the drawers are sticking, or the layout is just plain dysfunctional. If you’re constantly complaining about a lack of storage or a poor workflow, no amount of paint will fix that. Investing in new cabinets allows you to completely rethink the space to better serve your family’s needs, incorporating modern storage solutions like deep drawers for pots, pull-out pantries, and dedicated recycling centers.
While you should always design a kitchen that you and your family love, it’s nice to know that your choices are also a smart financial investment. And when it comes to resale value, a bright, updated kitchen is one of the single most powerful assets a home can have.
A realtor friend once told me, “Buyers don’t just buy a house; they buy a kitchen. A great kitchen can sell a whole property.”
White kitchens have a broad, universal appeal. They signal to potential buyers that the space is clean, modern, and well-maintained. A potential buyer might not love a bold blue or trendy green kitchen, but almost nobody objects to a beautiful white kitchen. It allows them to envision themselves in the space, adding their own personal touches. In today’s market, where buyers form their first impression from online photos, a bright white kitchen photographs beautifully and can make your listing stand out from the crowd. A minor kitchen remodel, often centered around a cabinet refresh, consistently ranks as one of the home improvements with the highest return on investment.
If you love the brightness of white but also crave a bit of color or drama, a two-tone kitchen might be the perfect solution for you! This is a fantastic way to add visual interest and personality while still reaping the benefits of white cabinets.
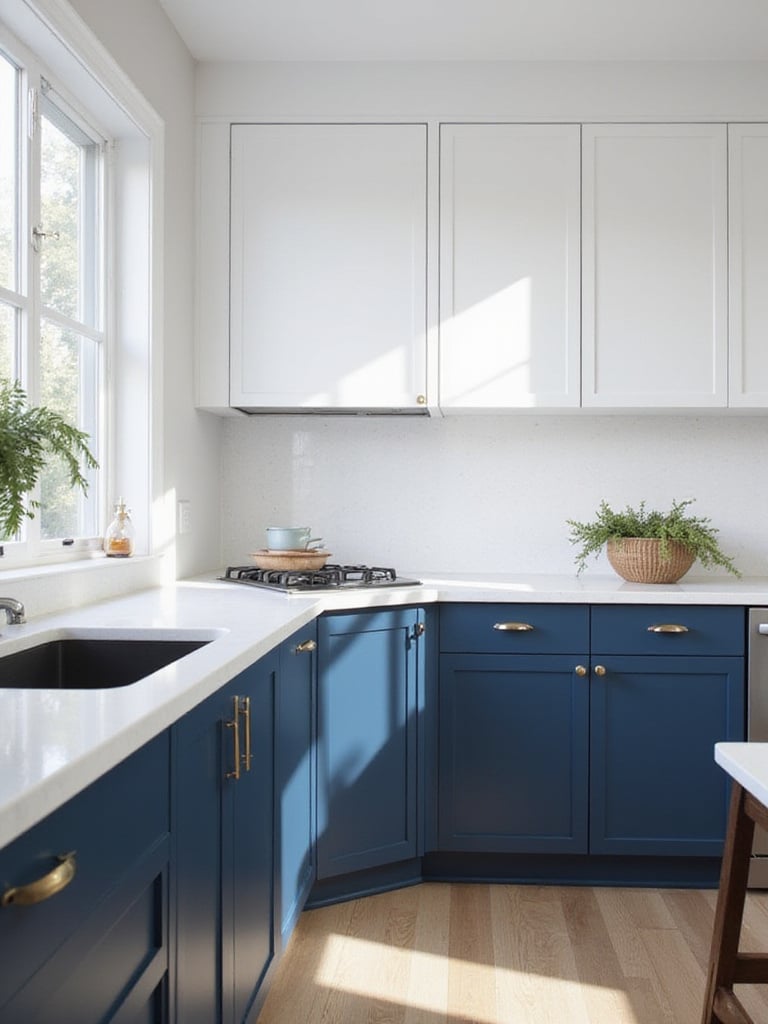
The most popular—and practical—way to do this is to use white for the upper cabinets and a darker or more colorful shade for the lower cabinets. I love this approach for families. The upper white cabinets keep the space feeling light and airy at eye level, while the darker base cabinets are fantastic at hiding the scuffs, kicks, and spills that inevitably happen down low. A deep navy blue, a rich charcoal gray, or even a warm wood tone on the bottom can ground the space beautifully.
Another great strategy is to keep the perimeter cabinets all white and then use a contrasting color for the kitchen island. This turns the island into a true focal point and a defined hub for socializing and activity. To keep the look cohesive, just make sure you use the same cabinet door style and hardware throughout the space. It’s the perfect compromise for those who can’t decide between light and dark.
We’ve already talked about the importance of lighting layers, but let’s dive a little deeper into how you can use light to really showcase your beautiful white cabinets and set the mood for your family. It’s not just about being able to see; it’s about creating an atmosphere.
The color temperature of your light bulbs makes a huge difference. Measured in Kelvins (K), this determines whether the light feels warm (yellowish) or cool (bluish). For a kitchen, I generally recommend something in the 3000K to 3500K range. It’s a soft, neutral white that keeps colors looking true (important for cooking!) without feeling as sterile as the 4000K+ lights you might find in an office.
Again, I have to sing the praises of dimmers. They are the key to a truly flexible, family-friendly kitchen. Imagine this: the lights are bright and energetic in the morning for the breakfast rush. In the afternoon, you can dim them slightly for a calm homework environment. During dinner, you can lower them even more for a cozy, restaurant-like feel. This ability to control the intensity of your light allows your kitchen to be a hardworking task space one moment and a relaxing family hub the next, all with the simple turn of a dial.
You’ve made the investment, and your white kitchen is stunning. Now, let’s make sure it stays that way. A simple long-term maintenance plan will protect your cabinets from the wear and tear of family life and keep them looking fresh for a decade or more. This isn’t about obsessive cleaning; it’s about being proactive.
Beyond your daily wipe-down, plan for a “deep clean and inspection” once a season. This is when you’ll give all the cabinet faces a thorough but gentle cleaning and take a closer look at the high-traffic areas. Check for any loose hinges or pulls and tighten them as needed. Look for any small nicks or chips in the paint, especially around the sink and trash pull-out.
The most important part of your long-term plan is having a touch-up kit ready to go. When you first get your cabinets, ask the installer or painter for a small amount of leftover paint or a touch-up pen. Store it somewhere safe. When you find that first inevitable nick, you can clean the area, dab on a tiny amount of paint, and it will be virtually invisible. Addressing these small injuries right away prevents moisture from getting under the paint and causing bigger problems down the line. It’s a tiny task that makes a huge difference.
Choosing white kitchen cabinets is about so much more than just following a trend. It’s about deciding to create a bright, versatile, and joyful heart for your home. It’s a choice that says you believe your home can be both beautiful and lived-in, both stylish and ready for the beautiful chaos of family life. Yes, they require a little bit of mindful care, but the payoff is a space that feels energizing, adaptable, and timeless.
In the end, the goal isn’t to have a “perfect” kitchen that looks like it’s never been touched. The goal is to have a kitchen that works for you, that grows with you, and that serves as the backdrop for countless memories. From rolling out cookie dough on the island to spreading out homework after school, those white cabinets will be there, reflecting the light and life of your family. And every little mark and memory is a sign of a home well-loved.


