Physical Address
304 North Cardinal St.
Dorchester Center, MA 02124
Physical Address
304 North Cardinal St.
Dorchester Center, MA 02124
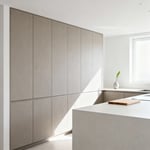
Living in New York City taught me a valuable lesson about small bathroom interior design: they’re not a limitation, but an invitation to get creative. As an architect, I’ve transformed countless tiny bathrooms into spaces that feel surprisingly spacious and luxurious. Today, I’m excited to share 18 game-changing ideas that will help you maximize your small bathroom interior’s potential. These aren’t just theoretical concepts – they’re tried-and-tested solutions I’ve implemented in real projects.
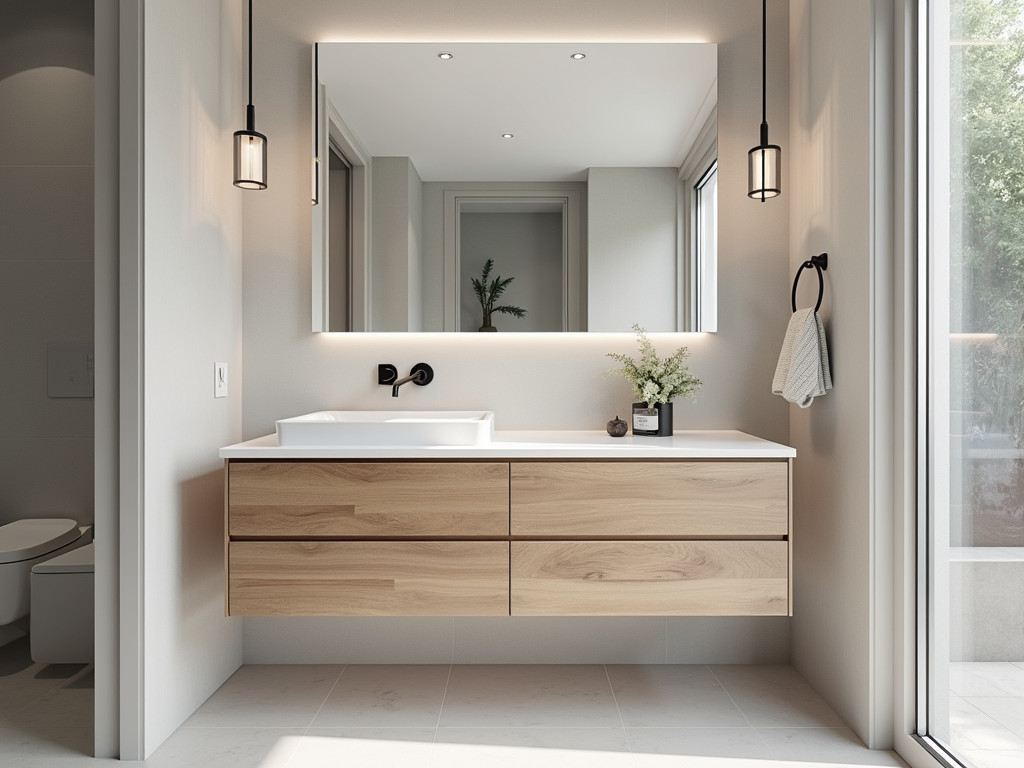
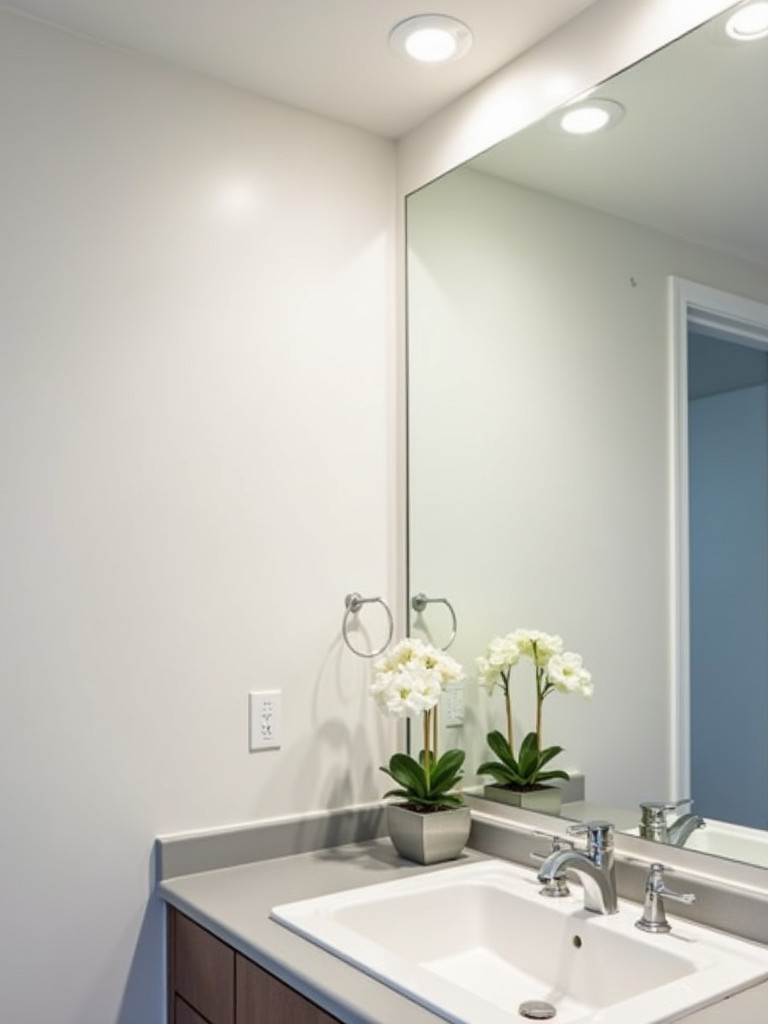
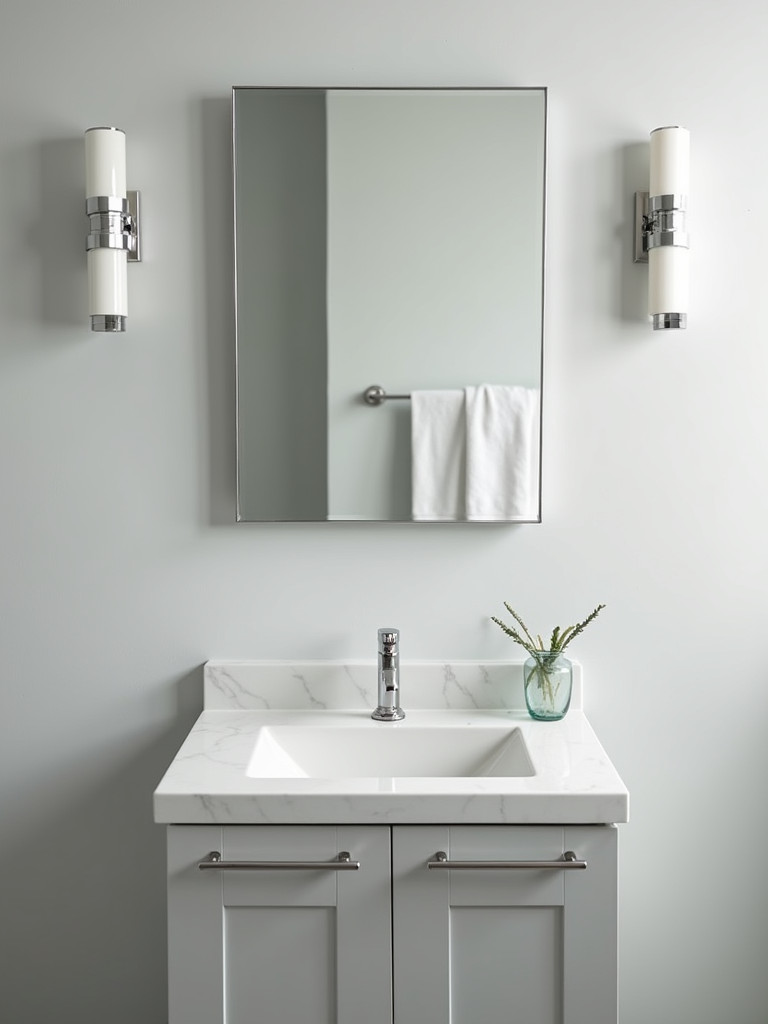
One of the most frequent questions I get from clients is about floating vanities. While the physical space saved might seem minimal – typically about 6-8 inches in height – the visual impact is dramatic. A floating vanity creates an illusion of space by allowing your eye to travel all the way to the wall, making the room feel more open and airy.

When selecting a floating vanity, many people worry about its weight capacity. Let me put your mind at ease: modern floating vanities can typically support between 150-300 pounds when properly installed. I always recommend choosing a model with built-in storage and opting for a light-colored wood finish, which helps maintain that sense of airiness while providing practical storage solutions. Speaking of wall-mounted fixtures, let’s explore another space-saving solution that pairs beautifully with floating vanities…
Did you know that corner sinks first gained popularity in the 1920s during America’s apartment-building boom? This space-saving innovation has stood the test of time, and for good reason. In my experience designing small bathroom interiors, a corner sink often becomes my secret weapon for maximizing limited square footage.
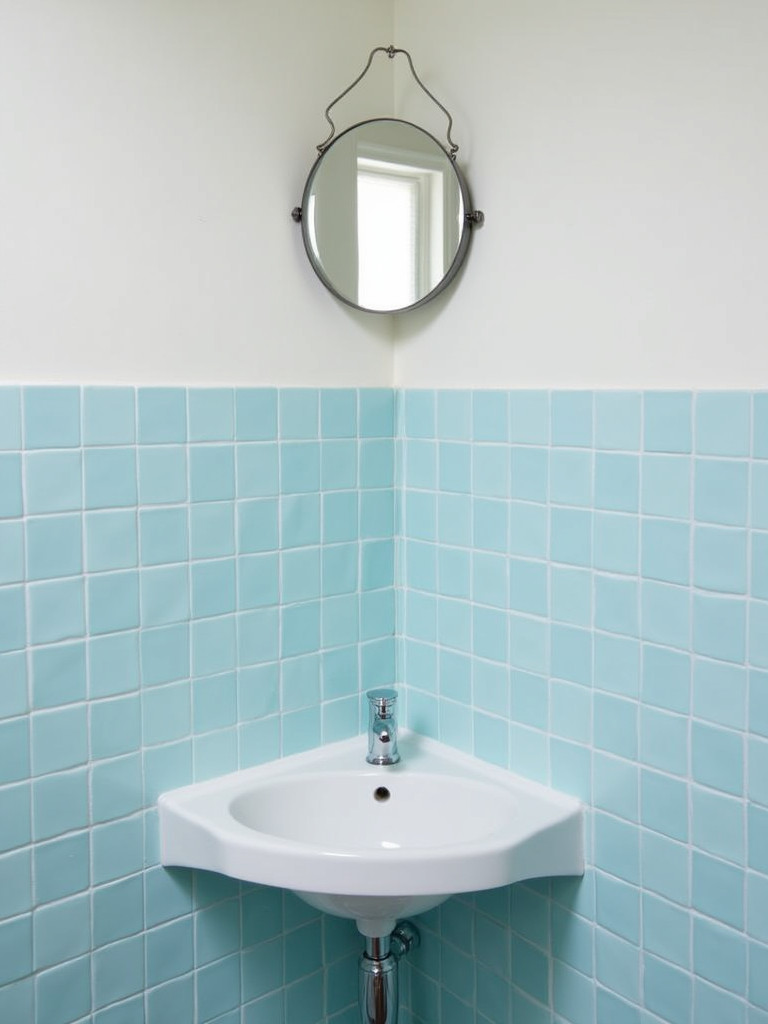
The truth is, while corner sinks can be an excellent solution, they require careful planning. First, measure your corner space precisely – you’ll need at least 16 inches on each wall for a standard corner sink. I love pairing corner sinks with corner mirrors to create a cohesive look, and the space underneath can be cleverly utilized for storage with custom shelving or a small cabinet. One pro tip I always share: ensure your plumbing is easily accessible before committing to a corner sink installation.
When designing a small bathroom interior, every inch counts. Wall-mounted faucets offer an elegant solution that not only saves precious counter space but also adds a touch of sophistication to your design. The key is having a wall that can support the plumbing infrastructure – typically, you’ll need a wall at least 6 inches thick to accommodate the mounting hardware and water lines.
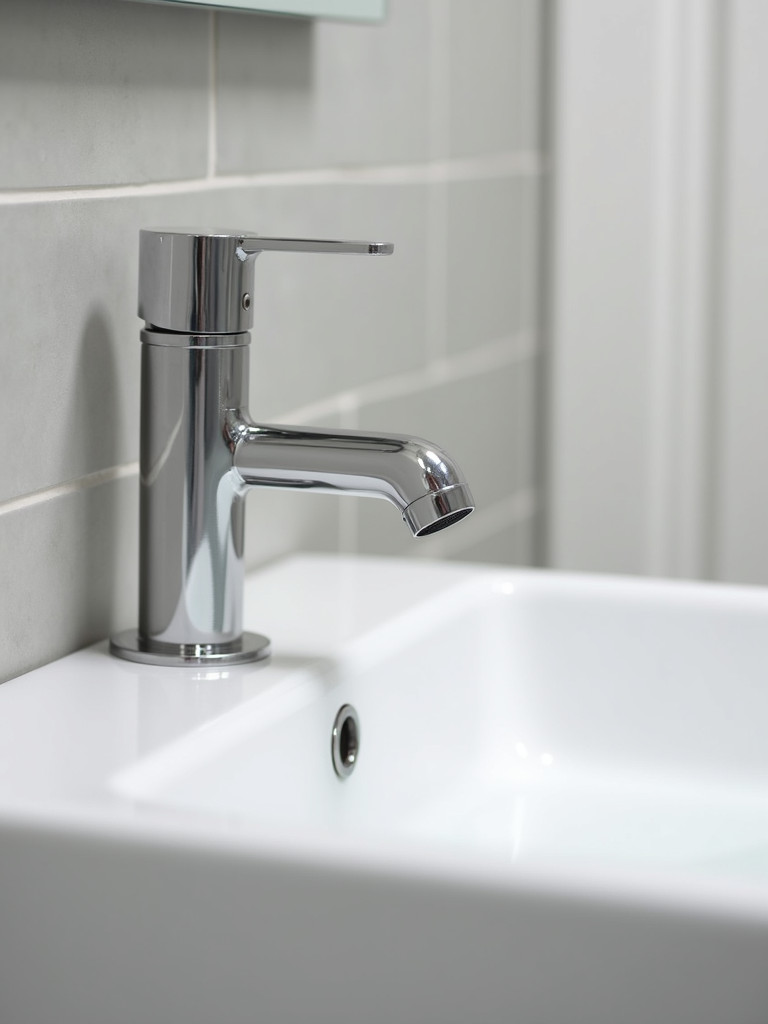
I particularly love pairing wall-mounted faucets with vessel sinks for a modern, elevated look. The combination creates a striking focal point while maximizing usable counter space. One of my favorite tricks is to choose a brushed nickel finish, which not only looks contemporary but also helps hide water spots and fingerprints. Remember to work with a professional plumber for installation – proper waterproofing and support are crucial for long-term success.
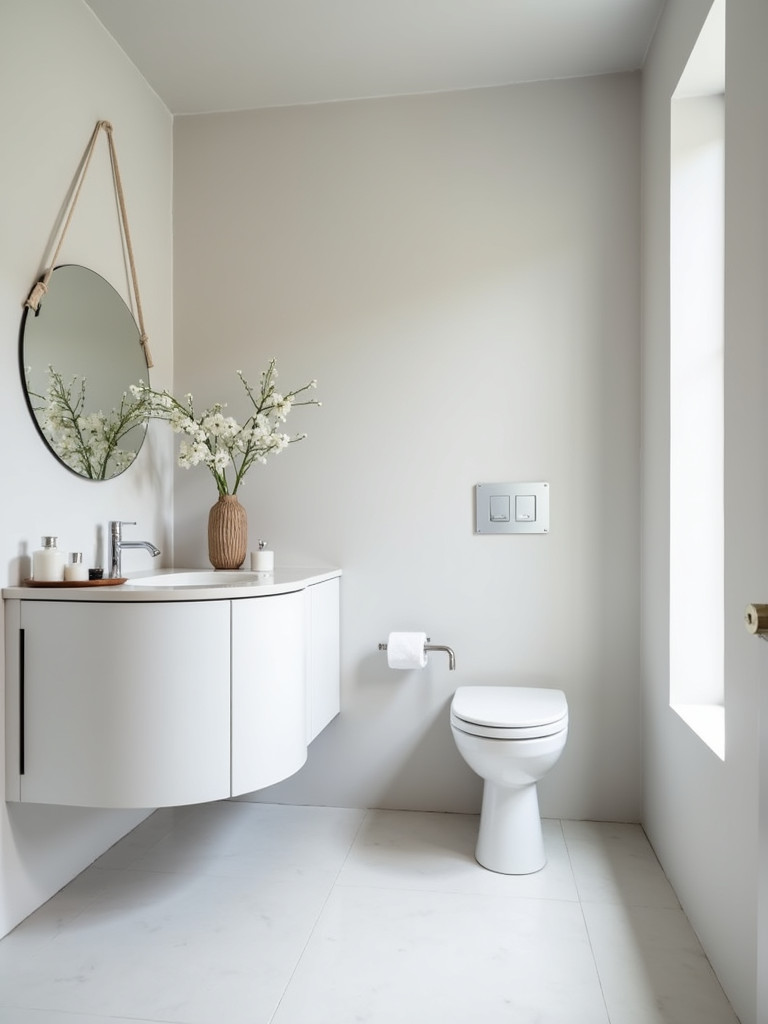
Throughout my career transforming small bathroom interiors, I’ve discovered that mirrors are perhaps the most powerful tool in a designer’s arsenal. The question I hear most often is whether a large mirror might overwhelm a small space. The answer? Quite the opposite! A well-placed large mirror can literally double the perceived size of your bathroom, creating an illusion of depth that transforms the entire room.
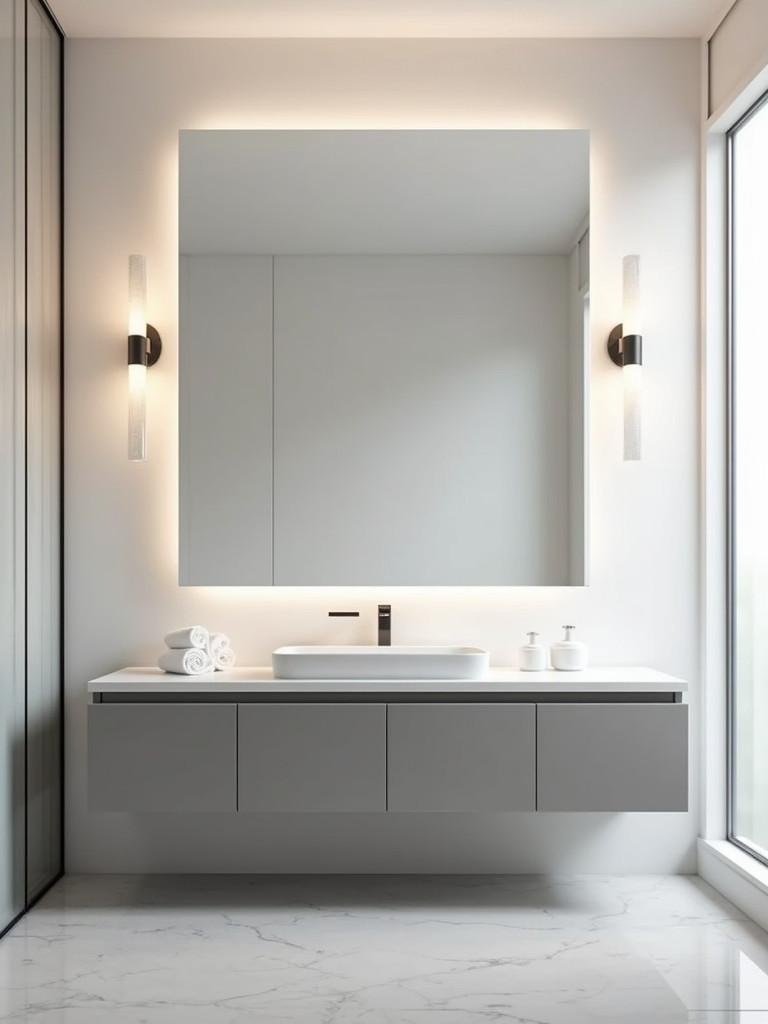
The key lies in strategic placement and proper proportions. I recommend installing your mirror from vanity height up to about eye level of the tallest household member, and extending it as wide as your vanity or wall allows. For maximum impact, consider a frameless design – it creates a seamless look that enhances the space-expanding illusion. One of my favorite tricks is to install a mirror with built-in lighting around the edges, providing even, flattering illumination for your daily routines while adding a modern touch to your small bathroom interior.
In my experience renovating small bathroom interiors, few elements make as dramatic a difference as switching to a glass shower enclosure. While some clients worry about cleaning and maintenance, let me tell you – the visual payoff makes it absolutely worthwhile. A clear glass shower enclosure creates an uninterrupted sight line across your bathroom, making the space feel significantly larger and more cohesive.
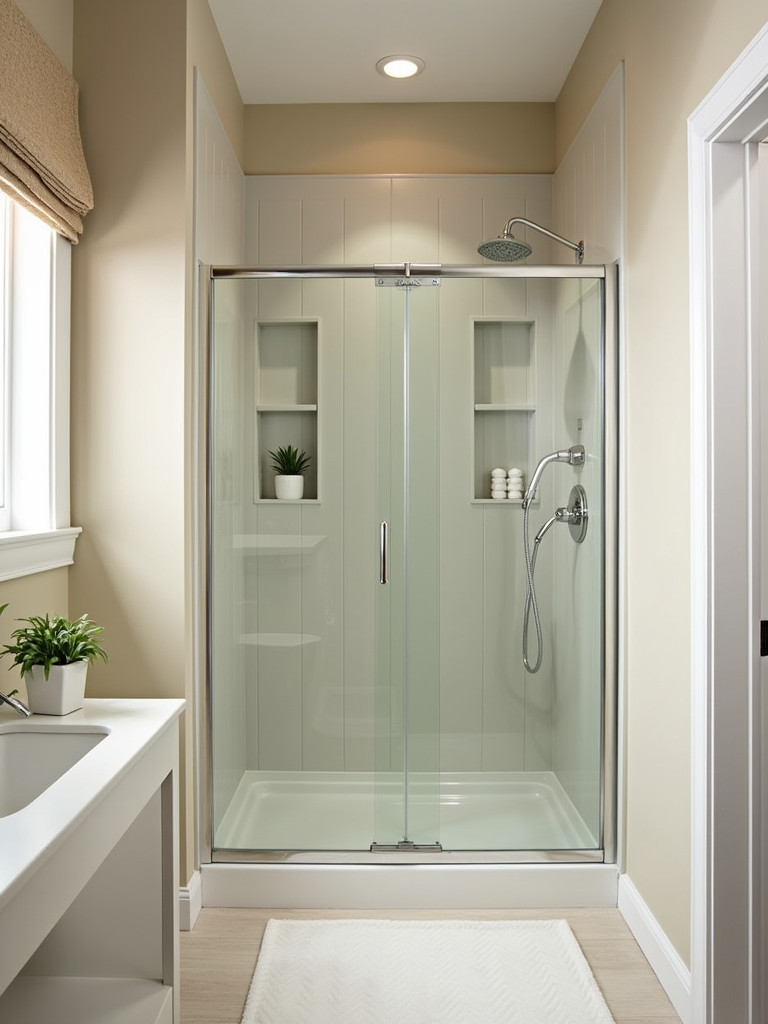
I recommend opting for frameless designs whenever possible – they’re not only more elegant but also easier to clean since there are fewer nooks where soap scum can accumulate. One of my favorite industry secrets is to specify glass treated with a protective coating that repels water and reduces spotting. It’s a small upfront investment that pays dividends in reduced cleaning time. When planning your glass enclosure, don’t forget to consider the shower door swing – in tight spaces, I often recommend a sliding door or a pivoting panel that requires less clearance.
If there’s one thing I’ve learned from countless small bathroom interior renovations, it’s that storage solutions can make or break a space. Built-in shelves are my go-to solution, and clients often ask me where they can incorporate them without compromising the room’s flow. The beauty of built-in shelves lies in their versatility – they can transform otherwise wasted space into functional storage while maintaining clean lines.
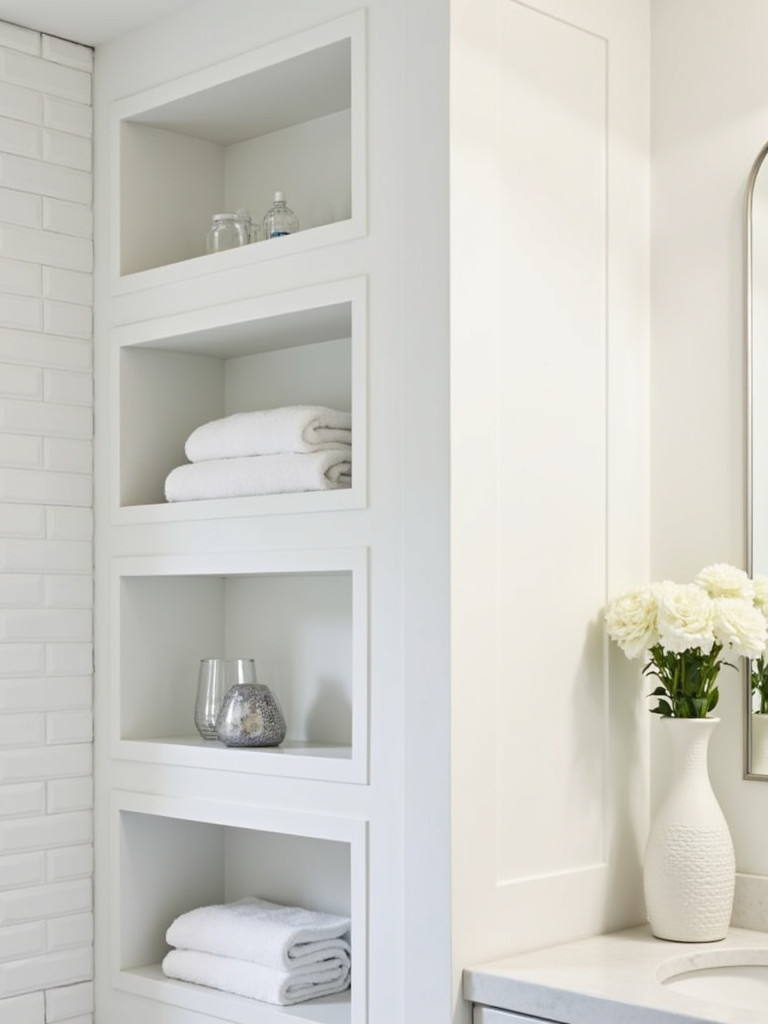
My favorite spots to incorporate built-ins are in shower walls (perfect for toiletries), between wall studs (creating zero-footprint storage), and above toilets (maximizing typically wasted space). When designing built-ins, I always recommend using moisture-resistant materials – tile-lined niches for shower areas and marine-grade wood or PVC for other spaces. A pro tip I share with all my clients: plan your shelf heights based on what you’ll actually store. Nothing’s more frustrating than a beautiful built-in that’s just an inch too short for your favorite toiletries!
One of the most common challenges I face when redesigning small bathroom interiors is helping clients who are renting and can’t make permanent changes. This is where vertical storage solutions become absolutely crucial. By thinking upward instead of outward, you can maximize every square inch of your bathroom without making any permanent alterations to the space.
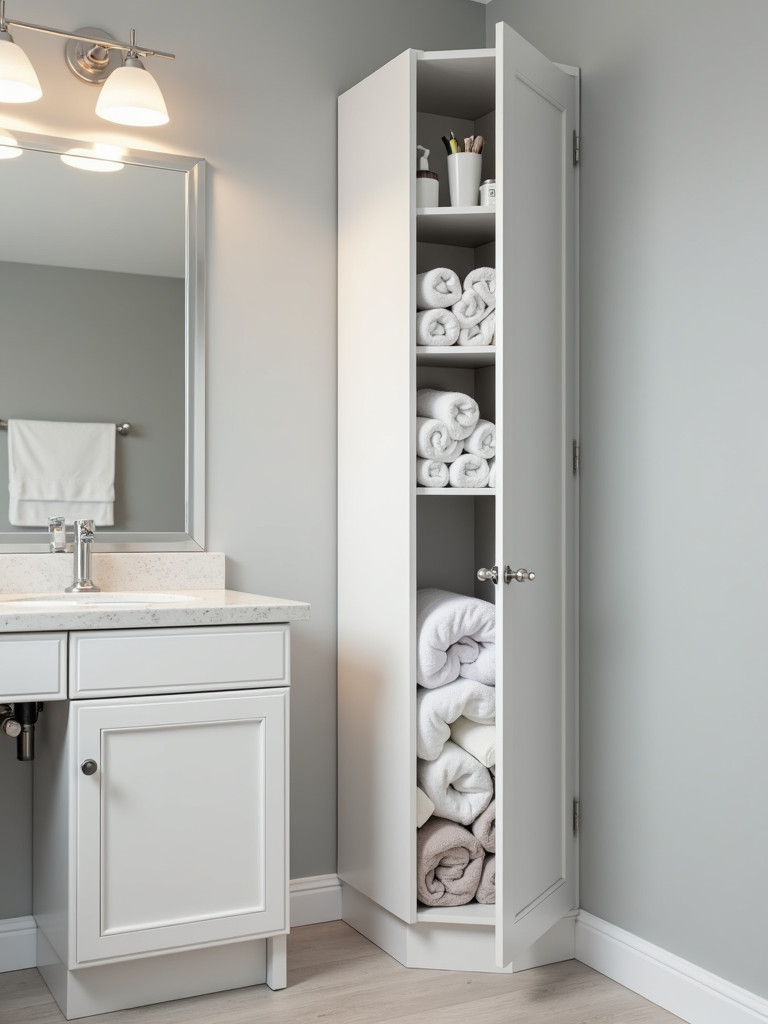
I always recommend starting with tall, narrow storage units that extend toward the ceiling. These pieces not only provide ample storage but can actually make your ceilings appear higher – a win-win in small spaces! For renters, I suggest using over-the-toilet organizers, door-hanging organizers, and tension-rod systems that can be easily installed and removed without damage. Pro tip: when organizing vertical storage, place frequently used items at eye level and seasonal items up high. The visual trick of drawing the eye upward not only makes your space feel larger but creates an organized, clutter-free environment.
Throughout my years of small bathroom interior design, I’ve experimented with countless color schemes, but I keep coming back to one truth: light colors are transformative in small spaces. While white is a classic choice, there’s actually quite a bit of flexibility within a light palette. I typically recommend starting with a base of warm white or light gray for walls and fixtures, then layering in soft, subtle colors like pale blue, sage green, or barely-there blush.
The science behind this choice is fascinating – light colors reflect more light around the room, making the space feel larger and more open. Here’s an insider tip: use a satin finish on walls rather than flat – it reflects more light and stands up better to bathroom humidity. When selecting your palette, consider how different times of day affect the lighting in your space. I always encourage clients to test paint samples during morning, afternoon, and evening hours before making a final decision.
One question I frequently encounter when designing small bathroom interiors is whether a statement lighting fixture might overwhelm the space. In my experience, the right statement piece can actually become the perfect focal point that ties the entire room together. The key is choosing a fixture that balances form and function while complementing your overall design scheme.
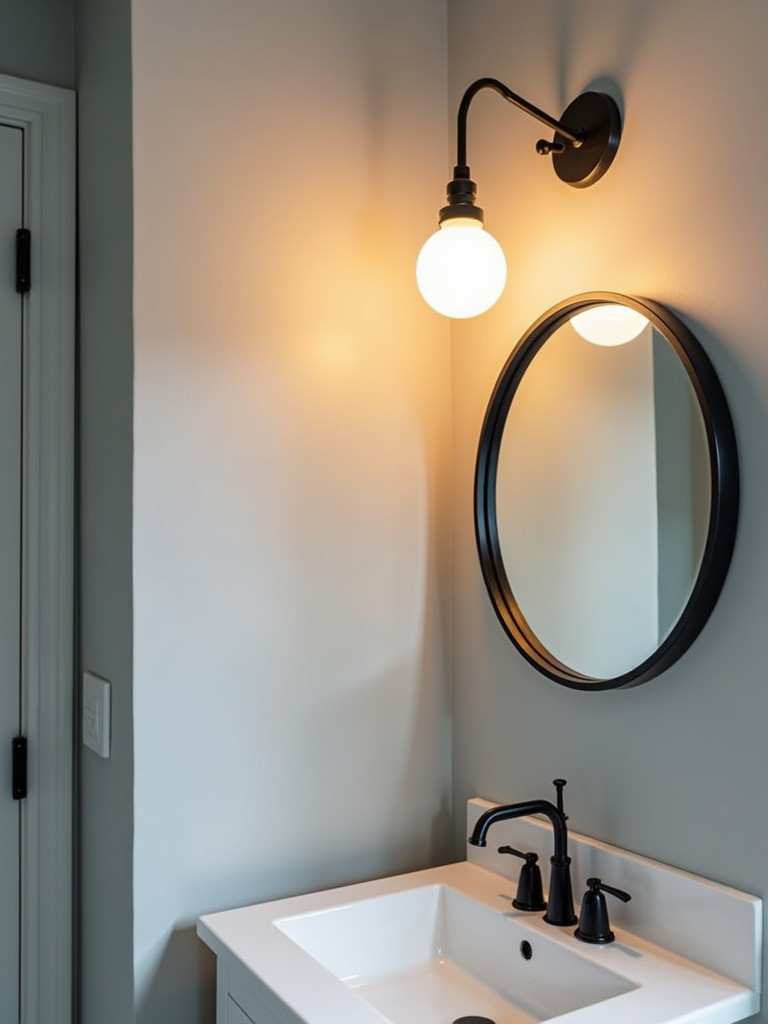
When selecting a statement fixture, consider both the style and the quality of light it provides. I often recommend installing a unique pendant light or an elegant sconce that can serve as both task lighting and art piece. Remember, bathroom lighting needs to be rated for damp locations, and I always suggest installing it on a dimmer switch for versatility. One of my favorite design tricks is to combine a statement fixture with subtle recessed lighting – this creates layers of light that can be adjusted throughout the day.
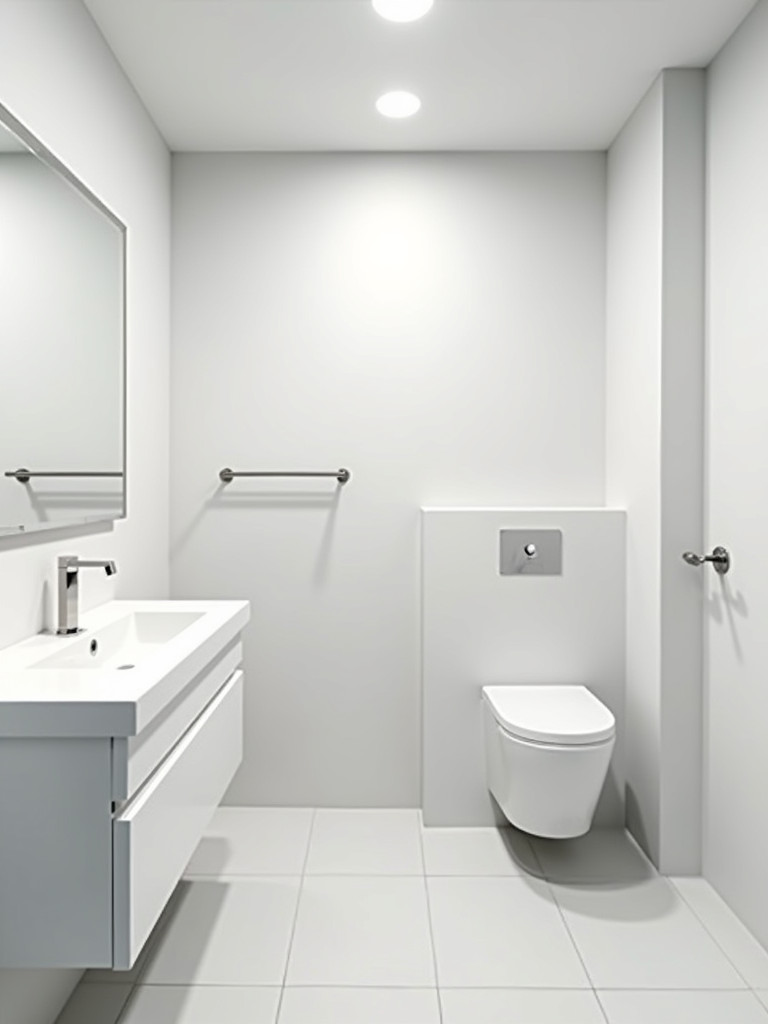
In my practice, I’ve found that switching to a pocket door can reclaim up to nine square feet of floor space in a small bathroom interior – space that would otherwise be dedicated to the door swing. Many clients ask about the soundproofing capabilities of pocket doors, and I’m happy to report that modern pocket door systems can be just as effective as traditional doors when properly installed.
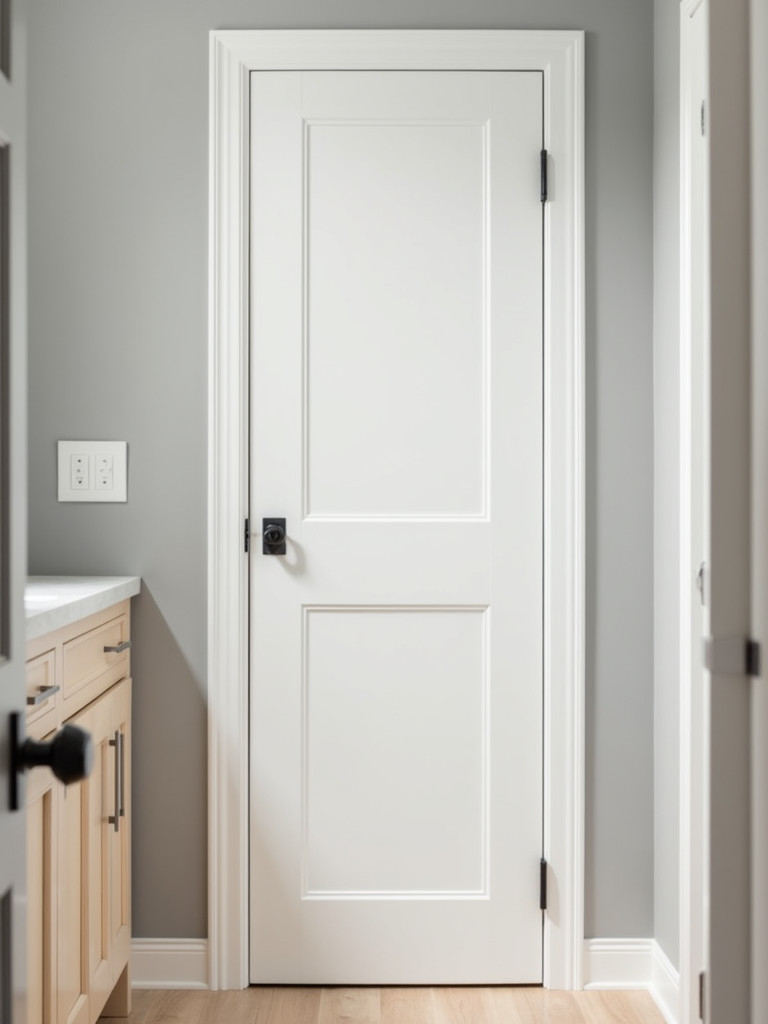
The key to a successful pocket door installation lies in the planning phase. You’ll need to ensure there’s enough space within your wall cavity (typically a minimum of 2×4 construction) and that there aren’t any vital plumbing or electrical lines in the way. While installation is definitely a job for professionals, the results can be transformative. I recommend choosing a door style that matches your bathroom’s aesthetic – whether that’s a clean, modern look or something more traditional. One of my favorite tricks is to use a pocket door with a frosted glass insert, which can help bring natural light into windowless bathrooms while maintaining privacy.
When clients ask me about the benefits of recessed lighting in small bathroom interiors, I always share this surprising fact: well-placed recessed lights can make your ceiling appear higher by eliminating visual clutter overhead. The strategic positioning of these lights can completely transform your bathroom’s ambiance and functionality.
I recommend installing recessed lights in a way that creates layers of illumination throughout the space. For a typical small bathroom, I usually suggest 4-6 lights arranged in a grid pattern, with special attention paid to areas where shadows might form. LED bulbs are my go-to choice – they’re energy-efficient and provide excellent color rendering, which is crucial for tasks like applying makeup or shaving. Here’s a pro tip I always share: install your recessed lights on a dimmer switch. This allows you to adjust the lighting throughout the day and create different moods in your space.
In small bathroom interiors, every piece of furniture needs to earn its keep. That’s why I’m such a strong advocate for multi-functional furniture – pieces that serve more than one purpose while maintaining style and efficiency. Over the years, I’ve discovered countless creative ways to make furniture work harder in limited spaces.
One of my go-to recommendations is a vanity with built-in electrical outlets hidden in drawers, perfect for storing and charging electric toothbrushes or hair tools. Another favorite is a mirror-fronted cabinet that combines storage with reflection, or a sleek stool that opens to reveal storage space for extra towels or toiletries. The key is choosing pieces that align with your daily routines while maximizing every inch of space. When selecting multi-functional furniture, always consider the item’s primary and secondary uses – both should feel natural and intuitive.
There’s a reason subway tile has remained popular since its debut in New York City subway stations in the early 1900s. When clients ask me why subway tile works so well in small bathroom interior design, I explain that its simple, rectangular shape creates clean lines that naturally draw the eye through the space, making it feel larger and more organized.
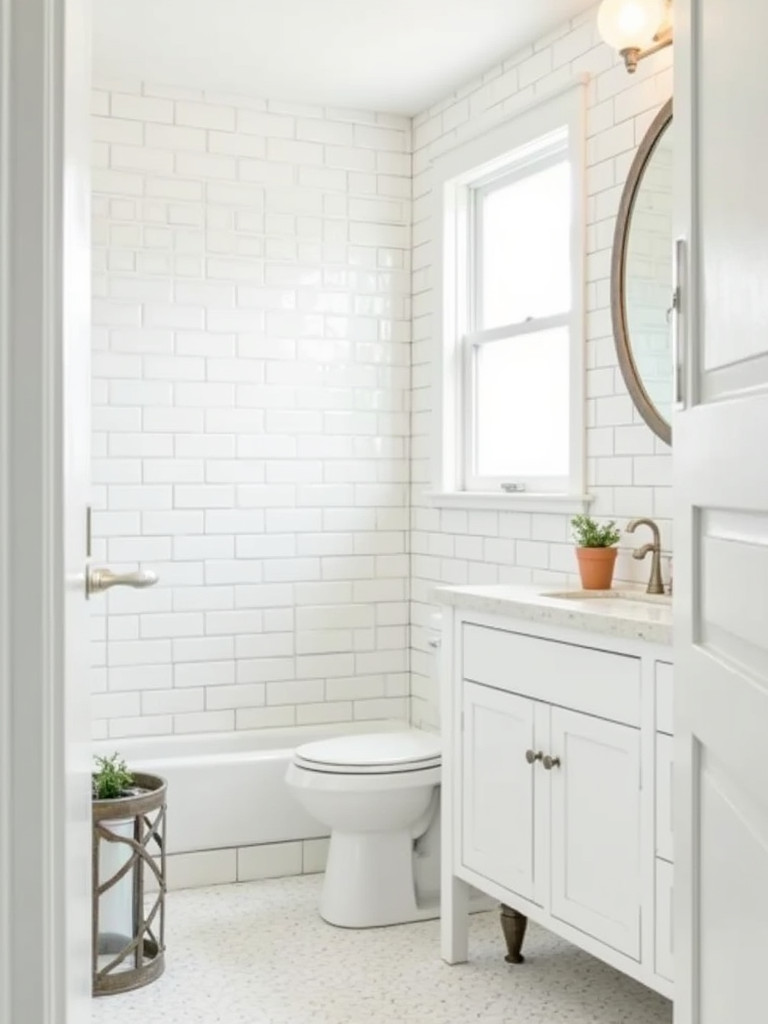
While classic white subway tile is always a safe choice, don’t feel limited to tradition. I often recommend playing with installation patterns – a vertical arrangement can make ceilings appear higher, while a herringbone pattern adds visual interest without overwhelming the space. Here’s an insider tip: choose a grout color that’s just slightly different from your tile color for a sophisticated, cohesive look. Remember to plan your layout carefully before installation – I always start from the center of the wall and work outward to ensure symmetrical placement.
One of the most common concerns I hear about patterned flooring in small bathroom interiors is whether it will overwhelm the space. In my experience, the right pattern can actually make a small bathroom feel larger by creating visual interest that draws the eye across the entire floor plane. The key is choosing a pattern that complements rather than competes with your overall design.
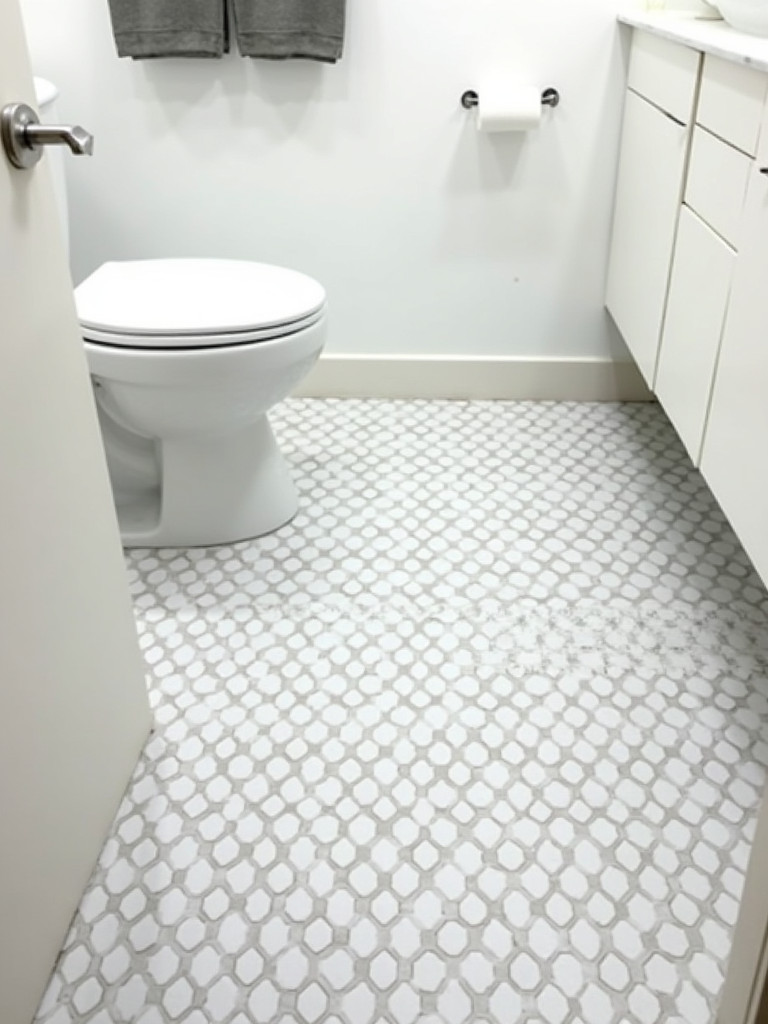
When selecting patterned flooring, I recommend opting for small-scale geometric designs in a limited color palette – this creates interest without chaos. One of my favorite tricks is using patterns that create diagonal lines across the floor, which can make narrow bathrooms feel wider. For durability, I always specify porcelain tiles with a slip-resistant finish, especially important in wet areas. Pro tip: extend your floor pattern into the shower area (if you have one) to create a seamless look that makes the space feel larger.
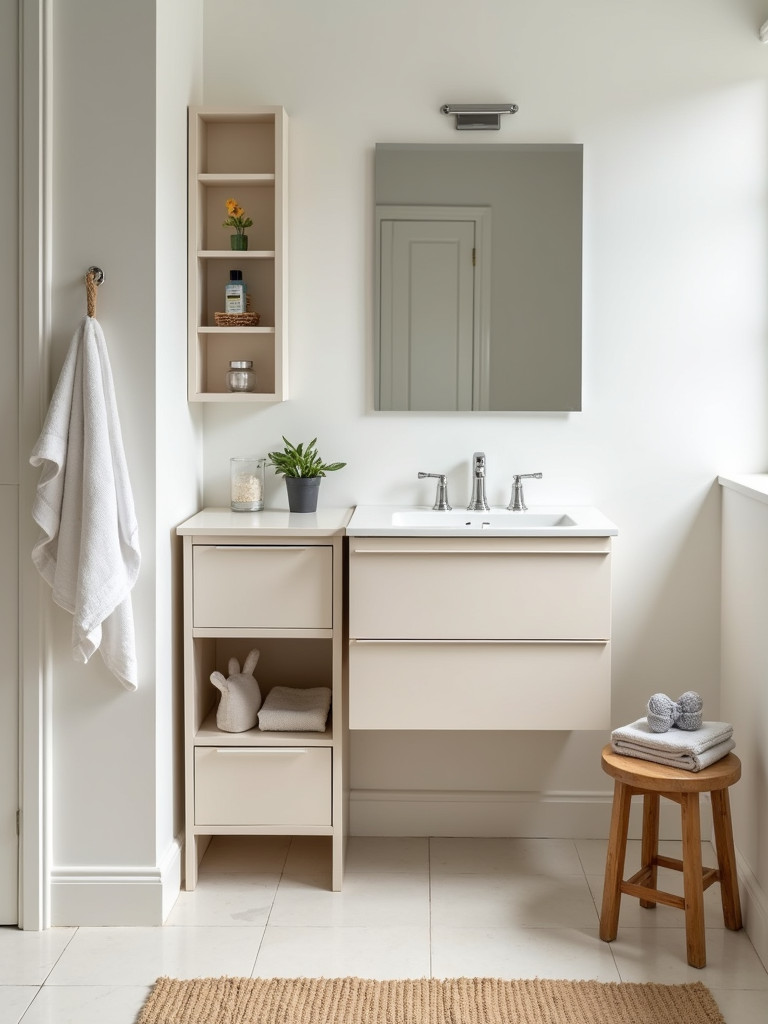
When designing small bathroom interiors, I often find myself explaining how mirrored cabinets have evolved far beyond the basic medicine cabinet. Today’s mirrored cabinets are design statements in their own right, offering a perfect blend of form and function that’s especially valuable in small spaces. Through careful selection, these pieces can transform both the functionality and appearance of your bathroom.
The key to choosing the right mirrored cabinet lies in understanding your storage needs. I typically recommend selecting a cabinet that extends from your countertop to at least eye level, with adjustable shelving inside to accommodate items of varying heights. One of my favorite design tricks is to install LED strips around the cabinet’s edges – this creates perfect lighting for grooming tasks while adding a modern touch to your space. Pro tip: look for cabinets with slow-close hinges and adjustable shelves for maximum functionality.
“What plants work best in bathroom hanging planters?” This is one of my favorite questions to answer because it combines two of my passions: small bathroom interior design and botany. In my experience, hanging planters are not just decorative elements – they’re a brilliant way to add life to a small bathroom without sacrificing precious surface space.

For bathroom environments, I recommend moisture-loving plants like pothos, peace lilies, or air plants, which thrive in humid conditions. The key is positioning your planters where they’ll get adequate light without interfering with daily activities. I love using macramé hangers or sleek modern planters suspended from the ceiling near windows or in corners. Here’s a designer secret: use plants with trailing vines to create natural artwork that draws the eye upward, making your ceiling appear higher. Just remember to ensure your hanging system is properly anchored – I always recommend installing into ceiling joists or using appropriate anchors.
In my years of small bathroom interior design, I’ve found that towel ladders are one of those rare elements that perfectly balance form and function. Clients often ask if a towel ladder is really worth the space it takes up, and my answer is always an enthusiastic yes! Not only do they provide essential storage, but they also add an architectural element that can make a small bathroom feel more designed and intentional.
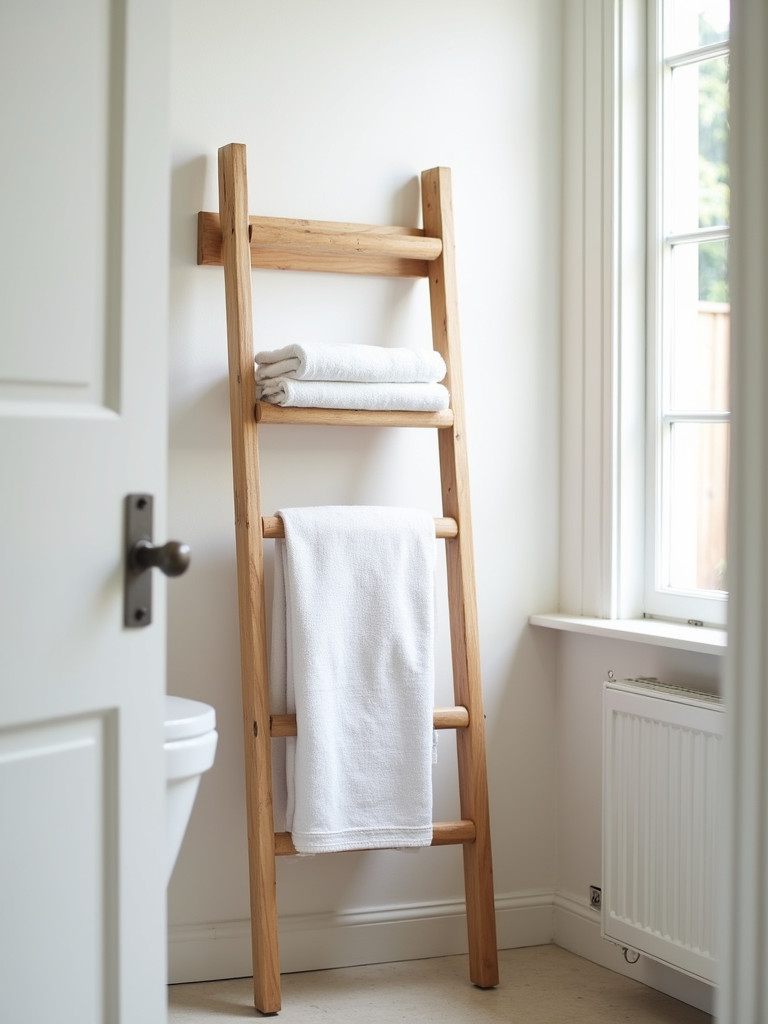
When selecting a towel ladder, consider both material and scale. I love using wooden ladders in spaces with a warm, organic feel, while metal versions work beautifully in more modern contexts. The key is choosing a ladder that’s proportionate to your wall height – ideally, it should stop about a foot below your ceiling. Pro tip: angle your ladder slightly away from the wall to create better air circulation around your towels, helping them dry more quickly. Position it where it won’t interfere with door swings or traffic flow.
In small bathroom interiors, the line between minimalist and sparse can be delicate. I often have clients ask, “How can I keep my bathroom uncluttered without making it feel sterile?” The answer lies in understanding that minimalism isn’t about having nothing – it’s about making everything count. Through careful curation, you can create a space that feels both peaceful and purposeful.
Start by evaluating every item in your bathroom through the lens of both function and beauty. Choose accessories that serve a purpose while adding visual interest – a beautifully crafted soap dispenser, an elegant tissue holder, or a carefully selected small piece of art. I always recommend limiting your color palette to three main tones and focusing on varying textures instead. One of my favorite minimalist tricks is to group similar items together rather than spreading them throughout the space – this creates purposeful vignettes rather than clutter.
By implementing these 18 ideas, you can transform your small bathroom interior into a space that feels both luxurious and functional. Remember, a small bathroom isn’t a limitation – it’s an opportunity to be creative and intentional with your design choices. The key is to start with one element that speaks to you and gradually build upon it. Whether you begin with a floating vanity or simply declutter your space, each small change brings you closer to creating your ideal bathroom oasis.
As we’ve explored these design solutions together, I hope you’ve come to share my belief that a small bathroom interior can be just as luxurious and functional as a larger one. The key isn’t having more space – it’s about using your space more intelligently. Whether you’re planning a complete renovation or looking to make small improvements, remember that every change, no matter how minor, contributes to creating your perfect bathroom.
Start with the ideas that resonate most with your needs and style. Maybe it’s installing a floating vanity to open up floor space, or perhaps beginning with something simpler like reorganizing with vertical storage. Whatever you choose, take it one step at a time. The beauty of small bathroom design lies in the details – each thoughtful choice builds upon the last, ultimately creating a space that not only looks beautiful but works beautifully for you.
Remember, these aren’t just design ideas – they’re proven solutions that have transformed countless small bathrooms into spaces their owners love. So take that first step, and don’t be afraid to get creative. After all, your small bathroom isn’t just a room – it’s an opportunity to showcase your style while creating a functional, peaceful retreat in your home.