Physical Address
304 North Cardinal St.
Dorchester Center, MA 02124
Physical Address
304 North Cardinal St.
Dorchester Center, MA 02124
Discover 15 Nordic-inspired bathroom remodel ideas from limewash plaster walls to Japandi design — covering materials, layout, and budget-banding.
After eleven years designing spaces informed by Nordic principles, I’ve come to believe that the bathroom is the most underrated room in the home. Not because it’s complicated, but because most people approach their bathroom remodel ideas the way they approach a grocery list — practically, efficiently, and with almost no thought for how the space will actually feel to inhabit. Scandinavian bathrooms are consistently ranked among the most peaceful living spaces in the world. That’s not because Norwegians have unlimited budgets. It’s because they apply a consistent set of principles about materials, light, and restraint that the rest of us can absolutely adopt. These 15 bathroom remodel ideas span full renovations and weekend upgrades, expensive interventions and clever ones. What connects them is a shared commitment to creating a space that genuinely restores you, rather than one that simply contains your morning routine.
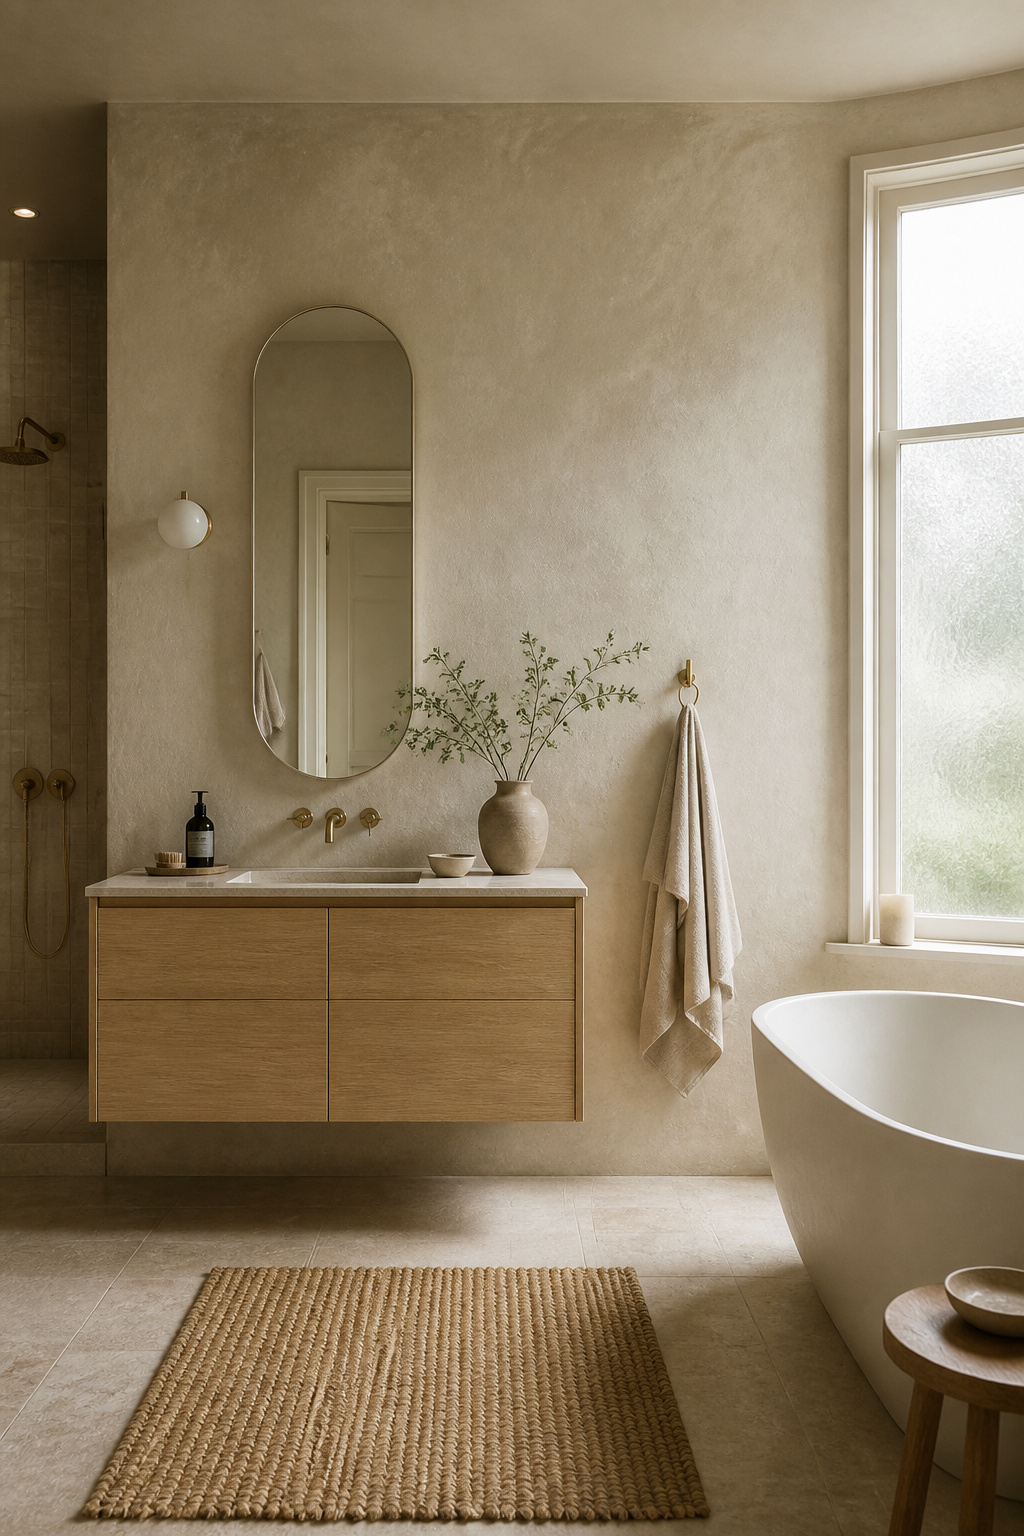
As bathroom remodel ideas go, limewash keeps reappearing in Nordic interiors for good reason — and it has nothing to do with trends. Limewash contains no plastics or synthetic coatings, which makes it naturally breathable, mould-resistant, and anti-bacterial. In a room that generates steam every day, a wall finish that breathes rather than traps moisture is the more intelligent choice.
The technical term is “non-film-forming” — limewash doesn’t create a hard shell on your wall surface, so it doesn’t blister, crack, or peel even in the most enthusiastic shower sessions. Apply it on all wall and ceiling areas outside the direct shower zone; it’s not intended for the inside of the enclosure itself, but everywhere else it performs beautifully.
Application matters as much as material. The ideal substrate is an absorbent lime-based or cement render — apply limewash over this and you get prime durability alongside the full breathability benefit. If you want to reduce the chalky surface finish for a more practical, handleable wall, a limewash densifier additive (mixed in before application) delivers that without the downsides of a sealer. Most specialists advise against conventional sealers: they negate the breathability and make repainting significantly harder.
For colour, the Nordic palette is warm rather than cold. Off-white, bone, and linen read naturally against wood and stone. Soft sage-grey has become increasingly prominent in Scandinavian bathrooms paired with white oak and brushed brass. The one palette to avoid: cold stark white — it fights with limewash’s inherently organic texture and ends up looking clinical rather than calm.
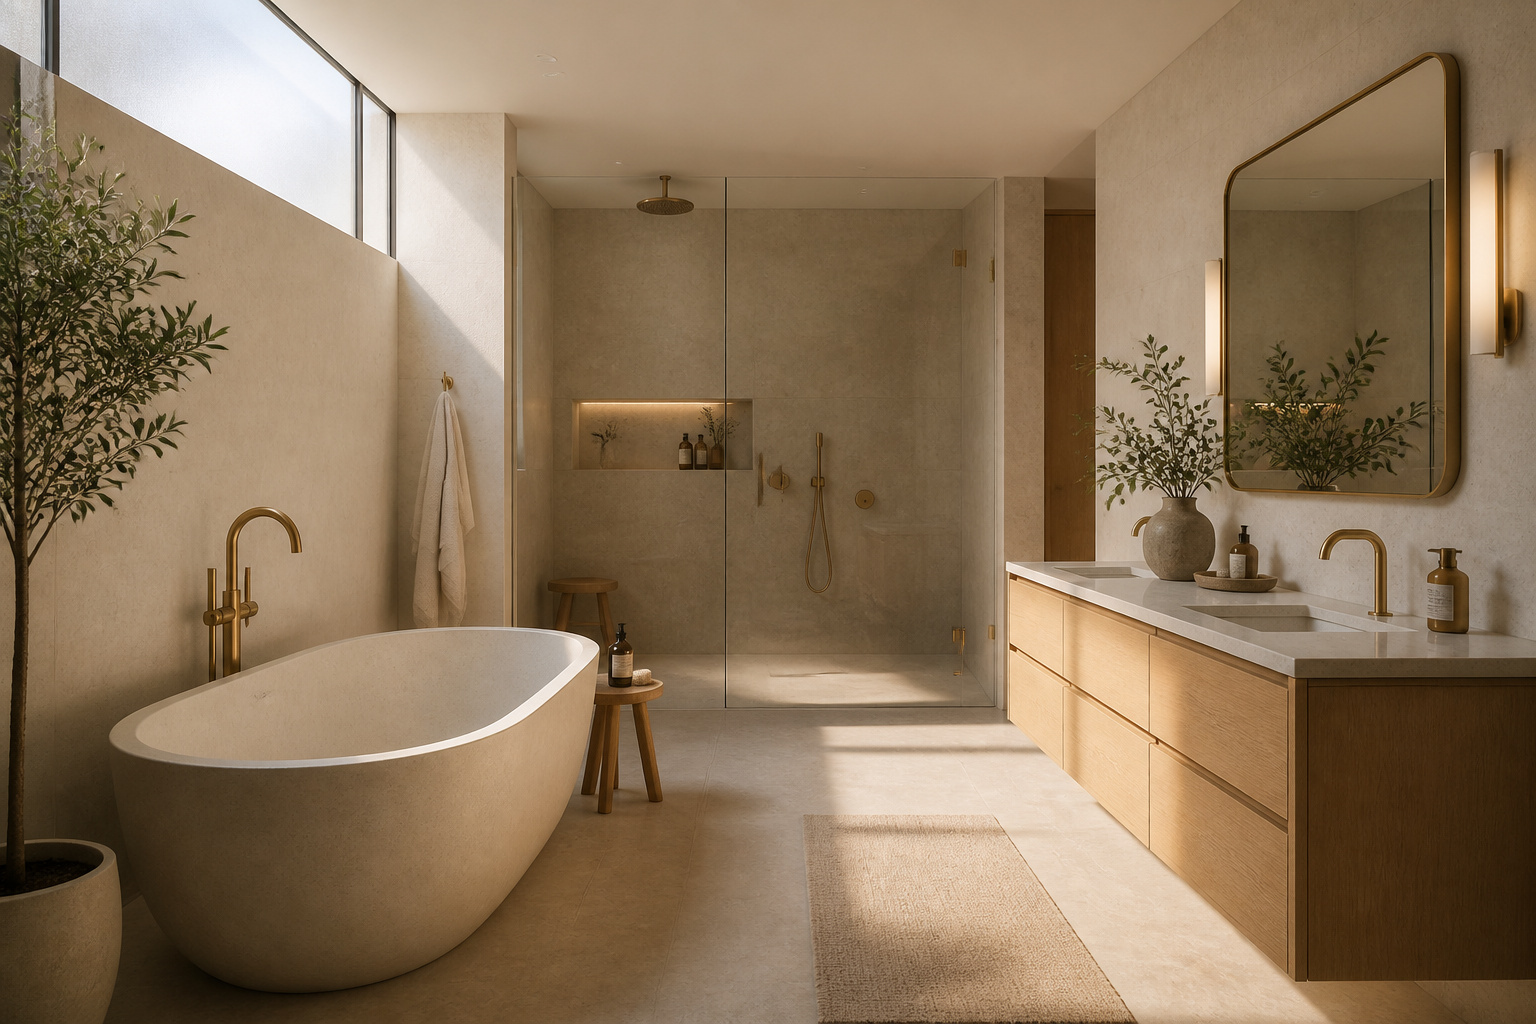
Of all the bathroom remodel ideas that signal a commitment to Nordic design, the freestanding tub makes the clearest statement. It either reads as the room’s deliberate anchor or as an afterthought standing in the middle of the floor. The difference is placement and scale, not price.
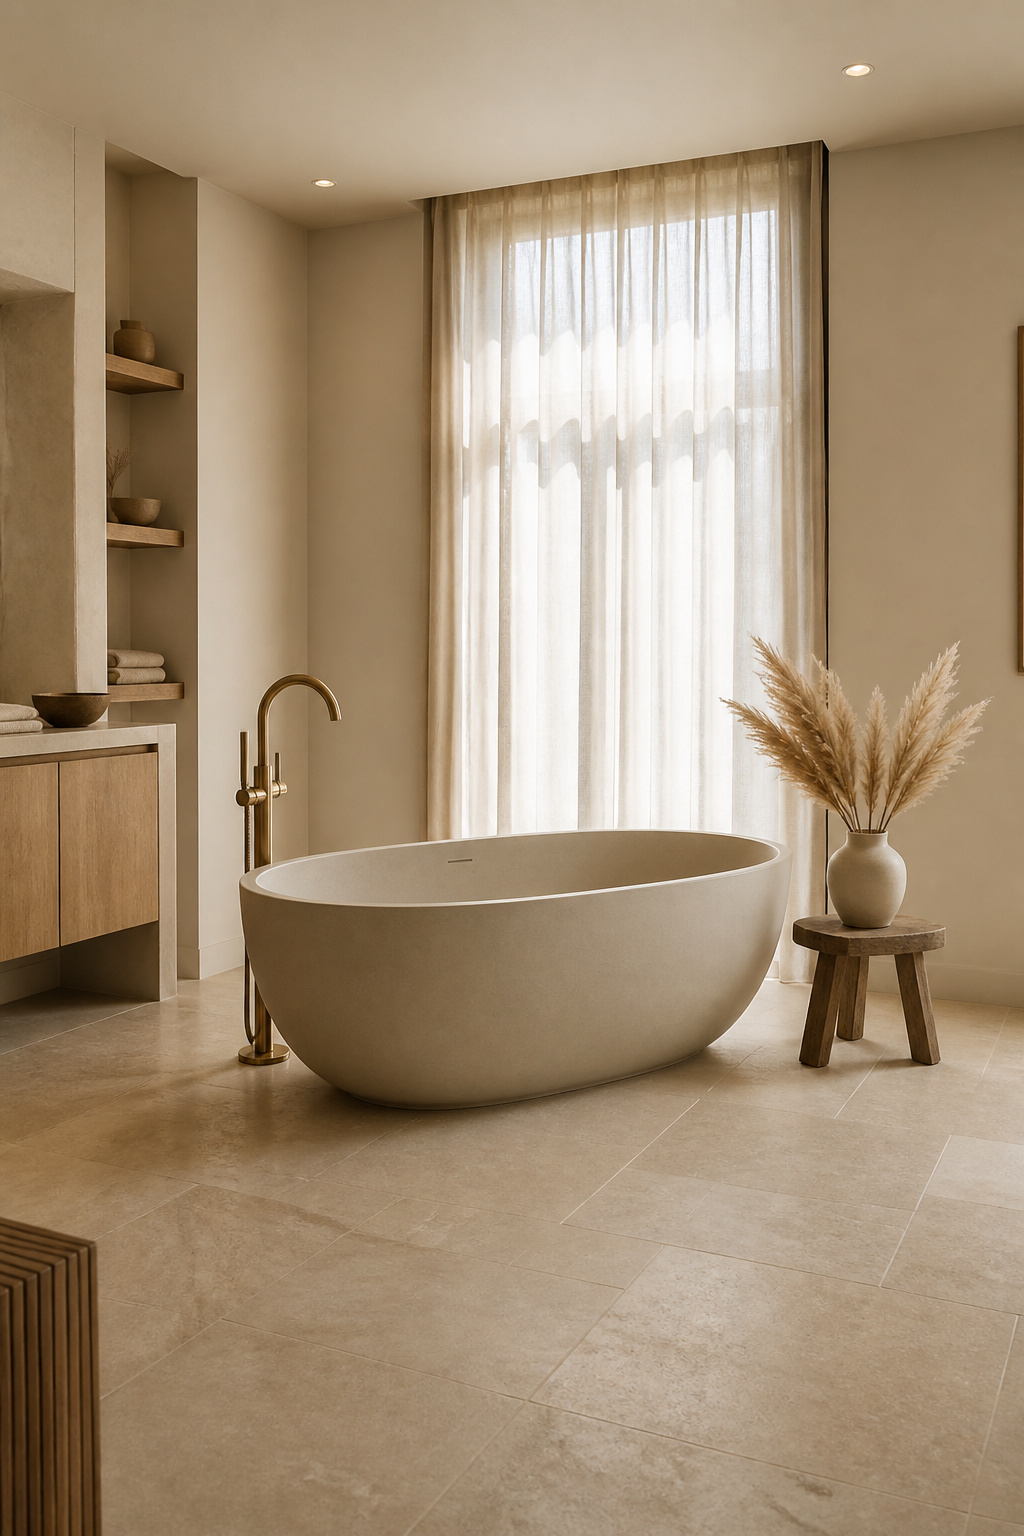
For a tub to read as an anchor, it needs visible floor on all four sides — minimum 24 inches of clearance around the piece. Position it to face a focal point: a window with a garden view, a textured limewash wall, or a skylight above. A floor-mounted freestanding tap at the faucet end completes the look correctly; a wall-mounted tap on a freestanding tub looks improvised.
On materials: cast iron is the classic choice — once it warms up, it holds heat exceptionally well, ideal for long soaking. The downside is weight (300–500 lb) and cost ($1,500–$4,000+), and older houses may need structural assessment first. Stone resin is the current high-end standard: non-porous, chip-resistant, matte finish, comparable heat retention to cast iron, available in contemporary shapes that cast iron can’t achieve. Acrylic is lighter and cheaper — the right choice for upper-floor installations or renovations where budget is the priority, though it loses heat faster.
Scale is decisive. A 55-inch tub in a large bathroom looks lost; a 59-inch tub in a medium bathroom feels intentional. Total bathroom floor area should be at least 100 square feet for a freestanding tub to look proportionate rather than crowded. If you love the warmth of a tub with natural wood surrounds and aged finishes, rustic bathroom decor ideas explores the aesthetic in complementary detail.
The plumbing rough-in for a floor-mounted tub filler must be precisely positioned before tile is laid. This cannot be adjusted after tiling, so confirm the tub placement during the structural phase of your renovation.
Polished stone floors in bathrooms are one of the most common and expensive mistakes in residential design. Polished surfaces are dangerously slippery when wet, show every water mark and soap smear, and scratch visibly with normal use. Honed finishes — matte, micro-textured, non-reflective — solve all three problems simultaneously.
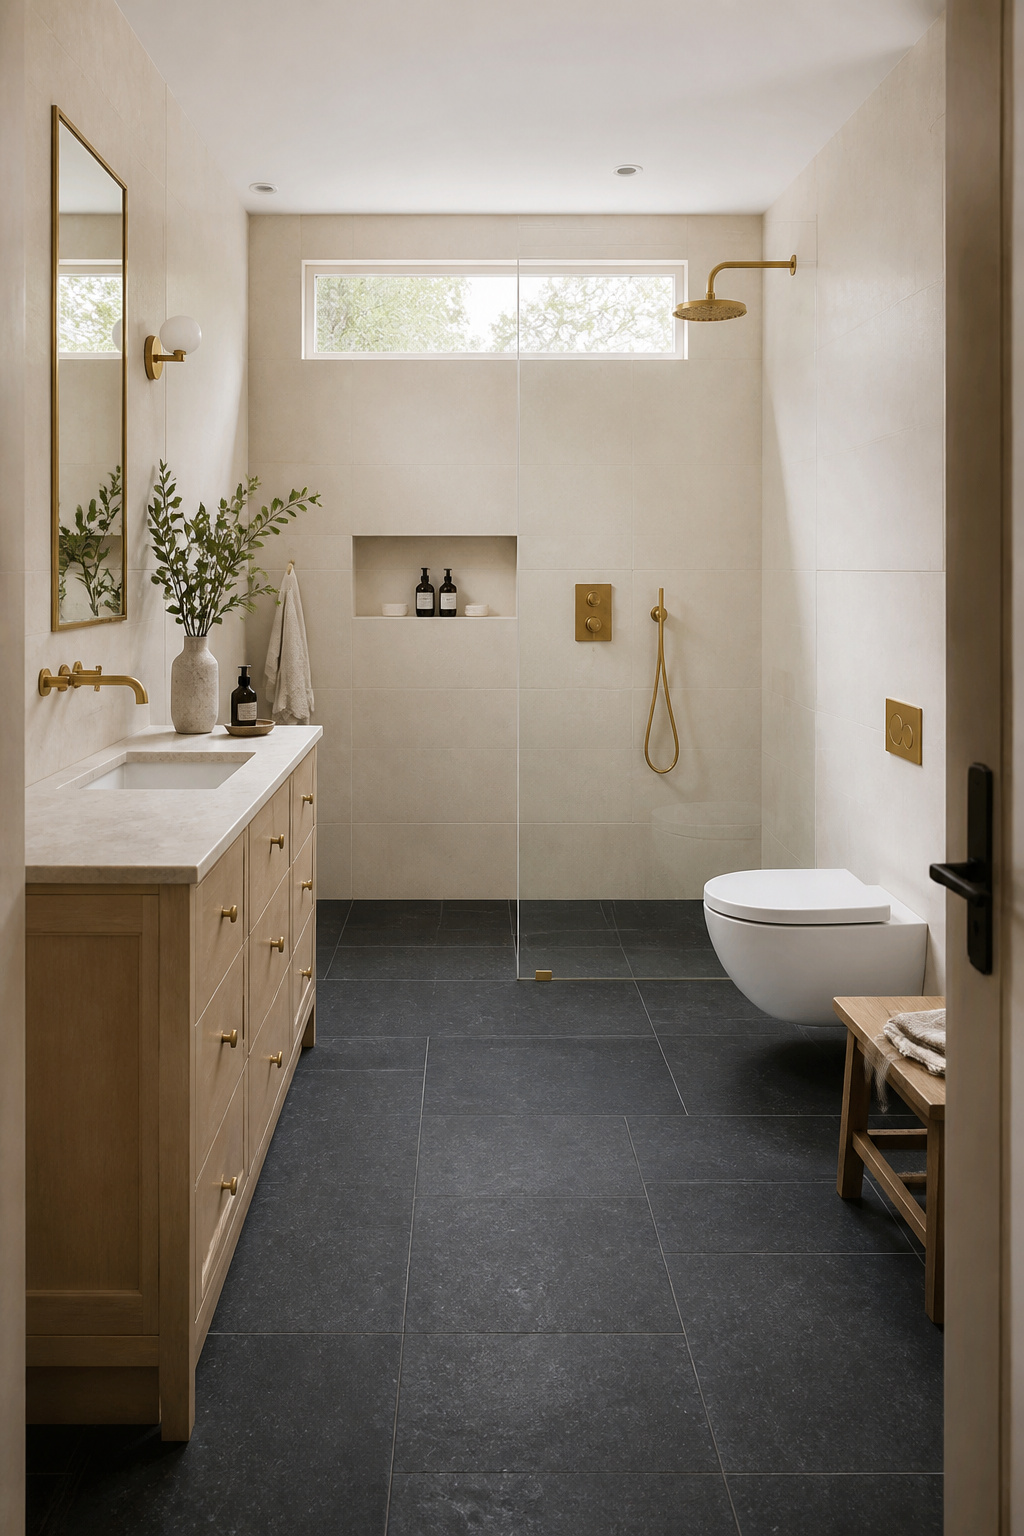
The best stone species for wet areas depend on what you’re optimising for. Travertine brings warm beige and ivory tones with a naturally textured surface; fill the voids before sealing and it performs beautifully on shower floors. Limestone offers subtle colour movement and a calm, neutral appearance that is particularly Scandinavian in character. Basalt is the dark option: grey-black, extremely dense, excellent grip on wet floors, and it pairs definitively with white oak vanities and warm brass fixtures. Slate has the best natural grip of any stone and is the most practical choice for shower floors, its layered texture creating natural drainage channels.
Sealing is non-negotiable. Travertine, limestone, and marble should be sealed during installation and every three to five years thereafter. Choose between enhancing sealers (which darken the stone for a wet-look finish) and natural sealers (same protection, no colour change). For ongoing maintenance: pH-neutral stone cleaner only — most common bathroom products are mildly acidic and will etch limestone and travertine permanently over time. For readers wanting to explore tile approaches more broadly, bathroom tile ideas that create mindful spaces covers a wide range of materials and applications.
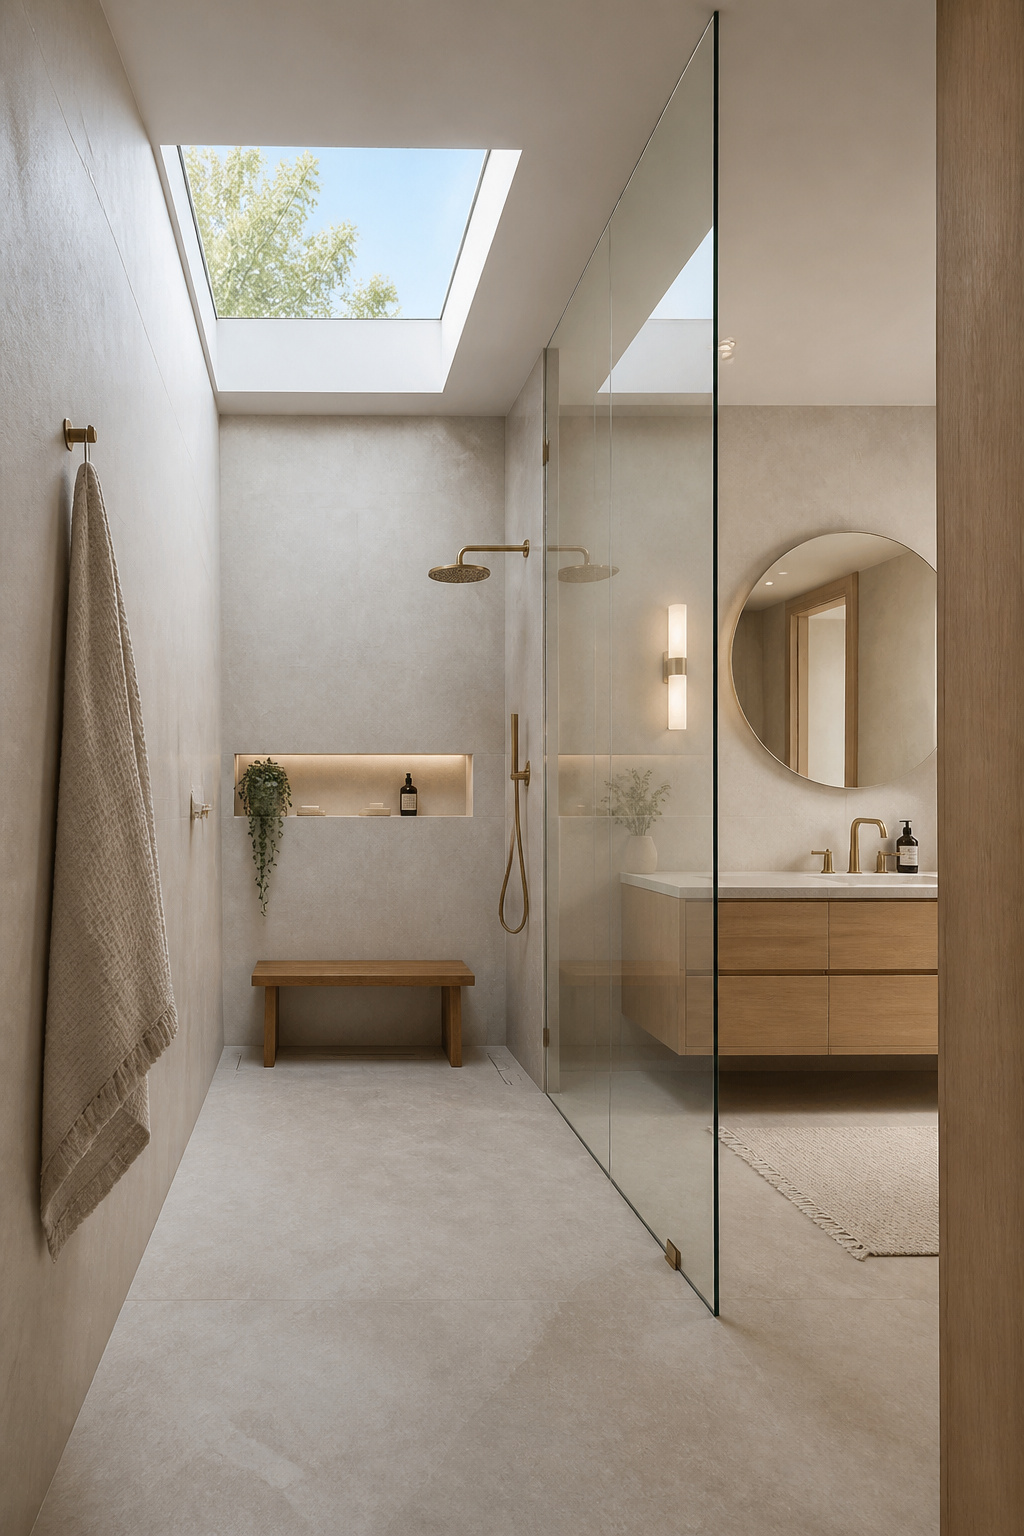
The wet room is the most prevalent shower format in contemporary Scandinavian new builds, and its popularity there is no coincidence. When the entire bathroom floor is waterproofed and drained, the visual and practical distinction between shower zone and room dissolves entirely. The space feels twice as large as its actual dimensions, and cleaning — no tray, no threshold, no door tracks — takes about two minutes.
In a true wet room, the entire bathroom floor is waterproofed and drained, not just the shower area. The entire floor and lower walls must be tanked — fully waterproofed — with a liquid-applied membrane turning up all walls a minimum of 100mm; the immediate shower area requires floor-to-ceiling waterproofing.
Floor gradient is structural, not cosmetic. The minimum fall is 15mm, with a maximum gradient ratio of 85:1 (1mm drop per 85mm of run toward the drain). The slope must be formed into the floor substructure before any waterproofing or tiling begins — you cannot create the gradient with tile thickness. This is the most common construction mistake in wet room conversions.
For the glass: all screens must be toughened to EN 12150-1 or equivalent. Eight millimetres is the professional standard for wet room screens — substantial enough to feel rigid without support bars. Among all bathroom remodel ideas that change a room’s spatial feel, the wet room conversion delivers the most dramatic result. Frameless panels with minimal wall-mounted brackets maintain the clean Nordic aesthetic.
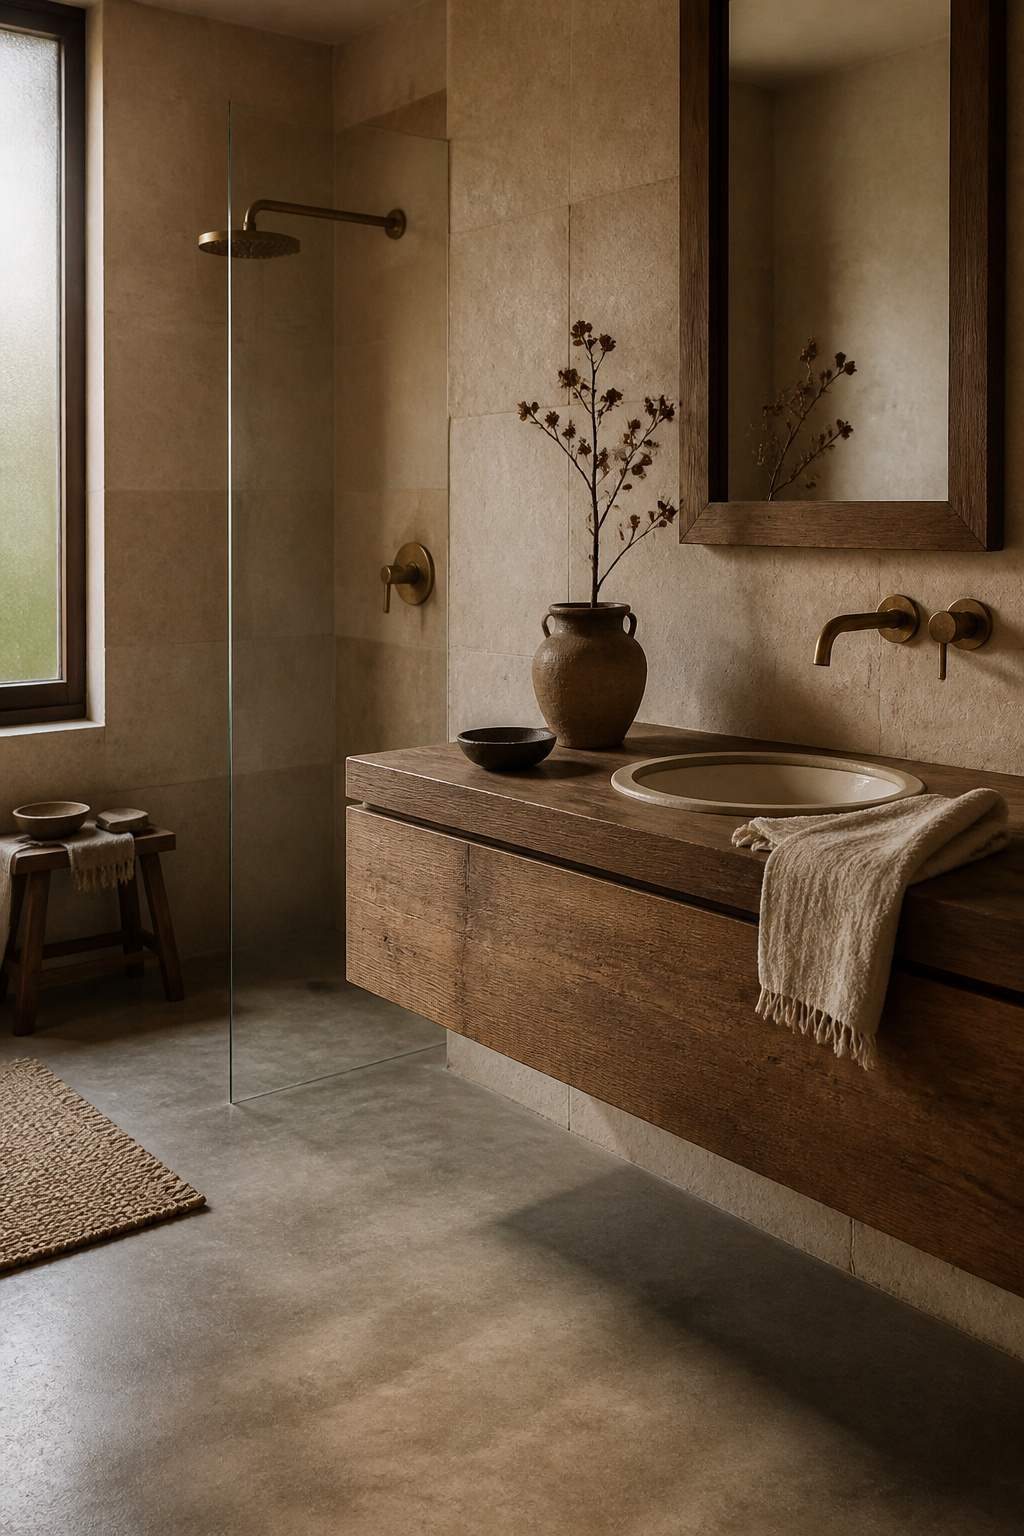
Wood and water seem like an obvious conflict, but the pairing of a well-chosen timber with a bathroom environment is one of the most enduring choices in Nordic interior design. The key is which wood and how it’s finished.
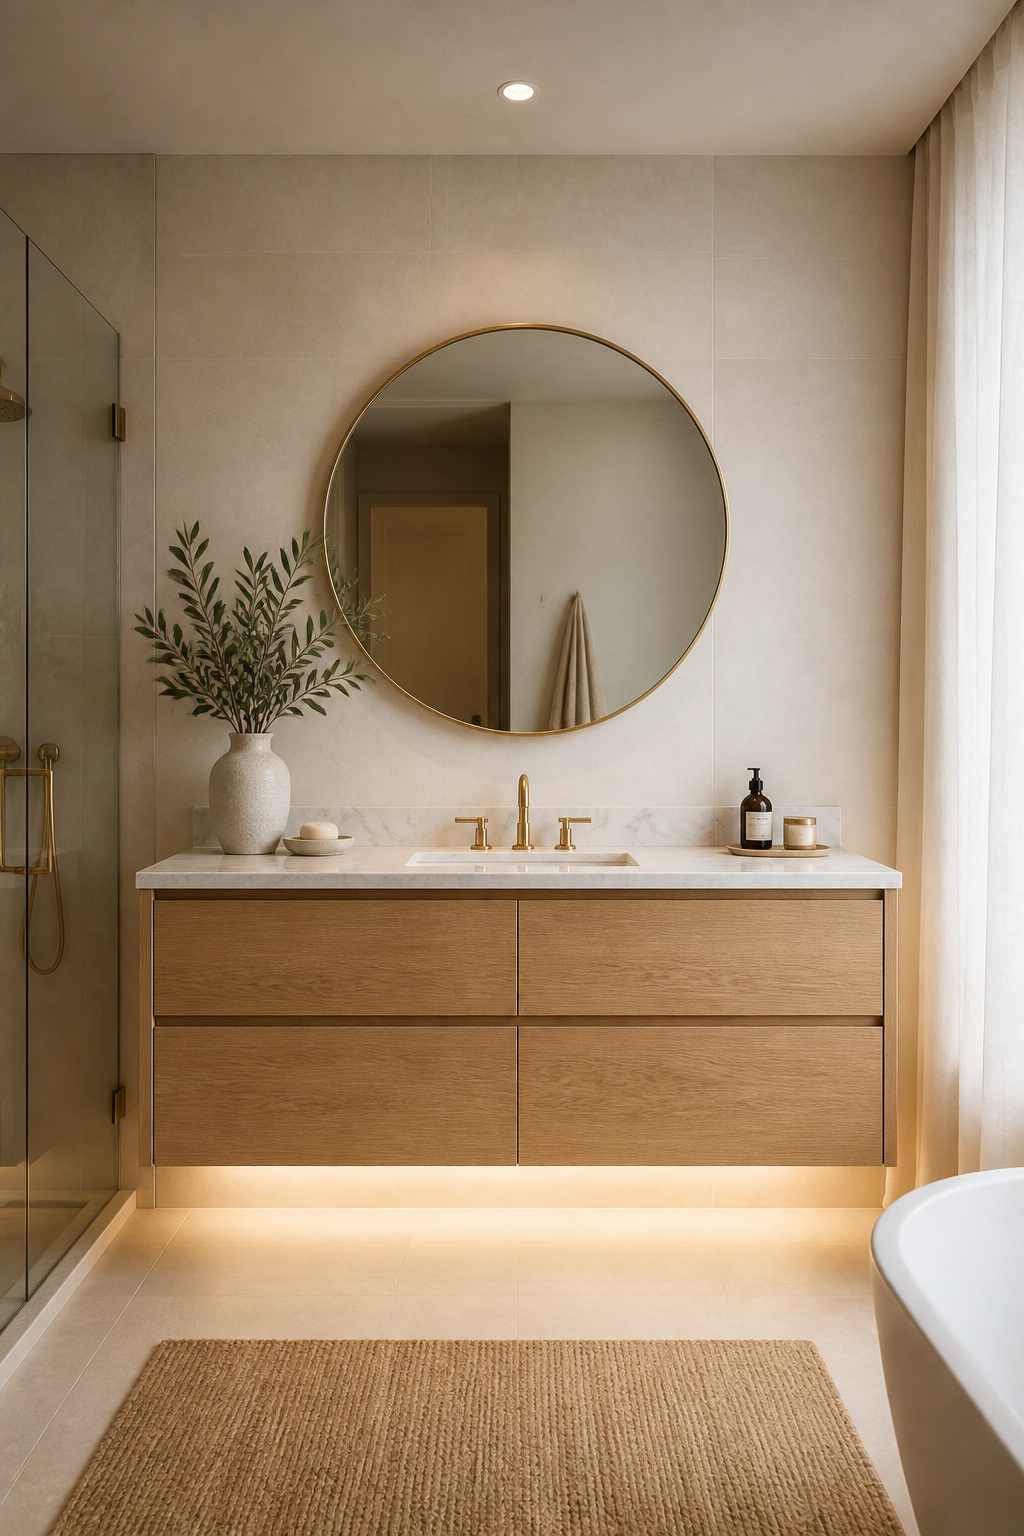
White oak’s unique cellular structure contains tyloses — balloon-like growths within the wood vessels that naturally plug the pores, creating exceptional moisture resistance. Properly finished, white oak handles humidity up to 70% without significant dimensional change. Teak takes a different route: its exceptionally high natural oil content creates an internal moisture barrier, which is why teak has been used for boat decks for centuries. Both score above 1,300 on the Janka hardness scale, the standard threshold for high-traffic durability. For finish, hardwax oil — rather than lacquer — preserves the wood’s natural breathability and is far easier to spot-repair.
Floating installation requires proper wall preparation. The wall must have solid blocking — minimum 3/4-inch plywood behind the drywall — at the mounting bracket location. A floating vanity under daily use carries 150–200 lb; hollow-wall anchors alone will fail. The basin choice drives the material conversation. Honed Calacatta or Statuario marble in an undermount profile is the classic pairing with white oak. Terrazzo basins suit sustainability-minded renovations; concrete basins against teak create the definitive Japandi pairing. For broader bathroom design context, modern bathroom design ideas that feel warm covers how to balance these material combinations effectively.
Large-format tile works because it reduces visual noise. A 600x1200mm porcelain tile on a bathroom wall has roughly one-sixth the number of grout lines as a 200x200mm tile on the same surface — less interruption, more expansive reading of the space. When you run the same tile floor-to-ceiling, the boundary between floor and wall dissolves and ceilings appear significantly higher.

As bathroom remodel ideas go, the floor-to-ceiling tile run is one of the most transformative single decisions available. For large-format tiles, rectified specification is strongly recommended. Rectified tiles are precision-cut after firing, with dimensional variation reduced to near-zero, allowing joints as narrow as 1/8 inch (3mm). Non-rectified tiles have natural firing variation and need a minimum 3/16-inch joint — disproportionately thick against a 600mm tile face.
The substrate must be flat. Large-format tiles bridge imperfections rather than conforming to them, and a floor or wall out of plane by more than 1/8 inch over 10 feet will cause tiles to tent and crack. This is structural prep, and it comes before tile selection.
For the Nordic palette: warm whites and linen tones are the classic choice, reflecting light without clinical hardness. Soft sage — a muted green-grey with warm undertones — is a strong 2025 direction pairing beautifully with white oak and brushed brass. Greige (grey-beige) is the reliable option that ages gracefully as surrounding design choices evolve over the years.
In Norway, Denmark, and Sweden, maximising natural light in every room — including bathrooms — is a design principle, not a luxury specification. In latitudes where winter daylight runs to six or seven hours, every photon matters, and architects apply this thinking consistently. The bathroom gets the same attention as the living room.
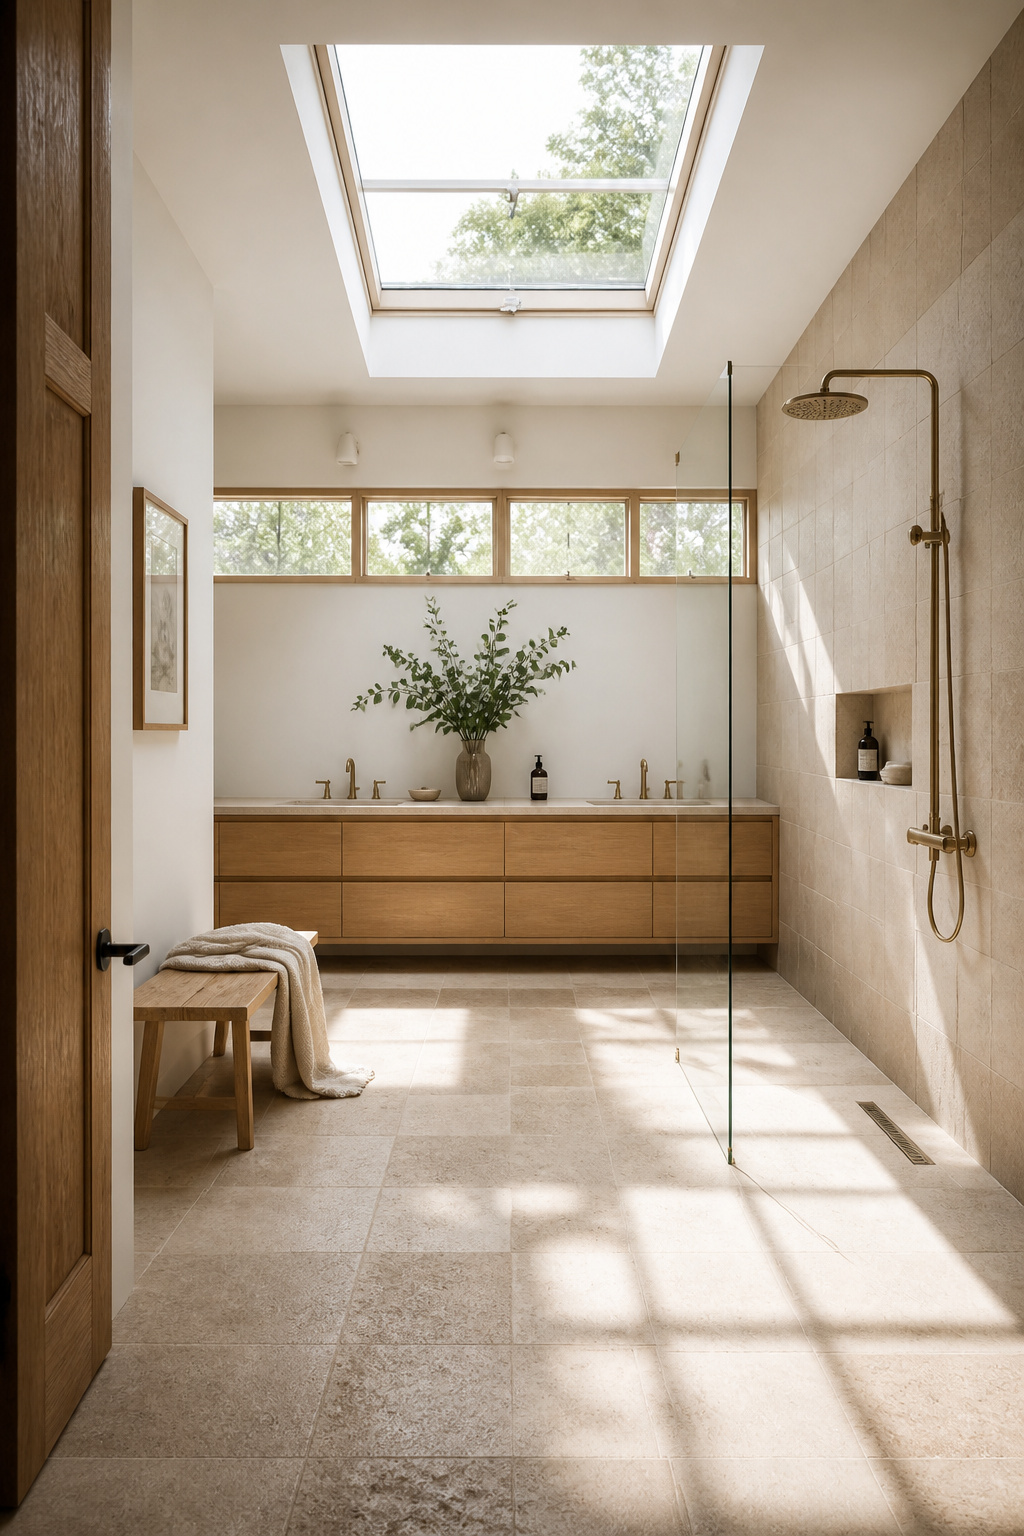
A skylight adds something no wall window can replicate: true overhead light that illuminates the floor and creates a diffused, even quality of natural light unlike any artificial source. It’s also — practically speaking — the only way to add natural light to a bathroom surrounded by adjacent rooms.
For bathrooms, operable (venting) skylights are the professional choice over fixed. A venting skylight removes moisture and heat at the source, reduces condensation risk, and reduces dependence on extraction fans. A fixed skylight in a poorly ventilated bathroom will develop persistent condensation — mould, water damage, frame rot — within a few years at a remediation cost that far exceeds the venting upgrade at installation. Some electrically operated units can be programmed to open automatically when internal humidity exceeds a threshold, creating a passive ventilation system.
Clerestory windows positioned above eye level — 6 feet from floor and higher — provide full natural light with complete privacy. Where full-height windows are required, frosted (acid-etched) glass diffuses light while eliminating visibility; obscure patterned glass (reed, rain) offers partial privacy with more visual texture. Both options maintain 80–90% of clear glass light transmission. For further ideas in this direction, minimalist bathroom ideas for a serene space explores how light and restraint work together.
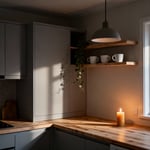
The moment you step out of a shower onto a warm stone floor instead of a cold one, the bathroom changes character completely. In Scandinavian bathrooms, electric underfloor heating is considered a baseline comfort feature — not a premium upgrade. Among all the bathroom remodel ideas that improve daily life without changing a room’s appearance, heated floors have the highest return on lived experience.
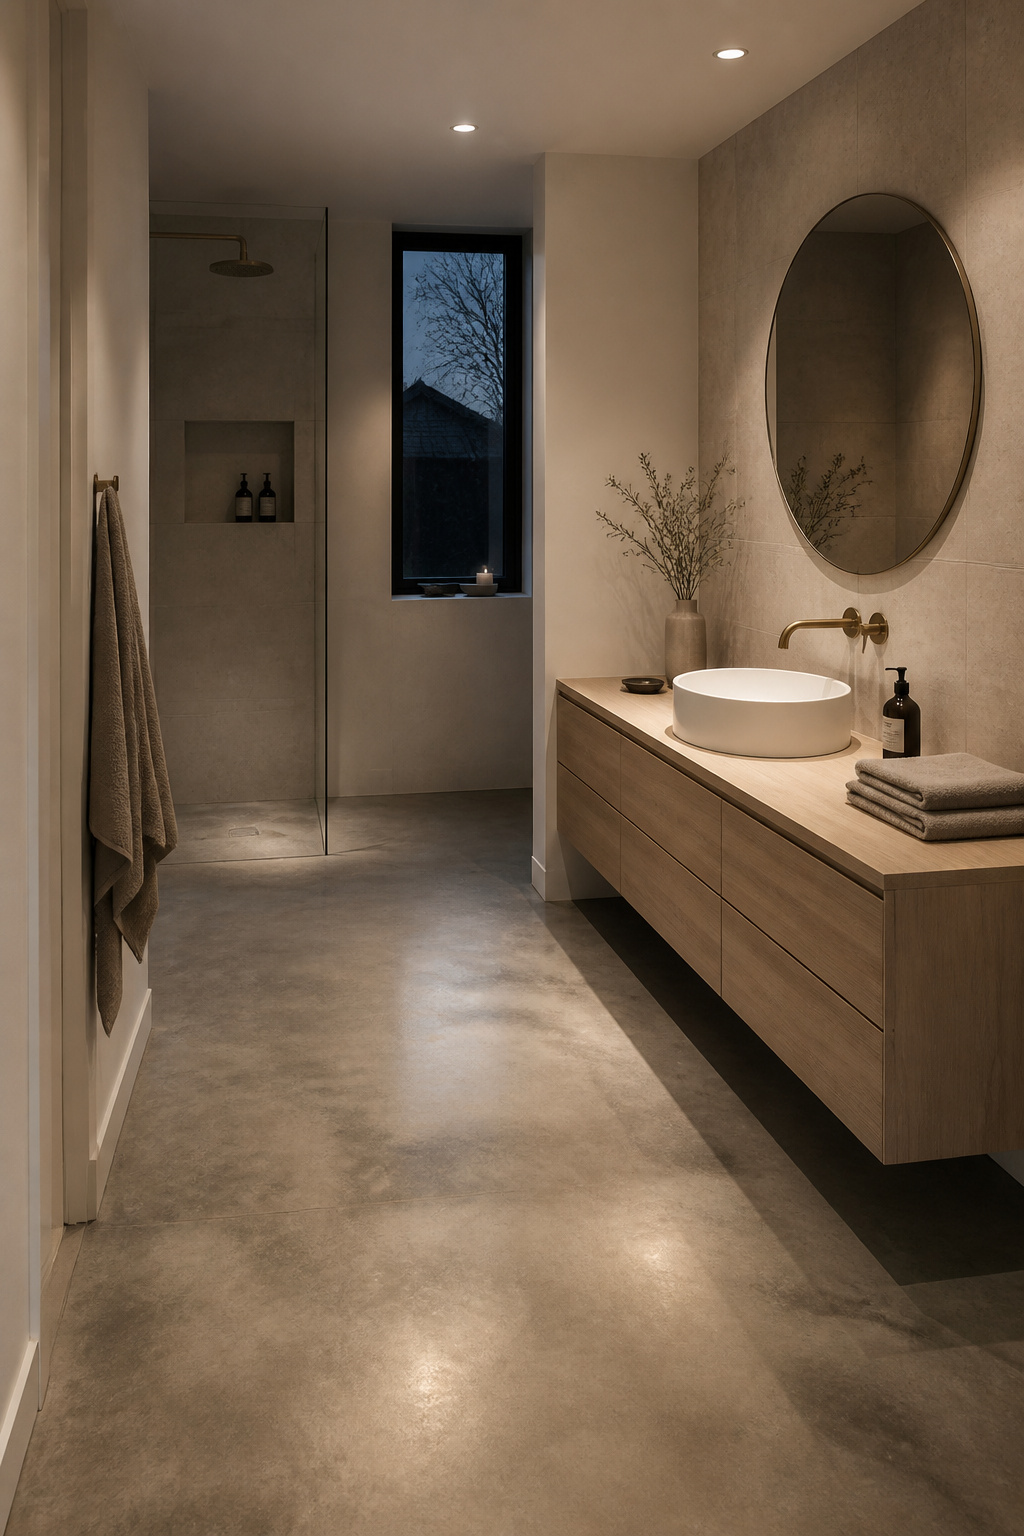
For bathroom renovations, electric underfloor heating is almost always the practical choice. Hydronic systems — which circulate warm water through pipes in the floor — cannot be installed as a standalone bathroom project; they require a whole-house system and a boiler. Electric mat systems can be retrofitted into any bathroom renovation with a single dedicated 240V circuit.
Stone, ceramic, and porcelain are the most efficient materials for electric underfloor heating. Polished concrete is similarly effective and holds warmth well after the element cycles off. Surface temperature limits: stone and porcelain up to 29°C, concrete up to 28–30°C — above these, thermal cycling stresses grout joints and tile adhesive over time. A programmable thermostat reduces running costs dramatically by operating the system only during occupied hours. For a standard bathroom of 8–10 square metres, electric mat systems including thermostat run $800–$1,500 — one of the highest-return investments in any bathroom remodel.
The recessed niche — a shelf built into the wall cavity rather than attached to its surface — is simultaneously the most elegant storage solution in a bathroom and one of the least expensive to execute. No brackets, no projection into the room, no visual interruption of the wall plane. This bathroom remodel idea removes surface clutter at its source.
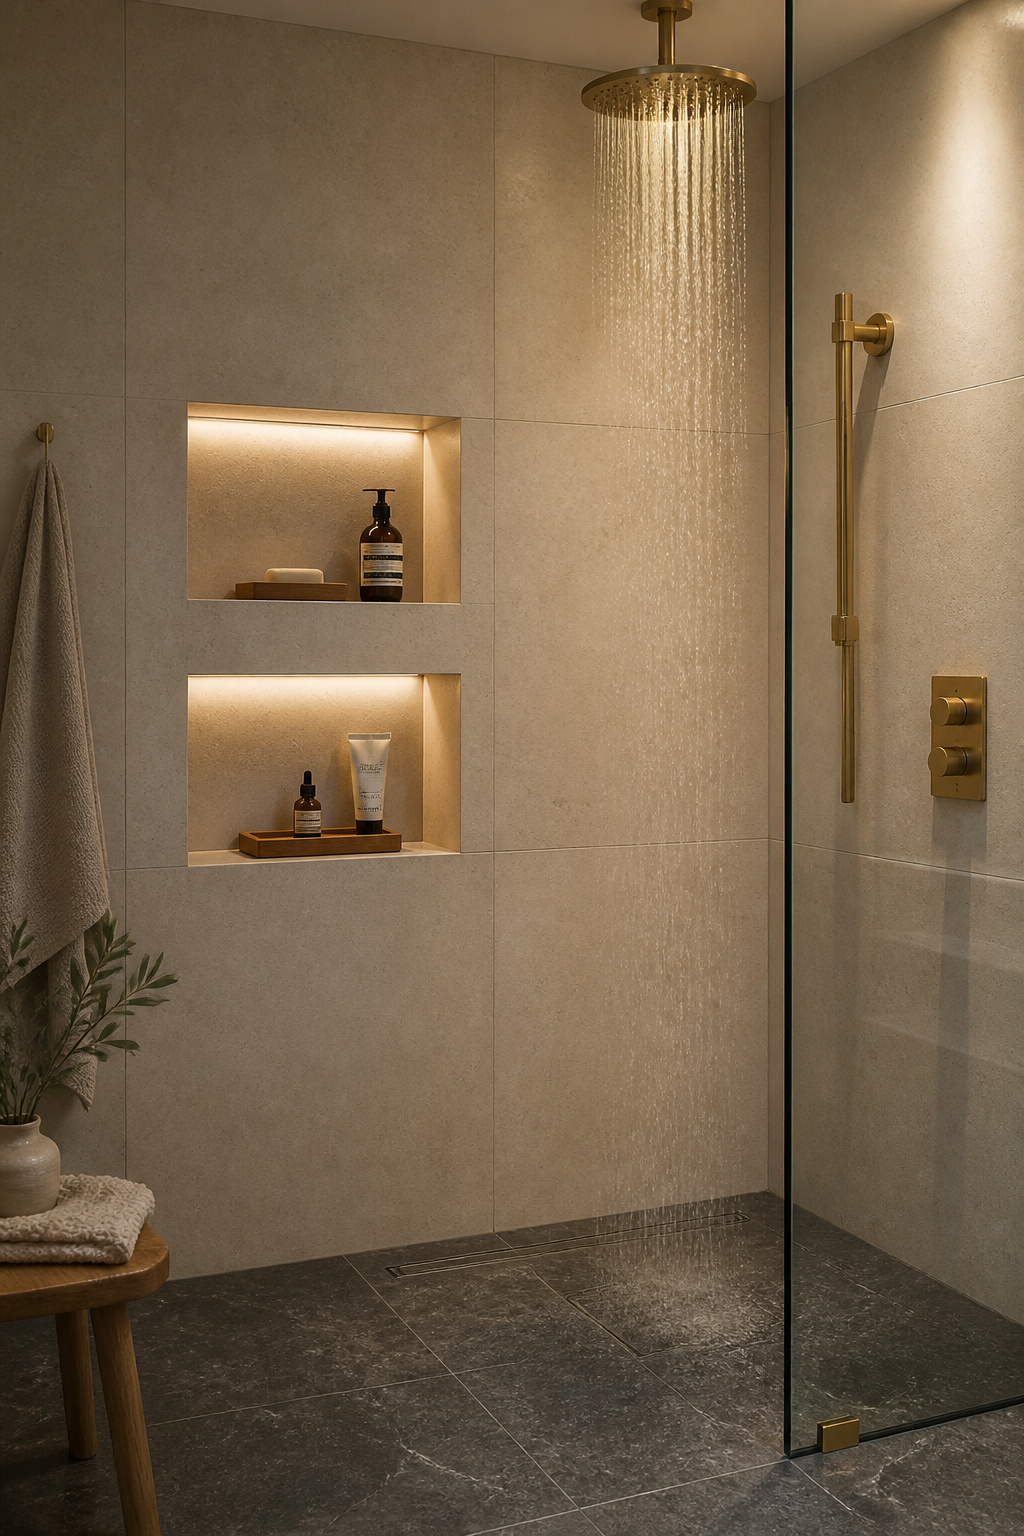
The structural question comes first: load-bearing or not? Standard non-load-bearing interior walls use 2×4 framing, giving 3.5 inches of usable depth — sufficient for shampoo bottles and soap dispensers. Walls with 2×6 framing offer 5.5 inches — significantly more versatile for a display niche. Exterior walls are almost always load-bearing and contain insulation; niches in exterior walls require a structural engineer.
A shower alcove niche typically runs 12 inches wide by 24 inches tall, built between standard studs at 48–60 inches from the floor. A display niche is often 16–24 inches wide by 12 inches tall — this requires cutting a stud and installing a structural header. Waterproofing inside any shower niche is non-negotiable: a liquid-applied waterproofing membrane must cover all interior surfaces before tiling. For finishing, tiling the niche to match the surrounding wall reads as architectural — the Scandinavian preference for calm, continuous surfaces. An accent tile inside (zellige, handmade ceramic) turns it into a feature point instead. For anyone working on bathroom storage more broadly, bathroom storage solutions to maximise every inch covers the full range.
Single-finish consistency is one of the simplest and most effective bathroom remodel ideas in Nordic design. A bathroom where every piece of hardware — taps, shower controls, towel bars, toilet roll holder, hooks — shares a single finish reads as designed. A bathroom with mismatched chrome, brass, and black reads as unconsidered, regardless of how much any individual piece cost.
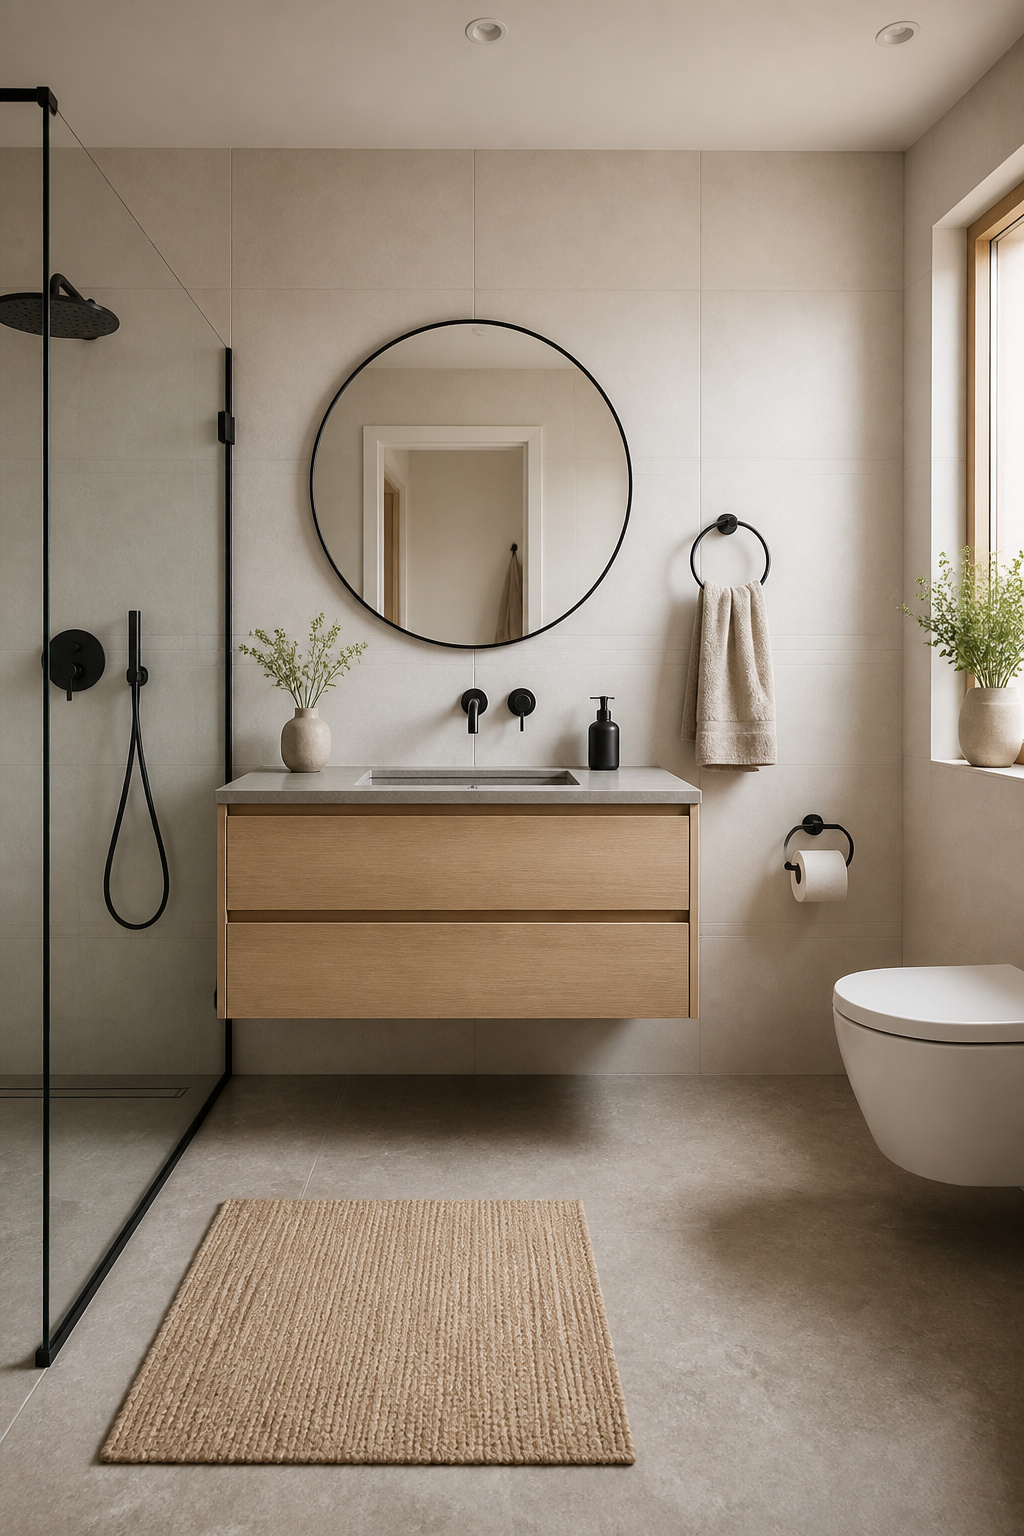
On durability, the finish specification matters enormously. PVD (Physical Vapor Deposition) coatings deposit titanium or zirconium atoms at a molecular level, creating a surface rated 8–10 on the Mohs hardness scale. PVD matte black is 10–20 times more scratch-resistant than chrome and passes 96-hour salt-spray exposure testing without blistering. PVD brushed brass is colour-stable and won’t fade or tarnish even in coastal humidity. Standard electroplating — the cheaper option — shows wear in high-contact areas within three to five years.
If deliberate metal mixing appeals: one dominant finish (80%+) plus one accent works; three or more finishes never does. Brushed brass as the accent against a matte black primary field — used only on the mirror frame, say — is a considered Japandi detail. For complete bathroom styling ideas that incorporate fixture choices, modern bathroom decor ideas covers the broader picture well.
A steam shower is the closest approximation to a Nordic spa experience that fits within a residential bathroom. The design case is straightforward: a dedicated steam enclosure gives a bathroom a clear identity and a distinct sense of purpose. Of all the bathroom remodel ideas in this guide, the steam shower is also the one that most consistently changes how people use their home.
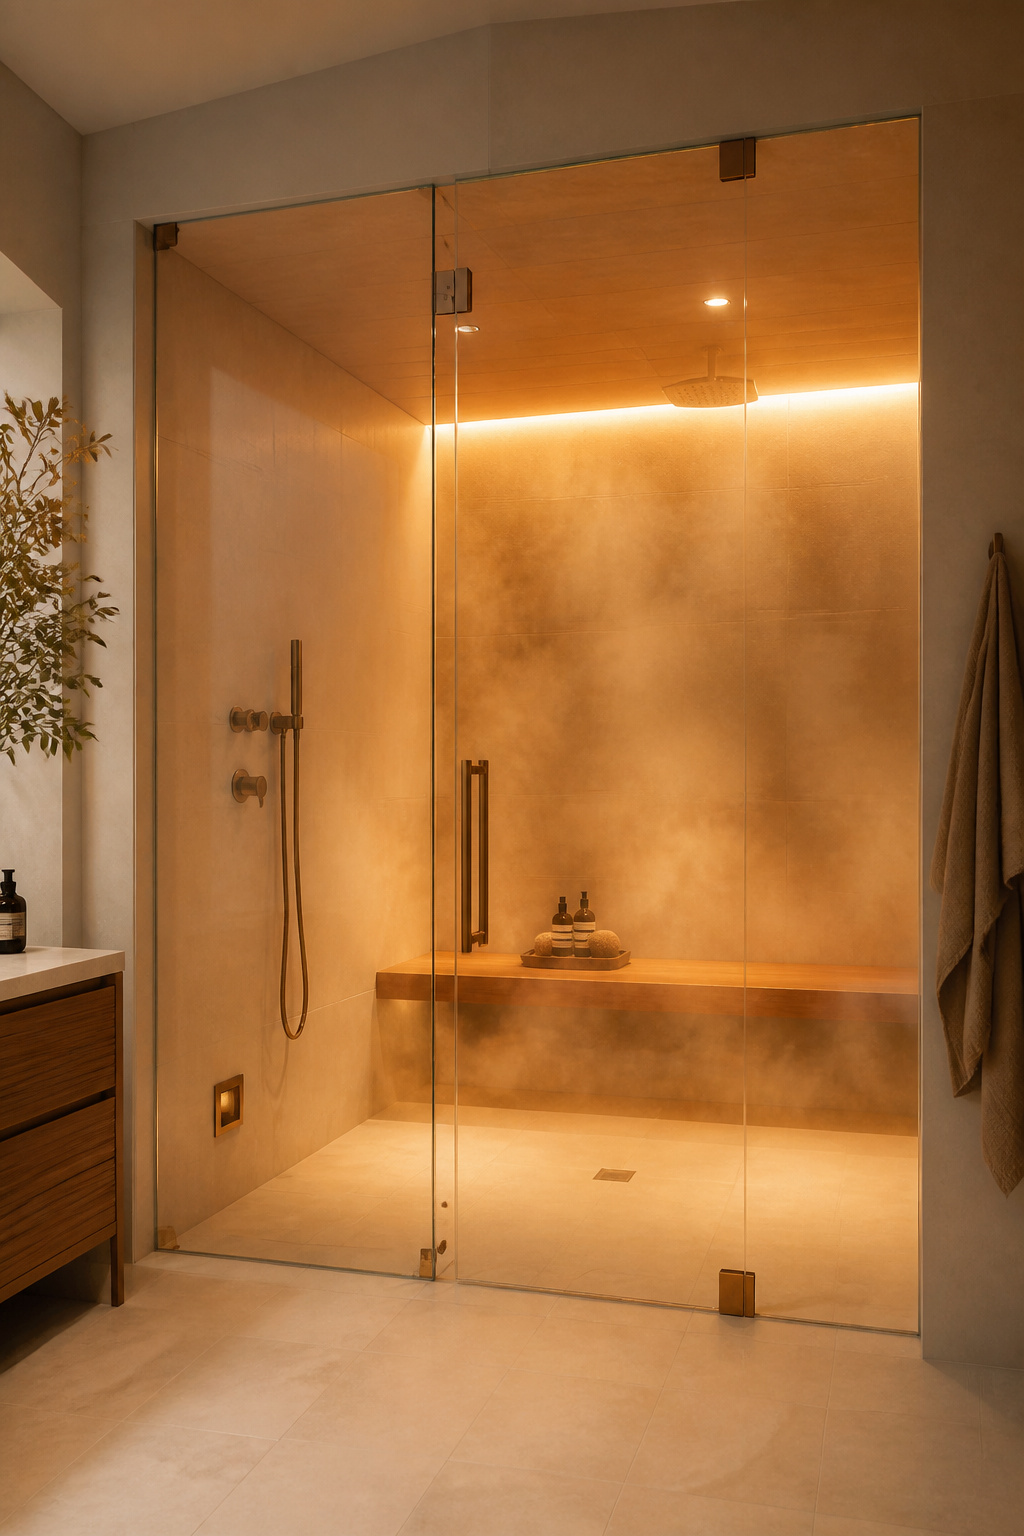
The infrastructure requirements are specific. You need a steam generator — a briefcase-sized unit located within 25 feet of the enclosure but not inside it — connected to a cold water supply and a dedicated 240V circuit. The enclosure must be fully sealed. Critically, the ceiling must be sloped — a minimum 2-inch drop per foot — to prevent condensate from dripping onto occupants. A flat-ceiling steam shower is deeply unpleasant in use.
Generator sizing is calculated by formula: length × width × height of the enclosure in feet gives cubic footage; multiply by a material factor (natural stone or marble: 2.0; porcelain or ceramic: 1.35) to get adjusted volume. A 4×4×8 foot porcelain-tiled enclosure works out to 128 cu ft × 1.35 = 173 adjusted cu ft, requiring approximately a 10kW generator. Use epoxy grout inside the enclosure — standard grout absorbs moisture and harbours mould over time. For anyone considering a whole bathroom spa overhaul, luxury bathroom remodeling ideas for a home spa covers the broader scope.
The Japanese ofuro tradition begins with a distinction most Western bathrooms collapse: washing and bathing are different acts. You wash first — at a low seated station beside the tub — and enter the tub only when clean. This bathroom remodel idea produces a space that treats bathing as ceremony rather than convenience, which is exactly why it resonates with Nordic hygge philosophy.
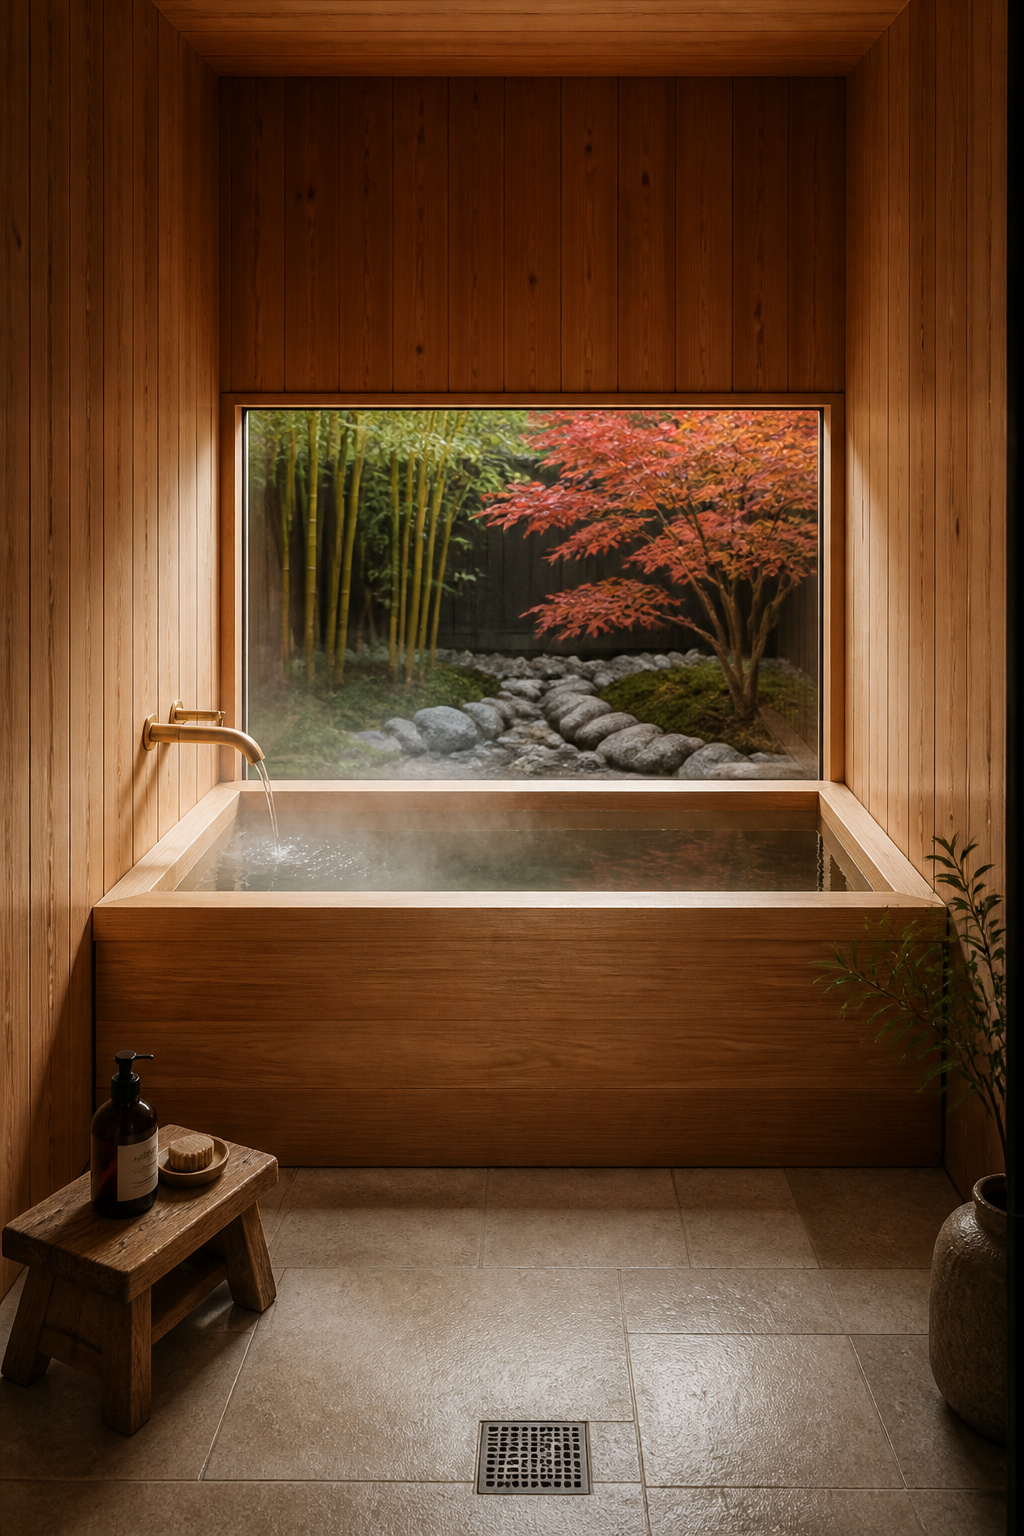
A standard ofuro measures 42–60 inches long, 27–36 inches wide, and 22–30 inches deep — roughly twice the depth of a standard American soaking tub but significantly shorter in length. Because you sit upright rather than recline, full-body immersion is achieved in a much smaller floor plan. This makes the ofuro ideal for bathrooms where a full-length Western tub would be impractical.
Cedar is the standard North American choice: naturally decay-resistant, bacteriostatic, and wonderfully aromatic. The aroma intensifies with heat and steam, which is part of the experience. Cedar tubs run $3,000–$8,000. Teak tubs, which are oil-rich and develop a warm golden patina, cost $4,000–$10,000 and suit coastal settings particularly well. Both require a centre-floor drain beneath the tub — plan the plumbing rough-in explicitly.
The cedar-lined alcove walls intensify the experience. When the hot water steams, the aromatic cedar surround creates an immersive environment that tiles and fixtures alone can’t replicate. The “borrowed landscape” technique — a window framing a deliberately planted courtyard with bamboo, gravel, and a single Japanese maple — creates the impression of bathing outdoors even in a fully internal space.
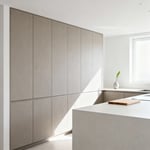
Not every bathroom remodel idea requires plumbing changes and weeks of disruption. Cabinet refacing — replacing doors, drawer fronts, and applying veneer to the existing cabinet box faces — delivers a genuinely dramatic visual transformation in 2–4 days at roughly 30–50% of full replacement cost.
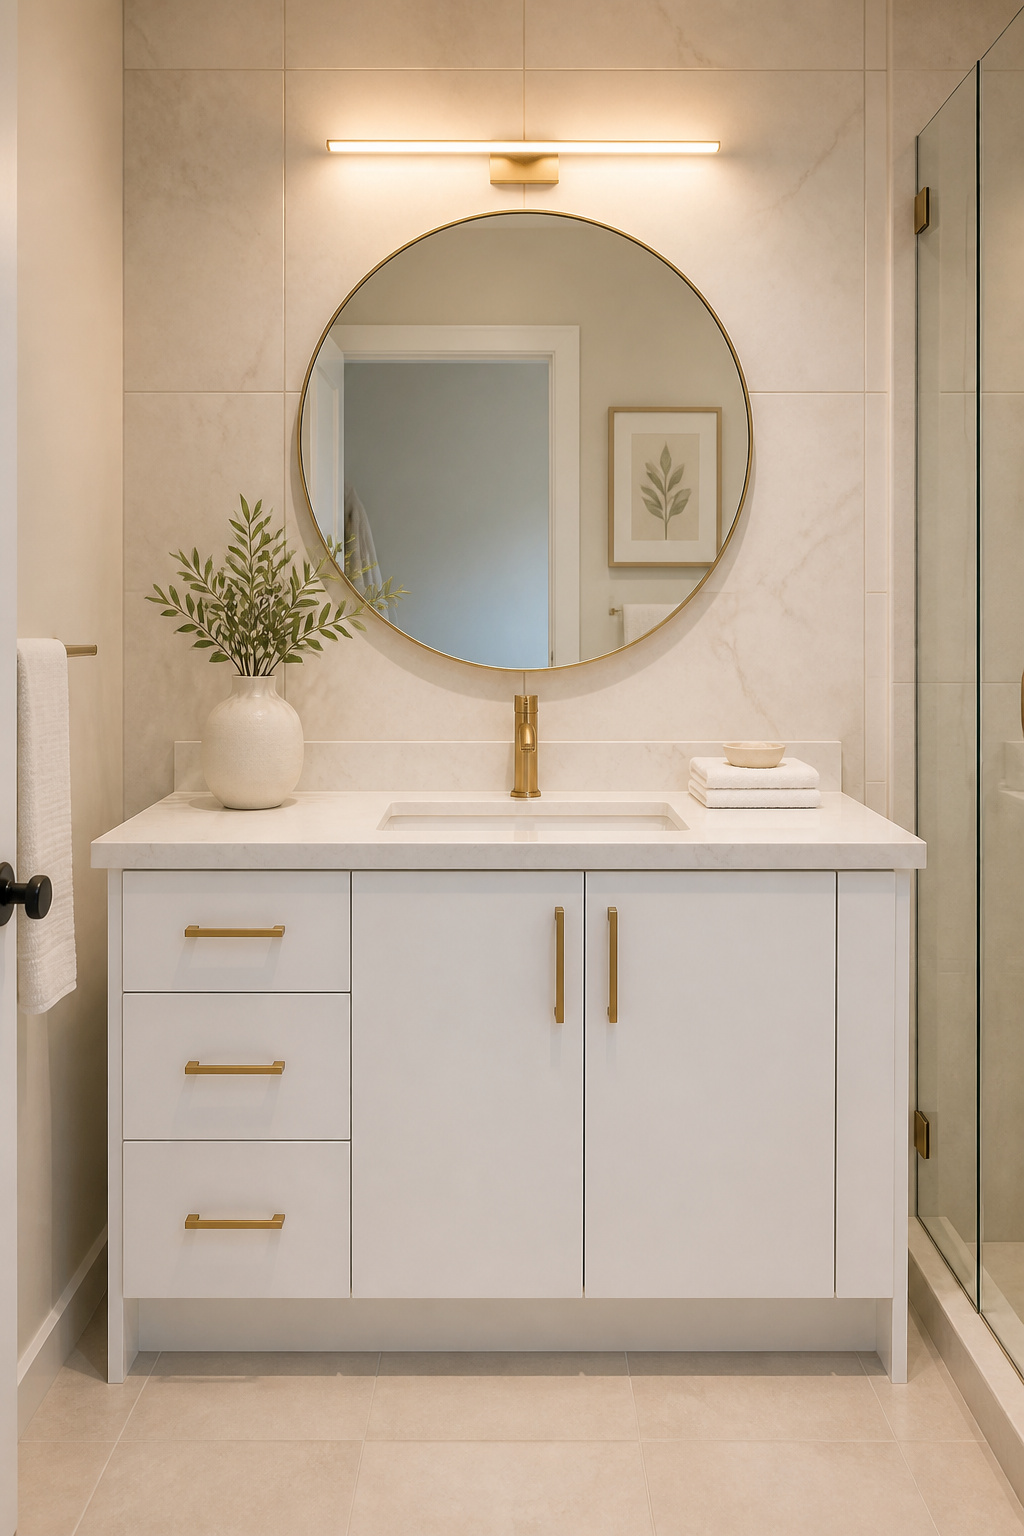
The average bathroom refacing project costs approximately $1,500, compared to $4,000–$12,000+ for full cabinet replacement. For that, you get new doors and drawer fronts in whatever material you specify, a veneer applied over the existing box faces, and new hinges throughout. What you can’t fix with refacing: structural damage to the boxes, a layout that doesn’t work, or internal water damage. The box must be sound — refacing water-damaged boxes is money thrown at a problem that will resurface.
Material choice matters for bathroom humidity. Thermofoil (rigid thermofoil/RTF) at $80–$120 per linear foot is moisture-resistant, warp-resistant, and lasts approximately 10 years. Wood veneer at $100–$250/linear ft looks more authentic but is more vulnerable to sustained humidity. Solid wood doors at $200–$500/linear ft are the most durable option, with white oak or maple particularly well suited to bathroom conditions.
Replacing pulls and hinges at the same time adds $100–$200 to the project but delivers a disproportionate visual upgrade. Brushed brass bar pulls on white thermofoil doors is the most cost-effective way to achieve a Nordic-contemporary bathroom look available anywhere. Add soft-close hinges at $3–$8 each — they change the feel of the cabinets more than any other single detail.
Wabi-sabi is the Japanese aesthetic of finding beauty in imperfection, impermanence, and incompleteness — the opposite of precisely matched, unchanging, uniform surfaces. These wabi-sabi bathroom renovation ideas centre on choosing materials that age visibly and beautifully over time, rather than materials engineered to resist all change.
This is not the same as neglect. Wabi-sabi materials are well-maintained, but the maintenance enhances rather than erases their aging. Unlacquered brass starts bright gold-yellow and gradually oxidises over 6–18 months to a warm brown-black unique to that specific tap, in that specific bathroom, used by those specific people. You cannot buy that patina. Mass-produced “aged brass” finishes are painted on and will chip; true unlacquered brass patinates from use, and the result is always individual.
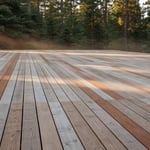
Raw concrete microtopping — a 2–3mm overlay applied over existing surfaces — is the practical bathroom application: all the texture and variation of concrete at a manageable scale. Weathered wood develops a silver-grey patina if left untreated, or a deepening honey brown when oiled regularly; choose your direction at the start and commit to it.
The Japandi interpretation applies Nordic restraint to the wabi-sabi impulse: choose one or two aging materials as focal points and keep everything else clean. A white oak vanity, an unlacquered brass tap, a honed limestone floor, and plain white walls — four material choices, all developing together, all pointing in the same direction.
Japandi is sometimes described as a trend. It isn’t — it’s a collision between two design philosophies that share most of their values, and its continuing relevance in 2025 reflects that depth rather than fashion. These Japandi bathroom remodel ideas are coherent because both traditions value natural materials over synthetic, functional objects over purely decorative, and restraint over maximalism.
Both the Japanese sento and onsen rituals and the Nordic sauna and hygge bathing habits treat the act of washing as ceremony rather than convenience. The Japandi bathroom is the physical space where those two traditions converge.
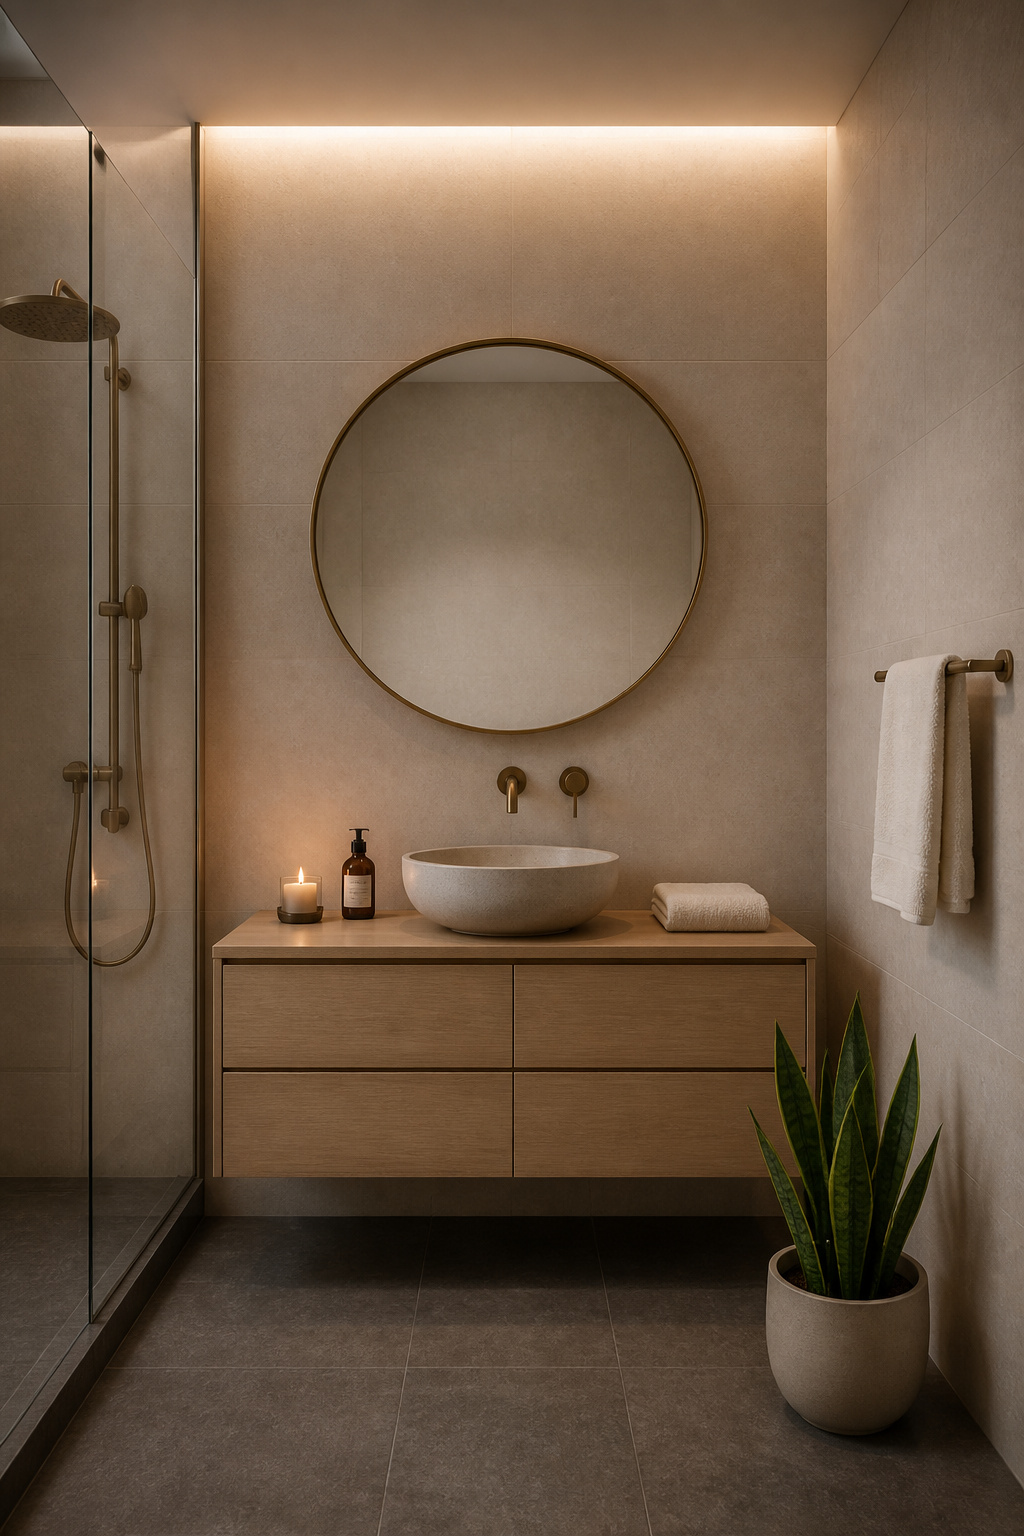
In material terms, six principles define the aesthetic. First: natural wood — oak, ash, teak, or walnut — for cabinetry and accessories, never painted wood or vinyl wood-effect. Second: stone (honed marble, limestone, or basalt) as the anchor material for floors or one wall surface. Third: a neutral warm palette — warm white, linen, greige, muted sage — never cool grey or blue-white. Fourth: one warm metal accent in brushed or unlacquered brass applied consistently. Fifth: flat-front cabinetry — no ornament. Sixth: one or two structural plants, not a collection.
The most common failure in Japandi bathrooms is applying the surface aesthetic without the underlying philosophy. The real thing requires that every object earns its place. A handthrown soap dish from a ceramicist, a hand-cut stone bath mat, a handwoven linen towel — these signal conviction rather than performance. Lighting is the most neglected Japandi element: warm white LEDs at 2700K maximum on dimmer switches, one candlelit surface. For further grounding in the principles that make this last, principles for a true bathroom design classic provides a useful framework.
Fifteen ideas is both a starting point and, for many rooms, an overwhelming one. The practical question is how to select and sequence the right bathroom remodel ideas in a way that produces a coherent result rather than a collection of good intentions.
Sequence your decisions in the right order. Layout comes first: decide whether the toilet, vanity, and shower positions will change before committing to anything else. Moving plumbing is the single largest cost multiplier in any bathroom renovation — if you can avoid it, do. Tile and stone selection comes second, because the floor and wall finish drives every other material decision that follows. Fixture finish comes third: once the material palette is established, the right metal is usually obvious.
Budget-banding these bathroom remodel ideas honestly: under $500, cabinet refacing with a hardware upgrade delivers the highest visible impact per dollar. In the $500–$2,000 range, electric underfloor heating combined with new tile flooring is consistently the most transformative functional and aesthetic upgrade available. At $2,000–$5,000, a wet room conversion or freestanding tub installation changes the room’s identity entirely. Above $5,000, a full material overhaul — floor-to-ceiling tile, new vanity, steam shower, skylights — creates a space that genuinely belongs to you. Spend heavily on the fixed elements (tile, stone, plumbing, heating) and conserve on the replaceable ones. A heated stone floor and quality fixtures will outlast two or three cycles of accessory updates.